The Bubble Wand is a wonderful tool with exciting bubble-blowing action in both real life and in Animal Well. But unlike real life, Animal Well lets you use the bubbles you create as fun platforms. Here’s how to get the Bubble Wand in Animal Well.
Animal Well Bubble Wand Location
The Bubble Wand (or B. Wand) is located in the lower-left quadrant of Animal Well’s map. To get there, you’ll want to go far left from the three green penguin statues in the center of the map near the egg collection room. On your way, there will be a few rooms with some light puzzle solving, but it’s otherwise an unobtrusive path.
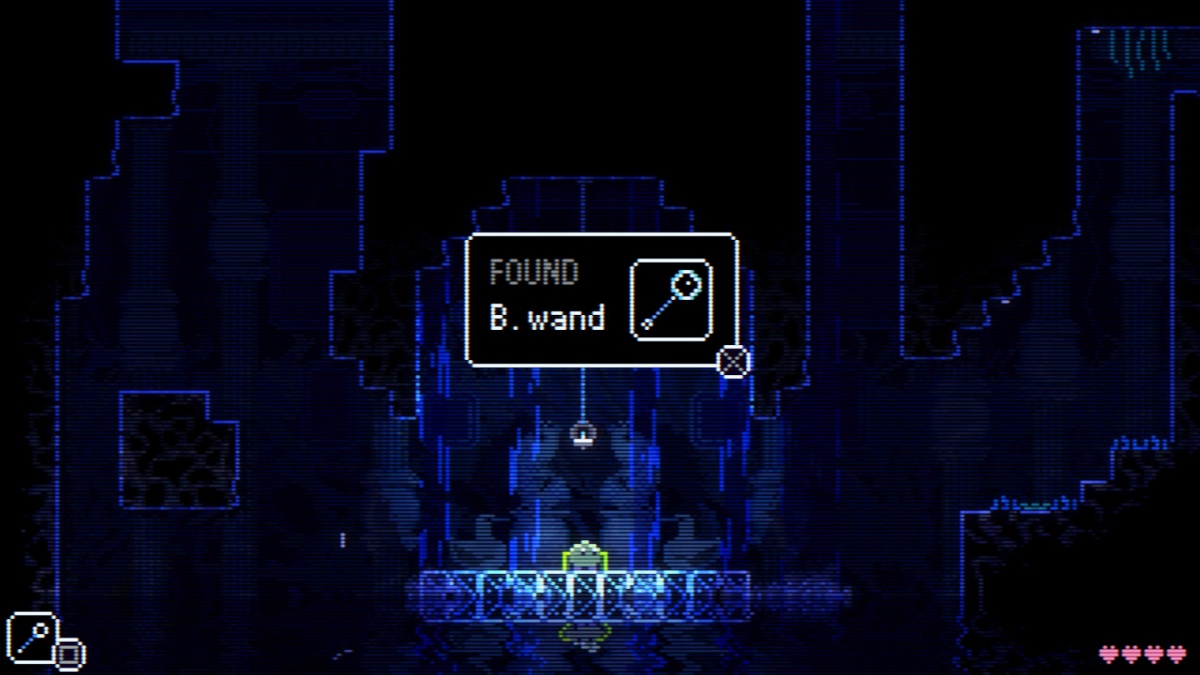
Once you get to a room with a Save phone, descend down the ladder and continue to the right. After a couple of screens, you should find another ladder. Descend it, and you’ll fall into a water-filled room where a glowing green seahorse will continuously spit at you. To get out of this room, you’ll need to hit the three switches on the ceiling and leverage the seahorse’s bubbles to exit on the left side of the room. After you leave the seahorse room, you’ll be able to pick up the Bubble Wand.
How to Get Past the Seahorse in Animal Well
To get past the seahorse in Animal Well, you need to hit the three yellow switches on the ceiling, which will open a gate you can exit from on the top-left side of the room. If you already have the Yo-yo item from the Ostrich’s domain, you can use it to easily and quickly smack each of the three buttons. But if not, you’ll need to use the seahorse’s bubbles as platforms to reach the buttons and tap them with your head.
Getting the seahorse’s bubbles in the right position can be tricky as the seahorse doesn’t always want to cooperate, and it will continuously spit a stream of water to push you back. But if you’re quick, you can push the bubbles around a little bit and lift them up into position with your head. The seahorse will always spit out four bubbles before diving back under the water, and it’s usually best to try to jump on to the second or third bubble for your best chance at reaching the appropriate heights.
The center switch is the easiest to hit as it’s also the lowest hanging. Just stand on either one of the two platforms below it and wait for the seahorse to appear and blow a few bubbles. Jump on to any one of the bubbles, and you should have enough lift to bop the switch.
The switch to the right can be one of the trickiest as the platform beneath it sits low, and the seahorse’s water jet can push you into the wall spikes if you’re not careful. I found it easiest to try to use the bubbles to first hop onto the platform where the ladder is hanging. From there, you can wait for another set of bubbles to hop on to and hit the switch.
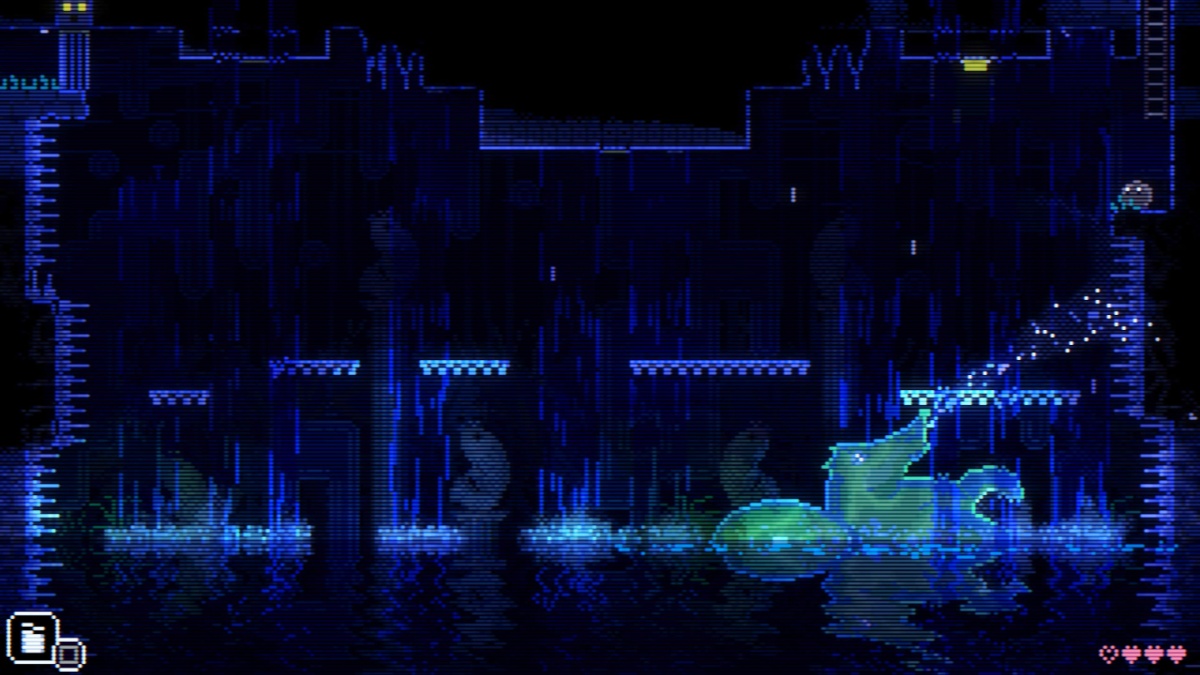
For the left switch, hang out on the platform left of center, and the seahorse should pop up beneath you, facing the direction of the switch. Try to hop onto the third bubble it produces and use the higher two bubbles as steppingstones to reach the switch. It may take a few tries to get everything lined up just right, but once the last switch is hit, the gate will open, and you can use the same method to reach the exit on the top-left of the screen.
After leaving the seahorse room, you’ll enter a cavern that has a chest on a clear platform in the middle of the water. Jump over to the platform and open the chest to receive the Bubble Wand, or B. Wand as the game calls it.
Now that you have the Bubble Wand in hand, you can use it to produce a floating platform, allowing you to ascend and descend Animal Well’s depths. And if you have Disc as well, you can delve deeper into the seahorse’s domain.