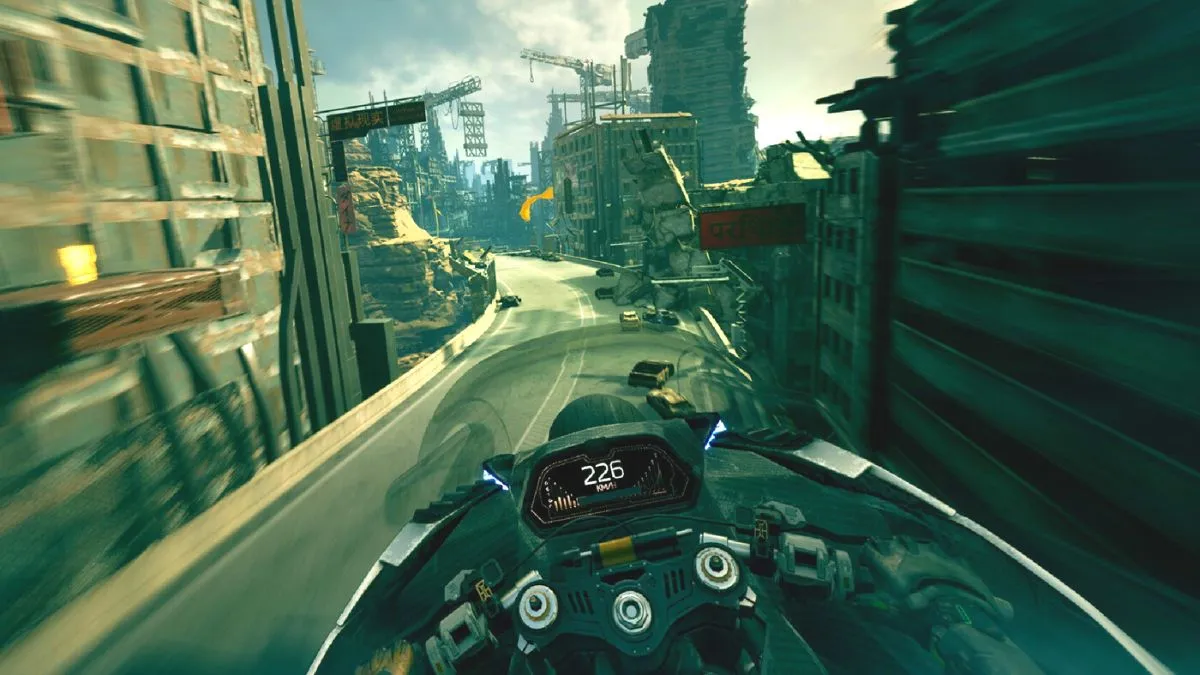
Ghostrunner 2 Chapter 10, Winds of the Desolate,” like so many other levels in the game, features a lot of different collectibles to get, so here’s our guide on how to find all of them.
Where Is Every Collectible in Ghostrunner 2 Chapter 10?
As can be expected, there are quite a few collectibles to hunt down in “Winds of the Desolate.” You’ll be looking to uncover a total of 12, split into eight Memory Shards, two Hidden Swords and two Artifact. As always, certain parts of the level will become in accessible once you move through them, so best to find them all in order. Let’s dive in…
Memory Shard #1
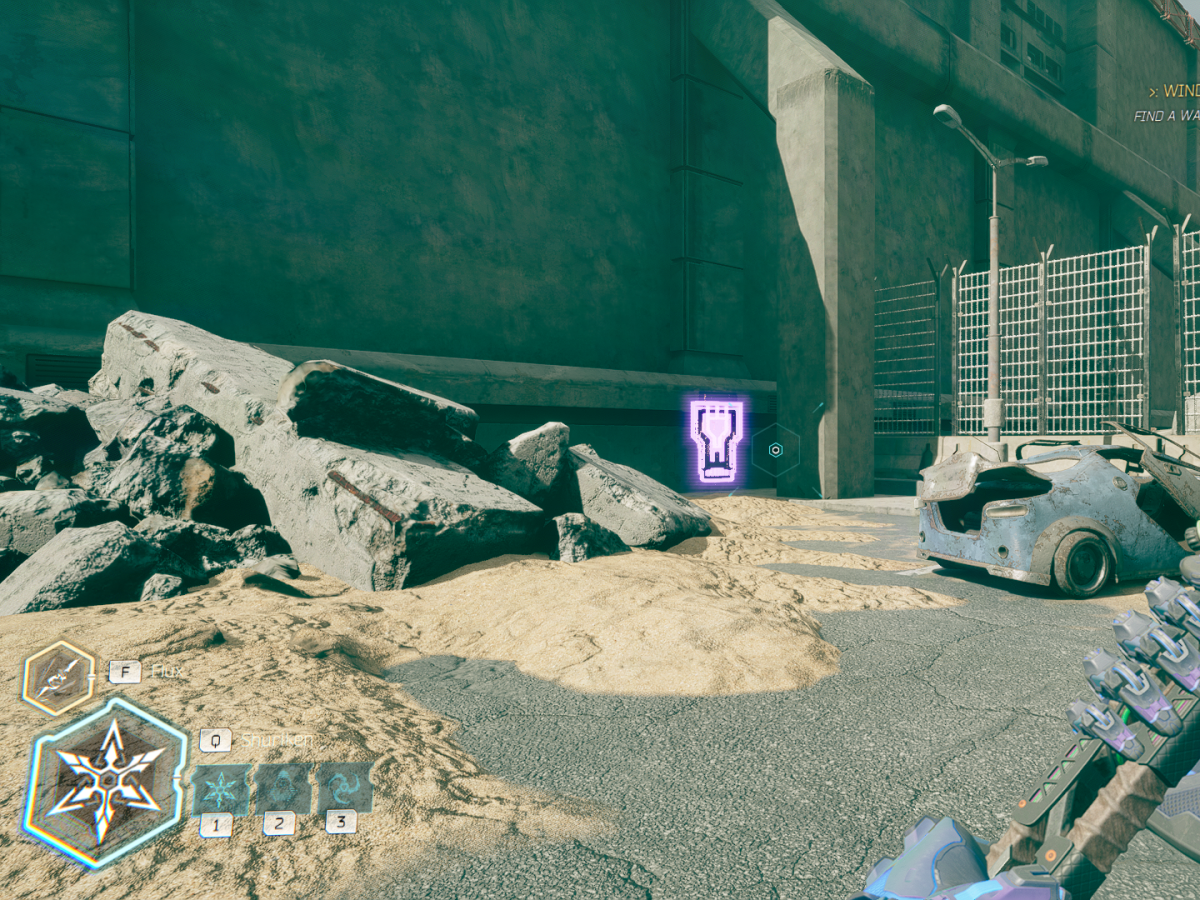
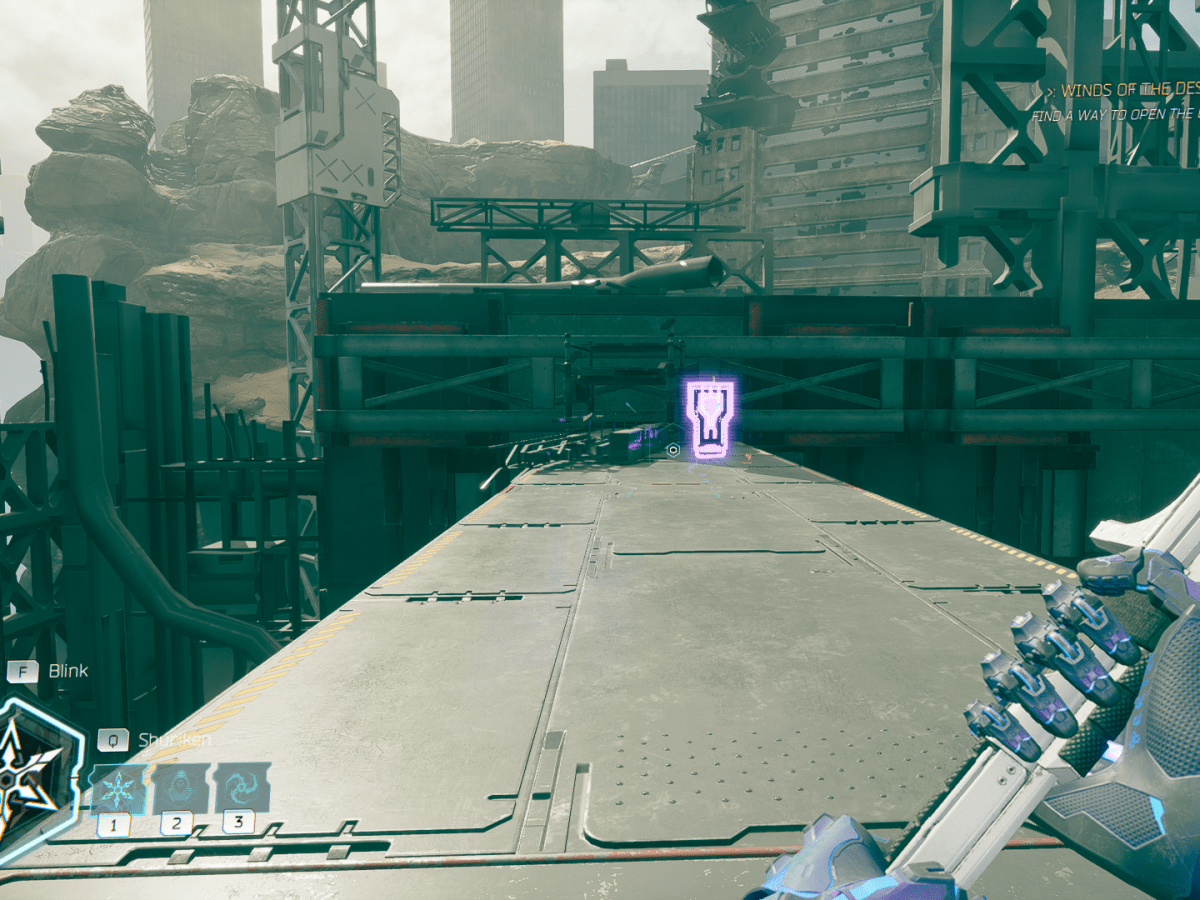
This particular collectible will be difficult to miss given that it’s not really off the beaten path but just standing alongside it, watching all the hikers walk past. Once you reach the section of the highway blocked by a massive gate (you’ll know the one when you objective changes to “Find a Way to Open the Gate”) you’ll want to dismount your bike. Facing the gate, turn to your left and move towards the pile of dust and sand. You’ll find this Memory Shard floating above the debris, begging to be saved.
Memory Shard #2
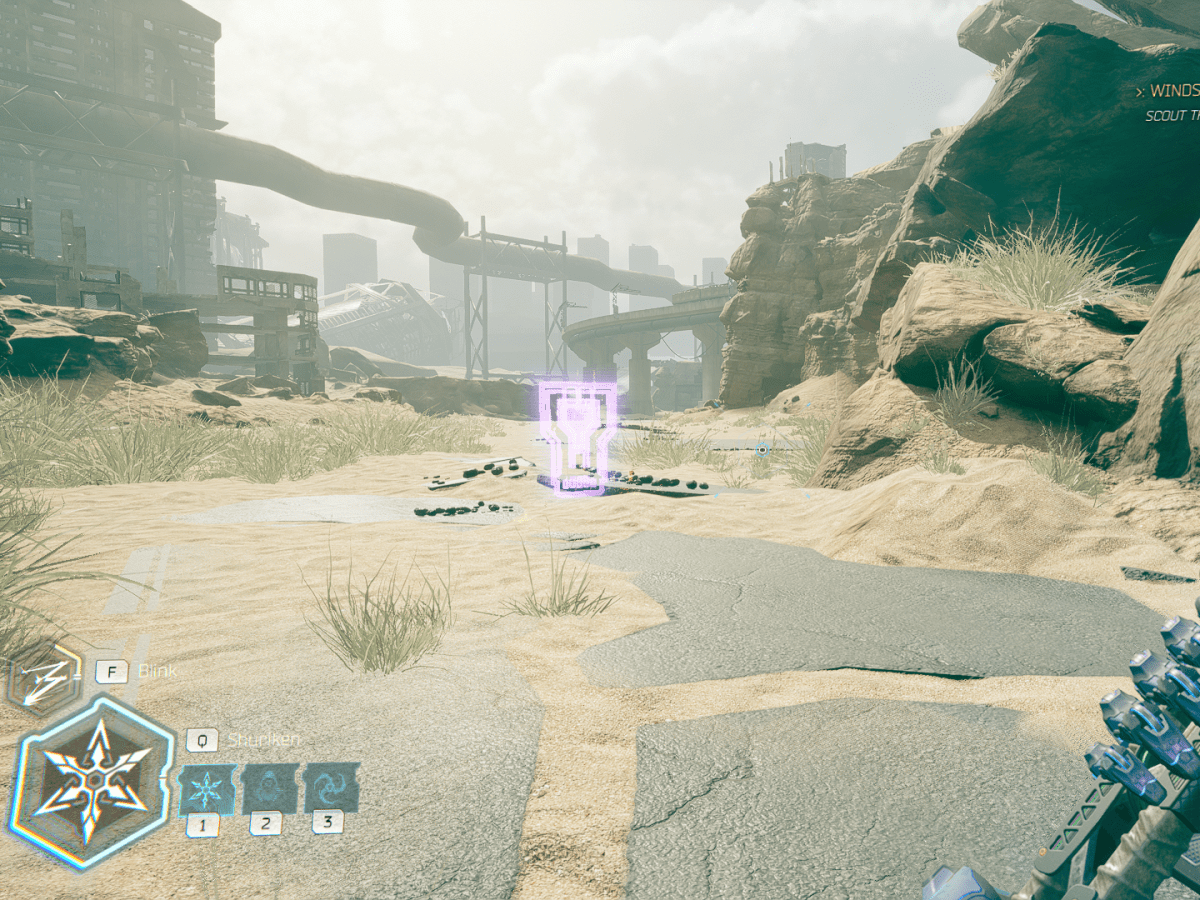
Just after the section of highway that’s guarded by two red laser walls, you’ll come across a pile of boulders that splits the road in two. If you take the left route to loop around, you’ll find a Memory Shard waiting for you.
Memory Shard #3
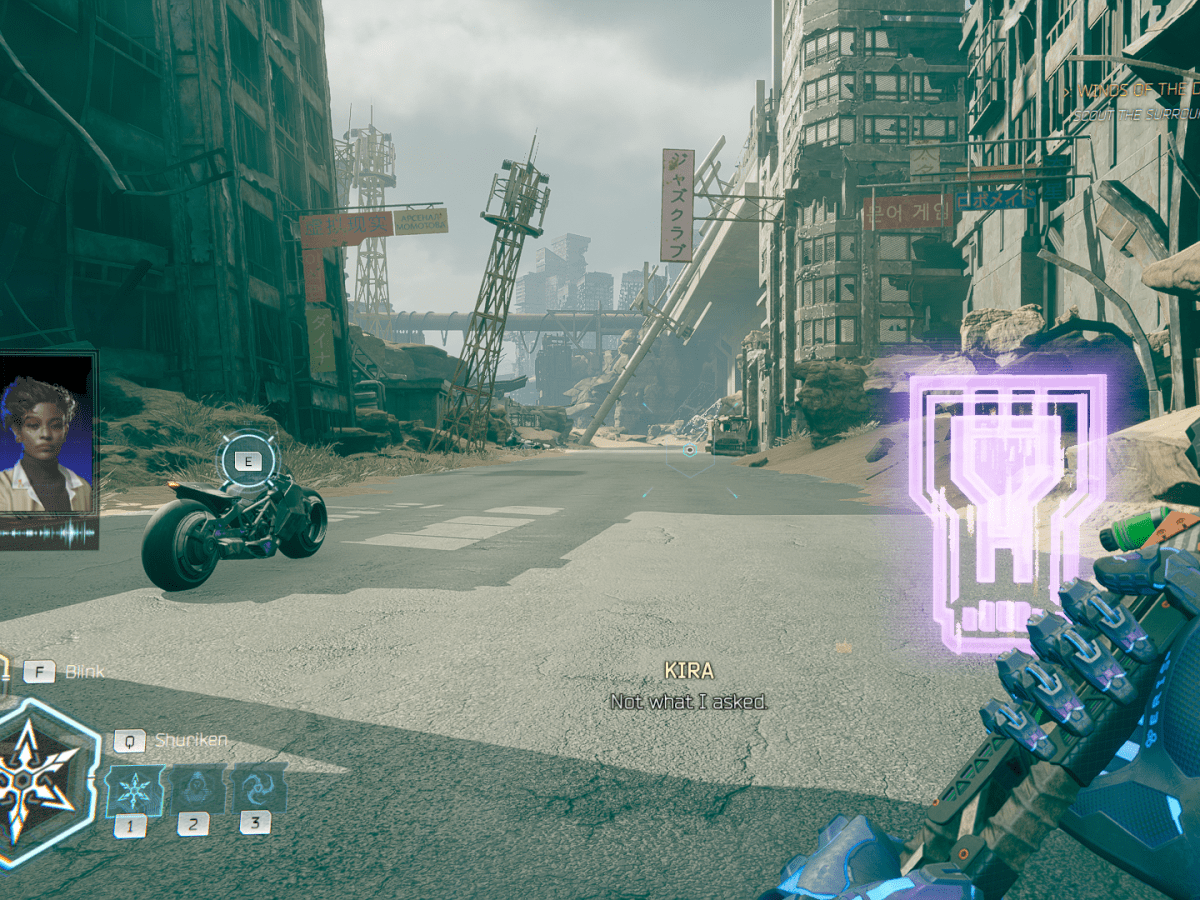
This one is a gimme of collectible. Just after picking up Memory Shard #2, the highway you’re driving upon will break away and you and your bike will fall onto a different road underneath. Keep following this route and this Memory Shard will be on your right.
Memory Shard #4
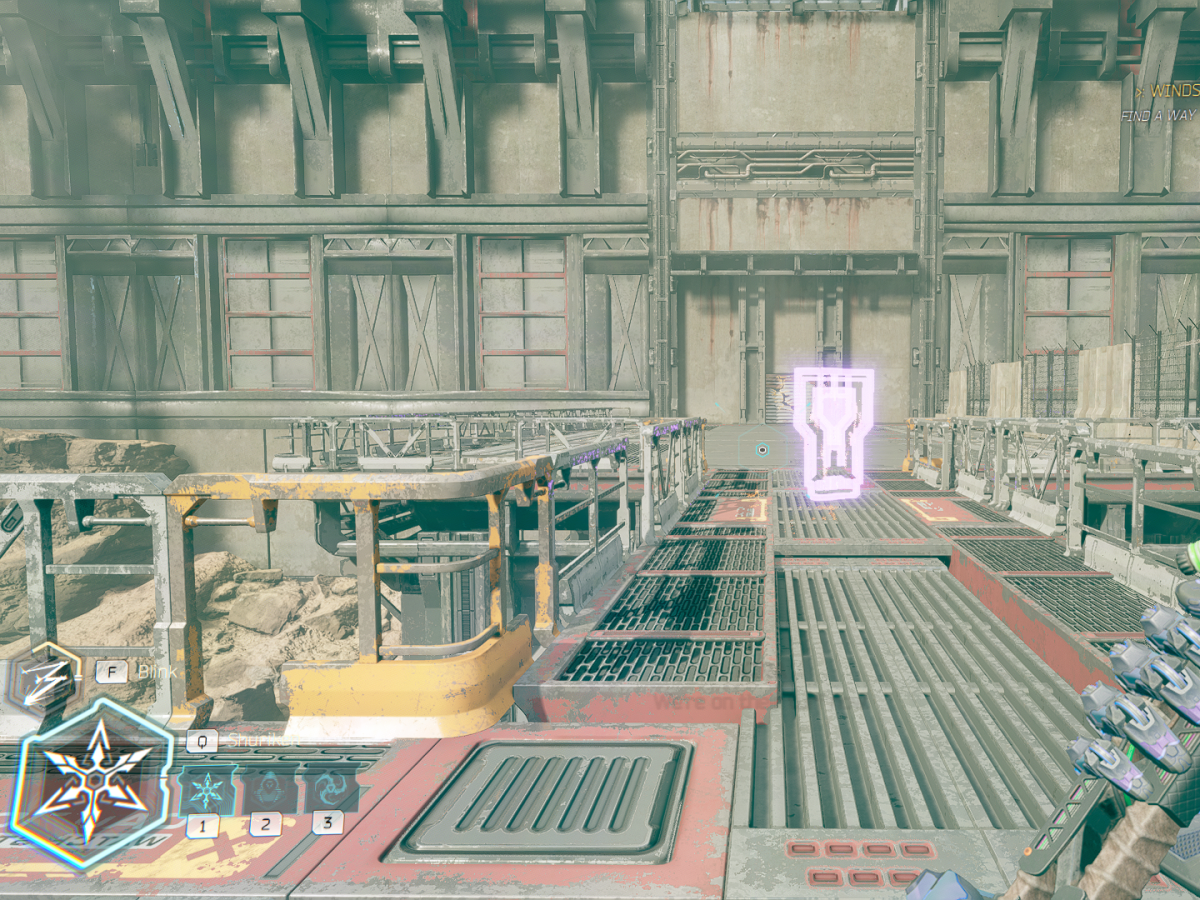
While this one may be obvious to see… it’s also pretty simply to pick up. When you come up to the massive gate with a red “CLOSED” sign plastered on the front, you should see the Memory Shard just above it on a catwalk.
Related: Ghostrunner – Zero Punctuation
Use the gap jammer to grapple up to the platform on the left and leap up onto the platform. The Memory Shard will be waiting for you in the middle of the catwalk. Seriously, whichever cyborg dropped these just gave up halfway through and started littering them about like bread crumbs.
Hidden Sword #1
In Ghostrunner 2 Chapter 10’s first arena battle, you’ll obviously want to start off by killing all the enemies desperately trying rip off your mask and expose your face to the elements. Once they’re all down, from the center of the area move to the left and use your grap jammer on the crane hook to leap across the platform across the way. From there, use your shuriken to break the support beam on the vertical wall which you’ll obviously want to run along to use your grapple to pull Jack up to the platform.
From there, follow the corridor right and grapple up to the ledge in front of you. There’ll be a gunman and a mech standing in front of you; take them down if you want (I recommend doing so) but just remember to return to this point. Once you’re back, use the vertical wall on the left to cross the gap and landing on the platform. Hook a left and slide under under the machinery blocking your path. On the other side, you’ll find your new sword hidden just behind a pillar. While the MIL/CUT_2713-SNOW looks shorter than your other blades, it’s functionally identical. Plus, it looks pretty cool.
Related: How Long Does Ghostrunner 2 Take to Beat?
Memory Shard #5
Out of all the collectibles in this level, this one is probably the trickiest to pick up so don’t forget to use the “Restart from Checkpoint” if you miss it. You’ll find this Memory Shard on the highway, specifically after the section where three explosive barrels are spread across the road. After leaping over the laser wall, you’ll want to slam on the boost and send your bike flying off the highway-turned-ramp.
As you soar through the air, you’ll see this Memory Shard floating on a catwalk railing in Ghostrunner 2 Chapter 10. Your bike doesn’t have enough velocity to reach it so you’ll want to dismount mid-air and use Jack’s momentum to carry him through to the pick-up. The actual platform is pretty wide so don’t worry about making a precision landing.
Time Trail
You can find Chapter 10’s Time Trail Challenge in the section filled with zombie cyborgs. You’ll know it’s the right place when you come across a giant “CLOSED” door what I can only imagine to be its child on the left. Cut through your foes, leap through the hole left behind by the fallen billboard and parkour your way to upper level.
On the platform with two gunmen zombie cyborgs and a zombie cyborg, you’ll find this terminal on the left. This particular challenge tasks Jack with deflecting projectiles at various targets. It’s fun and pretty easy to do if you’ve got the timing down. Earn the gold medal and you’ll net yourself two Memory Shards and 6,000 Data.
Artifact #1
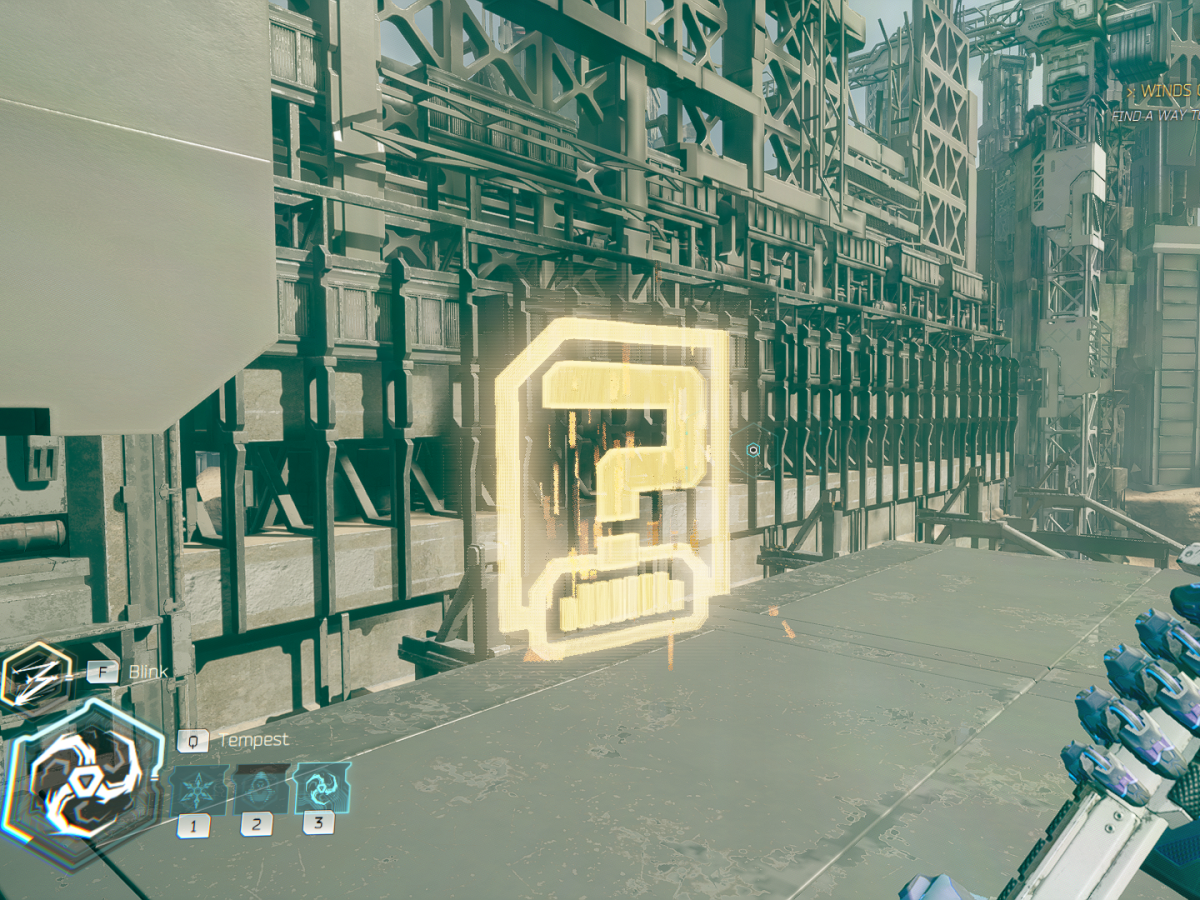
In the same arena wherein you found the Time Trial, use the horizontal beam and shuriken to leap onto the launchpad fan and arrive on an indoor section with a “CLOSED” door directly in front and a small “CLOSED” door on the bottom right. Head towards the smaller door, activate the terminal to open it up and then turn around to face the ramp coming downwards. Move underneath the ramp and you’ll see a slew of crates that can be pushed around with the Tempest Skill.
Facing the first two, use Tempest on the left crate to push it back, revealing another crate on the left. Tempest that away and move into the gap it creates on the right. Once you’re through here, you’ll see another Tempest crate on the right. You know what to do, push it away and then Tempest the crate it reveals on the left. There’ll be another crate on the left now. Push it away and you’ll find your Artifact, an old Weathered Rifle.
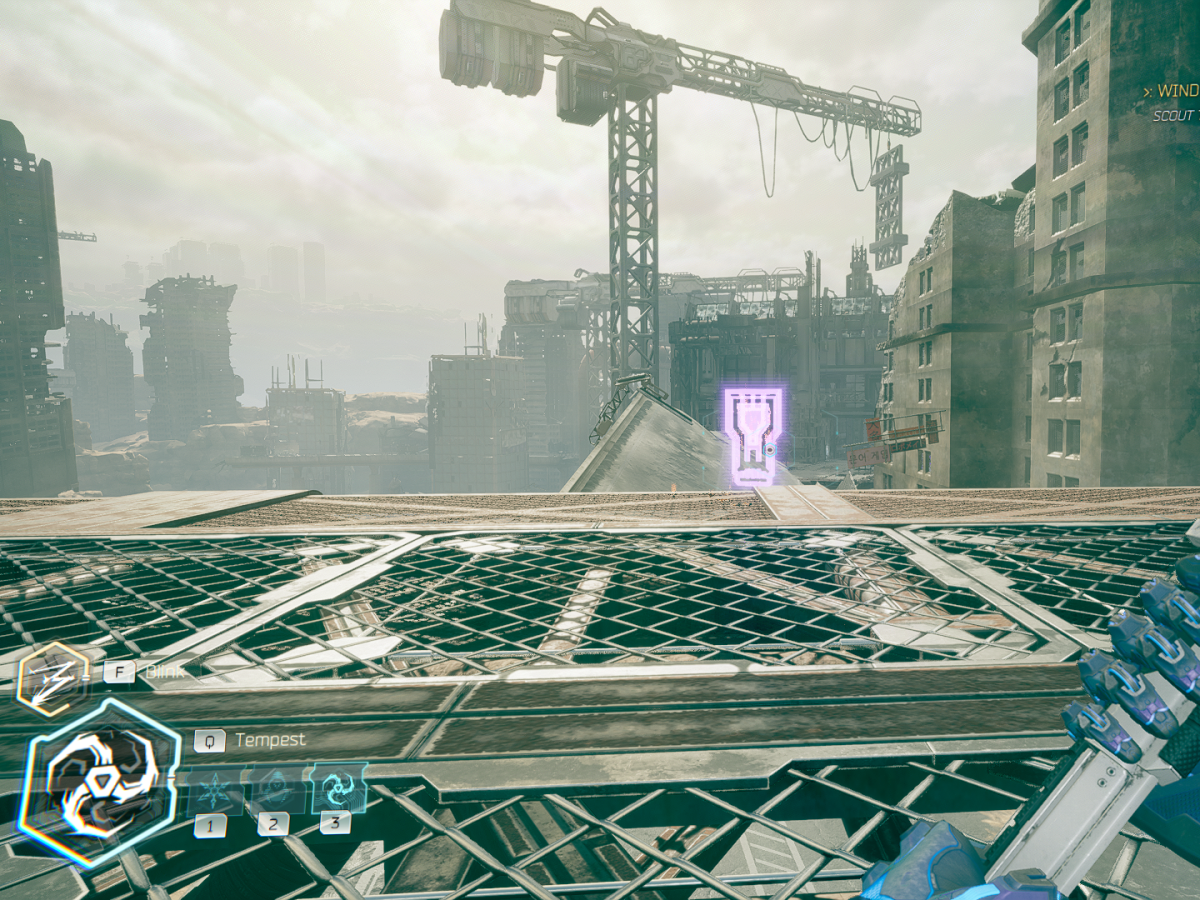
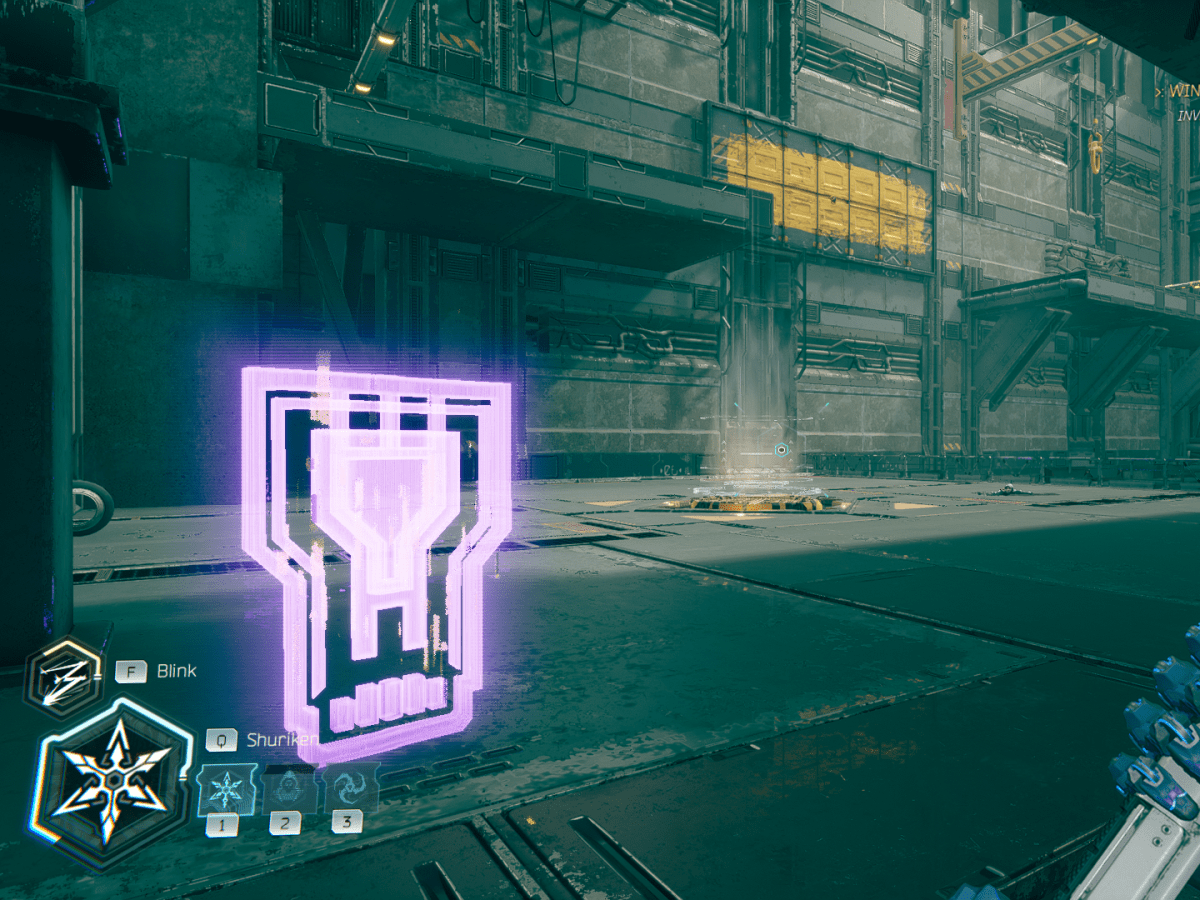
Memory Shard #6
After using the elevator to lift your cyberbike onto the next stretch of highway in Ghostrunner 2 Chapter 10, you’ll see this particular Memory Shard floating on a rusted platform on the right just just after you drive off the road. Use your trick of leaping off mid-air once again to soar on over and grab it.

Memory Shard #7
In the next big arena, after you use Tempest to shove the strapped down crate off a vertical launch pad, you’ll land in a secondary area. You’re in the right place if there’s a vertical wall being held up by a support beam that’s BEGGING for a shuriken.
Related: How to Make Constant Failure Fun in Video Games
The Memory Shard is on the catwalk just above this vertical wall and you should be able to reach it quite easily once your break its support structure.
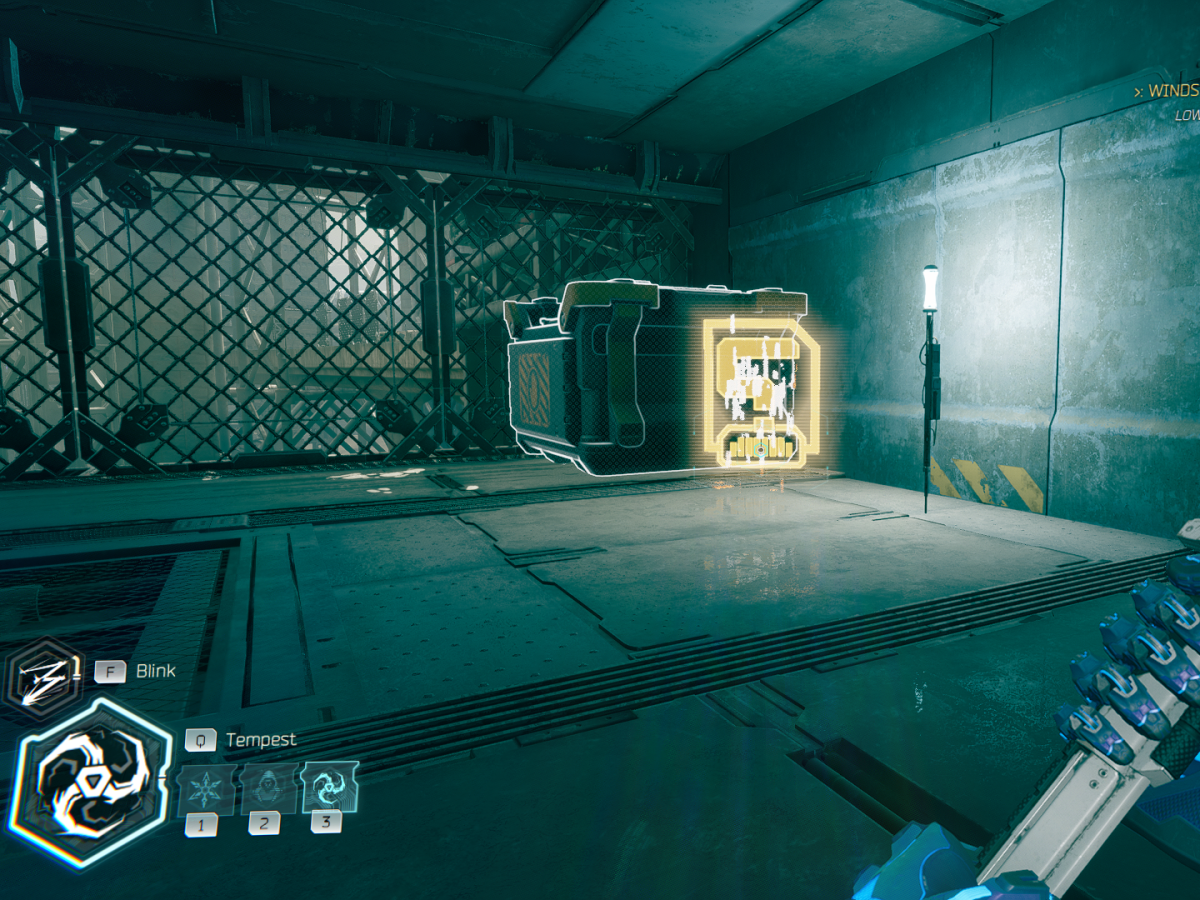
Artifact #2
After you collect Memory Shard #7, turn around and follow the path as it turns right. Keep moving until you see an explosive barrel flanked by a zombie cyborg. Wreak destruction and then use the horizontal beam to swing across the gap. Follow the ramp up and use Tempest on the crate to your left, exposing a vertical launch pad. Fly up onto the platform above you and follow it to the left, ducking around the construction to find your Artifact, a Dynamo Lighter.
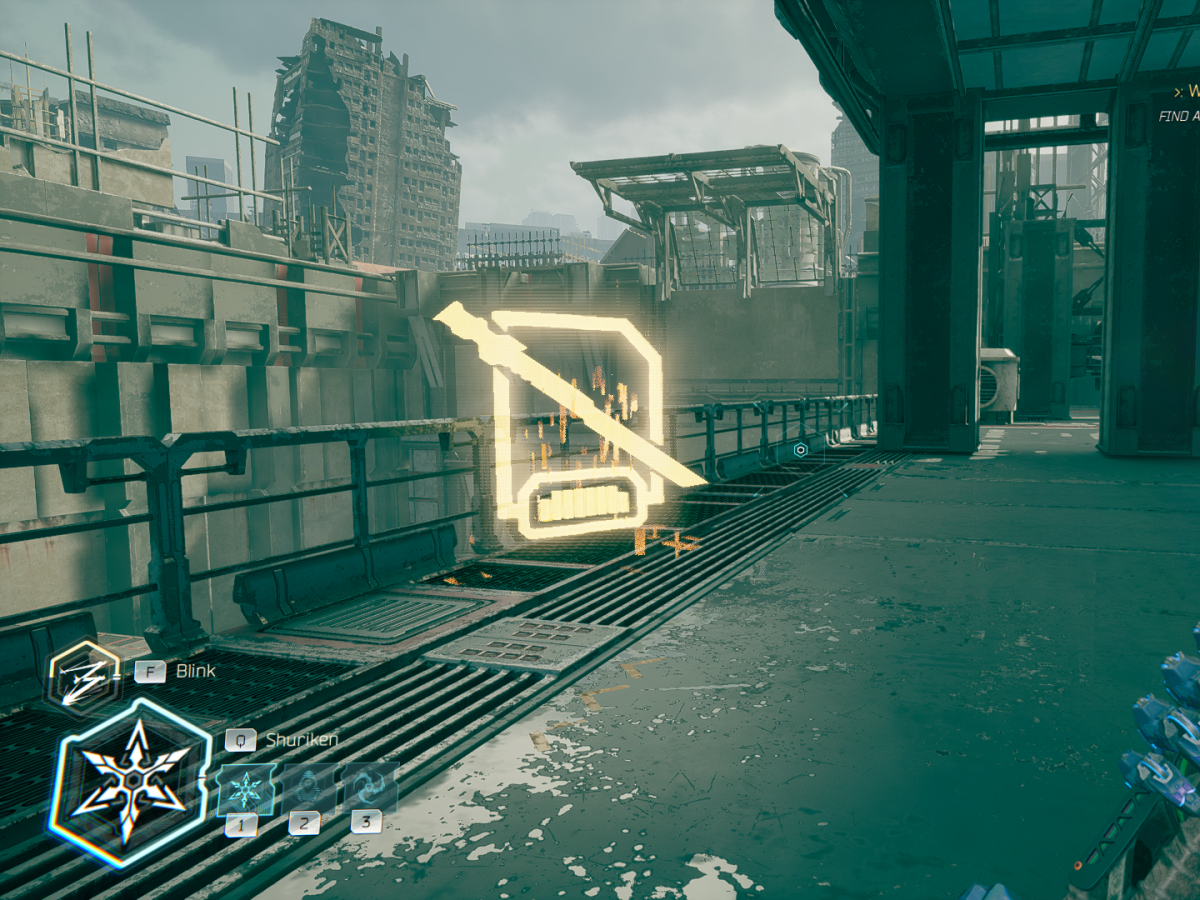
Hidden Sword #2
After using your bike to drive across a vertical wall in Ghostrunner 2 Chapter 10, you’ll come across another massive “CLOSED” door. Dismount and use the beam on the right to initiate some sick parkour that will require the gap jammer, shurikens and a grind rail at the end.
You’ll eventually end up in a room with an explosive barrel surrounded by three enemies. Move through here until you need to use the gap jammer to grapple up to a ledge that’s in front of a doorway. Rather than proceeding through it, turn around and you’ll see a Tempest crate behind you. Zip over to it, push it out of the way and move through the alcove it opens up. At the end you’ll find your new sword which a camo pallette swap of the MIL/CUT_2713-SNOW.
Memory Shard #8
In the final arena battle of Ghostrunner 2 Chapter 10, the one with a series of vertical platforms above you a single vertical launch pad in the middle, this Memory Shard is tucked away to the right of the entrance. A straightforward find to wrap up this level.
That was a lot of collectibles to gather over the course of a mission but just wait until Chapter 11 of Ghostrunner 2, which is where the game flirts with the concept of an open-world.
If you’re looking for more, check out where to find every collectible in Ghostrunner 2 Chapter 8.


Published: Oct 26, 2023 11:59 am