When you’re done with the poison, honey and stings from the previous fight, you’ll face the Brute Bomber in the Arcadion AAC Light-Heavyweight M3 Savage encounter in Final Fantasy XIV Dawntrail (FFXIV). Here’s how to beat the AAC Light-Heavyweight M3 Savage encounter in FFXIV.
FFXIV Arcadion AAC Light-Heavyweight M3 (Savage) Timeline
The Brute Bomber fight requires an Item Level of 710 or higher, and it has a hard enrage timer around the 11-minute mark, which is a bit tougher than its predecessors. The fight has a tougher DPS check compared to the previous ones, but the boss won’t dash as much as he did in the normal mode, so melees won’t have to worry that much.
| Timer | Cast Name |
|---|---|
| 0:06 – 0:11 | Brutal Impact (x4) |
| 0:16 – 0:21 | Knuckle Sandwich (x4) |
| 0:31 – 0:38 | Quadruple Lariat/Octuple Lariat (Far) |
| 0:41 – 0:49 | Quadroboom/Octoboom Dive (Far) |
| 0:52 | Quadroboom/Octoboom Dive (Spread or Stack) |
| 0:55 – 1:00 | Brutal Impact (x4) |
| 1:12 – 1:16 | Barbarous Barrage (Cast) |
| 1:28 | Barbarous Barrage (1st set) |
| 1:31 | Barbarous Barrage (2nd set) |
| 1:34 | Barbarous Barrage (Final set) |
| 1:30 – 1:36 | Murderous Mist |
| 1:45 – 1:49 | Doping Draught |
| 2:17 – 2:24 | Quadruple Lariat/Octuple Lariat (In) |
| 2:27 – 2:35 | Quadroboom/Octoboom Dive (In) |
| 2:38 | Quadroboom/Octoboom Dive (Spread or Stack) |
| 2:41 – 2:46 | Brutal Impact (x6) |
| 2:52 – 2:57 | Knuckle Sandwich (x6) |
| 3:12 – 3:16 | Tag Team |
| 3:18 – 3:25 | Chain Deathmatch |
| 3:28 – 3:34 | Lariat Combo (Chain 1) |
| 3:38 | Lariat Combo (Chain 2) |
| 3:40 – 3:47 | Quadruple/Octuple Lariat |
| 3:49 – 3:54 | Brutal Impact (x6) |
| 4:10 – 4:14 | Final Fusedown |
| 4:26 | Self Destruct + Explosion |
| 4:31 | Self Destruct + Explosion |
| 4:31 – 4:39 | Quadroboom/Octoboom Dive |
| 4:42 | Quadroboom/Octoboom Dive (Spread or Stack) |
| 4:54 – 4:58 | Fusefield |
| 5:01 – 5:04 | Bombarian Flame |
| 5:42 | Mana Explosions (debuff ends) |
| 5:50 – 5:55 | Knuckle Sandwich (x6) |
| 6:03 – 6:12 | Doping Draught |
| 6:25 – 6:31 | Quadruple/Octuple Bombarian Special (x7) |
| 6:41 | Bombarian Special (Out) |
| 6:43 | Bombarian Special (In) |
| 6:52 | Bombarian Special (Knockback) |
| 6:55 | Bombariboom |
| 7:03 – 7:07 | Fuses of Fury |
| 7:09 – 7:13 | Tag Team |
| 7:16 – 7:23 | Chain Deathmatch |
| 7:26 | Self Destruct |
| 7:31 | Self Destruct |
| 7:30 – 7:38 | Murderous Mist + Lariat Combo (Chain 1) |
| 7:42 | Lariat Combo (Chain 2 + Poison) |
| 7:44 – 7:51 | Quadroboom Dive/Octoboom Dive |
| 7:55 | Quadroboom/Octoboom Dive (Spread or Stack) |
| 7:59 – 8:04 | Brutal Impact (x8) |
| 8:13 – 8:18 | Knuckle Sandwich (x8) |
| 8:33 – 8:37 | Fuse or Foe |
| 8:46 | Infernal Spin + Explosive Rain |
| 8:58 | Explosion |
| 9:03 | Explosion |
| 9:01 – 9:08 | Quadruple/Octuple Lariat (Out or In) |
| 9:11 – 9:16 | Brutal Impact (x8) |
| 9:31 – 9:35 | Barbarous Barrage (Cast) |
| 9:47 | Barbarous Barrage |
| 9:50 | Barbarous Barrage |
| 9:53 | Barbarous Barrage |
| 9:50 – 9:56 | Lariat Combo (Dash 1) |
| 10:00 | Lariat Combo (Dash 2) |
| 10:10 – 10:15 | Knuckle Sandwich (x8) |
| 10:34 – 10:38 | Doping Draught |
| 10:51 – 10:57 | Special Bombarian Special (x6) |
| 11:07 | Special Bombarian Special (Out) |
| 11:10 | Special Bombarian Special (In) |
| 11:18 | Special Bombarian Special (Enrage) |
Brute Bomber will use Doping Draught multiple times during the Arcadion M3 Savage encounter in FFXIV, increasing his damage and the number of hits dealt by his tankbusters and regular AoEs. He also gets alternative versions of his regular Lariat and Dive attacks, which are random following the fifth use.
FFXIV Arcadion AAC Light-Heavyweight M3 (Savage) Guide
Assessing clockspots for spreads (Octuple/Octo) and partners for pair stacks (Quadruple/Quadro). Partners will be swapped during Dives to ensure maximum uptime for melees. Melees also swap with Healers during Infernal Spin for better uptime. DPS check is much tighter here than in the previous fights, so beware.
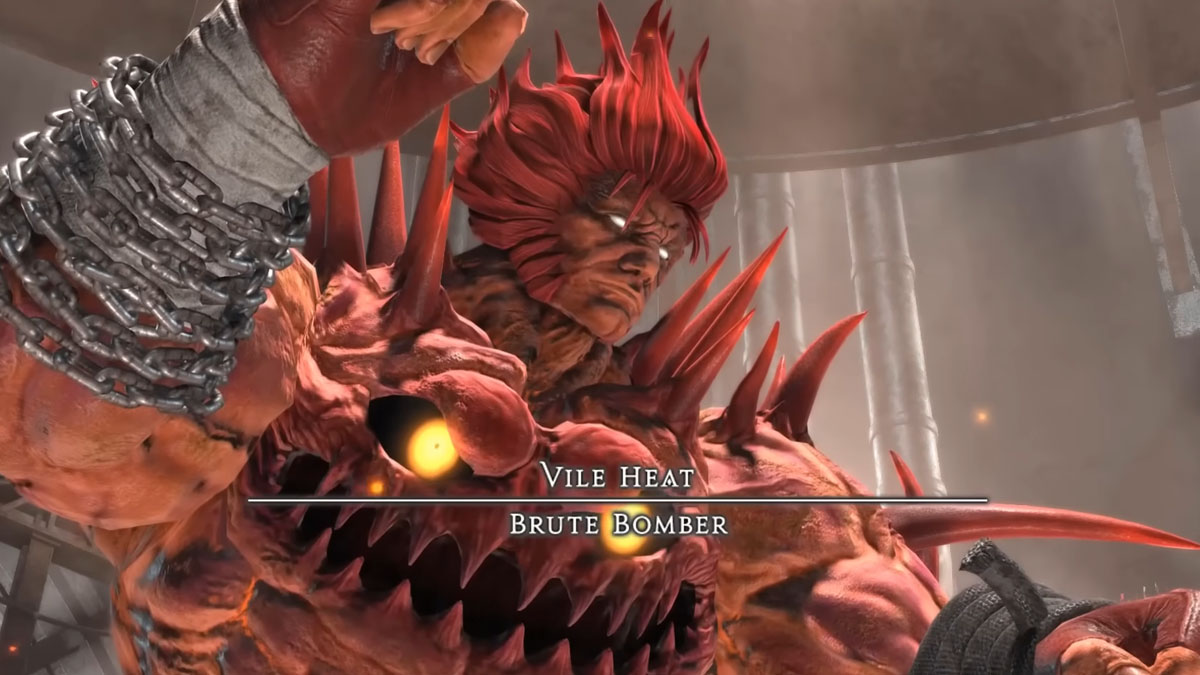
- Brutal Impact – AoE damage. Increases the number of hits by two each time he uses Doping Draught.
- Knuckle Sandwich – Shared Tankbuster. Increases the number of hits by two each time he uses Doping Draught.
- Quadruple Lariat – AoE around the boss finishing with a pairs stack. Stack far away from his hitbox. If the boss is glowing, the safe zone is the opposite, so you and your pair stack close to him.
- Octuple Lariat – AoE around the boss finishing with a line spread. Stay on your clockspot far away from the hitbox. If the boss is glowing, the safe zone is the opposite, so you stay close to the boss instead.
- Quadroboom Dive – The boss jumps to the location he’s facing, causing proximity damage and finishes with a pair stack. If the boss is glowing, he causes a knockback instead.
- Octoboom Dive – The boss jumps to the location he’s facing, causing proximity damage and finishes with a spread. If the boss is glowing, he causes a knockback instead.
- Barbarous Barrage – Brute Bomber summons seven towers that must be soaked by a certain amount of players. They also inflict a knockback effect, which can be used to solve the next tower.
- Two towers require four persons.
- Four towers require two persons.
- The final middle tower requires all eight players.
To address this, assign all tank/melees to north/west and healers/ranged to south/east. Once they take the first tower, the pairs from Dives are knocked back to soak towers on the opposite side according to their assigned groups (Group 1 faces left, Group 2 faces right). Finally, all players are pushed to the final tower to soak it. Make sure you’re pushed behind the boss after the last tower to avoid Murderous Mist.
- Murderous Mist – A poison-inflicting attack that only leaves a small area behind the boss as a safe zone. During Chain Deathmatch 2, you must take the poison (alongside a hit from Lariat Combo) to survive.
- Doping Draught – Brute Bomber drinks illicit substances during the fight, increasing his damage and the number of hits for his AoE and tankbusters. Can’t be removed and lasts for the whole fight.
- Tag Team – Brute Bomber summons two clones. One of them will be linked to you during Chain Deathmatch, and only you can see the chain. Remember which clone you’re tethered to.
- Chain Deathmatch – The clone links a chain to you. You must take a hit from that clone (and that clone only) to survive the mechanic.
- Lariat Combo – Brute Bomber dashes in front of him, hitting the direction where his fist is glowing. He immediately dashes back, so check his fist again after dodging the first one. If done during Chain Deathmatch, you must take damage from the clone you’re linked to. His two clones will use Lariat Combo, so position yourself to take damage from the linked clone and dodge the other one. There are two hits, and the second safe zone is always the place where both clones landed during the first dash.
- Final Fusedown – Brute Bomber summons four long-fused bombs and four short-fused bombs, while also inflicting all players with Self Destruct with the same fuses. Locate the corner where there are three long-fused bombs and use it as the new north for this mechanic.
- Short-fused players (either all DPS or all Tanks/Healers) will position themselves beneath the long-fused bombs, while the others position themselves in the middle, closer to the long-fused bombs.
- Once the first fuses explode, long-fused players spread to the now-safe spots while short-fused players stack in the middle to avoid the remaining explosions.
- Both the bombs and the players always explode at the same time. If you take two explosions during the whole mechanic, you die. Immediately followed by a Dive.
- Self-Destruct – Hits all players of a role with a short fuse, and the other role with a long fuse. Low damage, but if you take any explosion other than yours, you die.
- Fusefield – Brute Bomber summons four long fuses and four short fuses, inflicting four players with 25s and 43s debuffs. Short debuffs go on short fuses and vice versa. You must detonate the fuses one at a time.
- The commonly used strat is the Snake Priority (from P8S). Starting from north clockwise, head to the first fuse you can according to your debuff and to the role order: Healer 1 > Tank 1 > Tank 2 > Healer 2 > Ranged 1 > Melee 1 > Melee 2 > Ranged 2. If Tank/Healers have short debuffs and there’s a short fuse on the north, Healer 1 takes it. Tank 1 takes the next short fuse, and so on.
- Players will pop their fuses in this same order, according to the role that got the short debuffs first. Remember to space the explosions a bit to let healers top everyone off. Healer 1 usually saves his strongest cooldowns for the short debuffs while Healer 2 takes care of the long ones.
Don’t overlap explosions and avoid the middle, as you’ll get a powerful Burn that will likely kill you.
- Bombarian Special – A set of various hits that deal high AoE damage.
- After the fourth hit, Brute Bomber hits around him just like in Lariats, so get out by the third hit.
- Immediately after, the only safe spot will be inside his hitbox, so run back.
- He finishes with a full-body splash which knocks back players and resolves the final mechanic according to the move’s full name. If it’s Octuple Bombarian Special, it ends with a spread. If it’s Quadruple Bombarian Special, it’ll be a pair stack.
Bombarian Special will also serve as the fight’s enrage, where he’ll wipe the raid with a full-body splash.
- Fuses of Fury – Combines the bombs from Final Fusedown with Chain Deathmatch, but he also chains himself to you. Solve the bombs by heading to the long-fused first, then solve the Lariat Combos with the clones. However, this time you also need to take damage from the poison, so pay attention to make sure you’re being hit by it. Immediately follows with a Dive.
- Fuse or Foe – Combines Inferno Spin with various Explosive Rain AoEs. Also inflicts Self Destruct on players once again, so they need to dodge everything while heading to their assigned positions to avoid clipping each other.
- Inferno Spin – Hits the whole arena with a cone fire attack. He only hits every corner once, so whichever place he already hit is guaranteed to be safe.
- Explosive Rain – Starts out as a slow-exploding AoE zone but expands across the room, leaving small safe spaces for movement.
Brute Bomber is a huge step up from the previous fight, but with time, you’ll be able to beat the M3 Savage fight in the Arcadion series in FFXIV. The fight also gives you some of the best upgrades to your gear, so it’s worth the suffering. I guess.
FFXIV is available to play now.








Published: Aug 7, 2024 2:26 PM UTC