



Terminal Escape Room is one of the most exciting experiences that players can have in Roblox, where you’ll need to hurriedly escape a horrifying situation. If you’re not fast enough, it’ll spell your doom — let’s walk you through every chapter, then.
Jump To:
- Roblox Terminal Escape Room Answers & Walkthrough
- Terminal Escape Room Chapter 1 – All Answers Listed
- Terminal Escape Room Chapter 2 Answers & Walkthrough
- Terminal Escape Room Chapter 3: All Answers & Full Walkthrough
- Terminal Escape Room Chapter 3: Elevator
- Terminal Escape Room Chapter 3: Newspaper Room
- Terminal Escape Room Chapter 4 – All Answers Listed
- Chapter 5 – Searching for Keycard 2
- Chapter 5 – The Testing Room/Keycard 3
- Chapter 5 – Looking for Keycard 4
Roblox Terminal Escape Room Answers & Walkthrough
Getting lost in this experience can be terrifying, so we’ve got you covered on every chapter that the game throws your way. Let’s start off on Chapter 1, and continue forward from there, shall we?
Terminal Escape Room Chapter 1 – All Answers Listed
Below, we’ve detailed every step that you’ll need to take during the first chapter of Terminal Escape Room in Roblox. Without delaying any further, let’s jump in and get this taken care of quickly.
Terminal Escape Room Chapter 1: Cabin 1
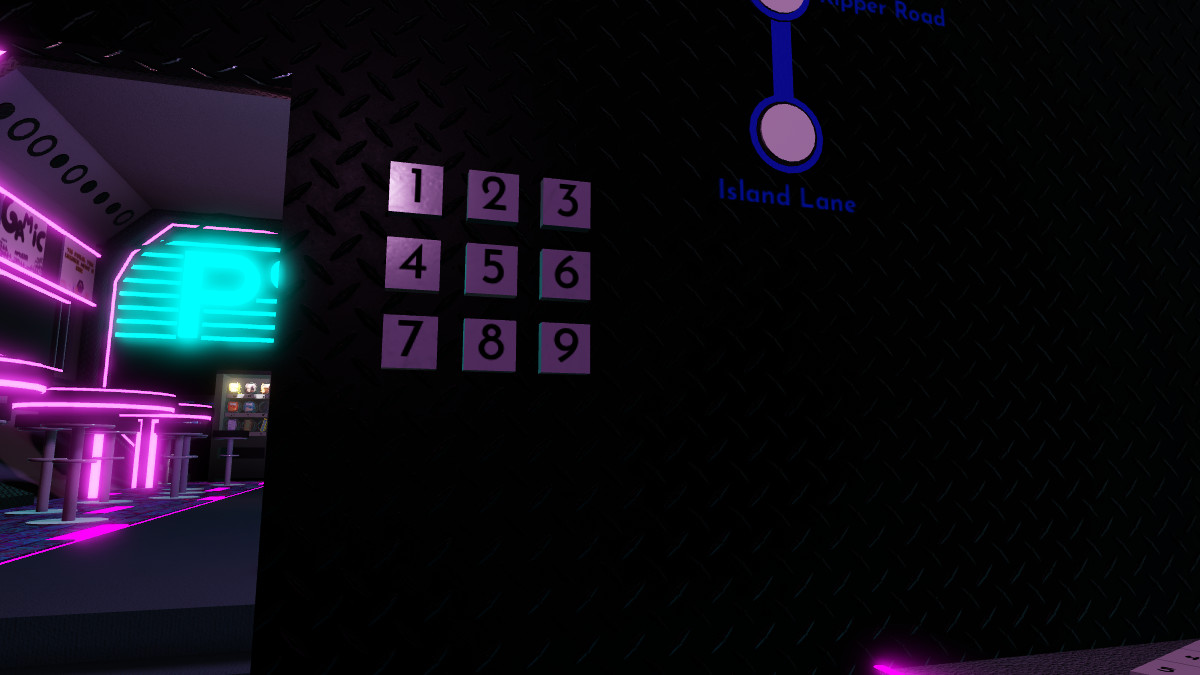
If we’re looking to escape the first cabin, we’ll need to find the code that will work with this particular keypad. We aren’t given much in this room beyond a large assortment of different fliers for different events, so we’ll need to start searching through them all if we’re hoping to get any sort of a clue.
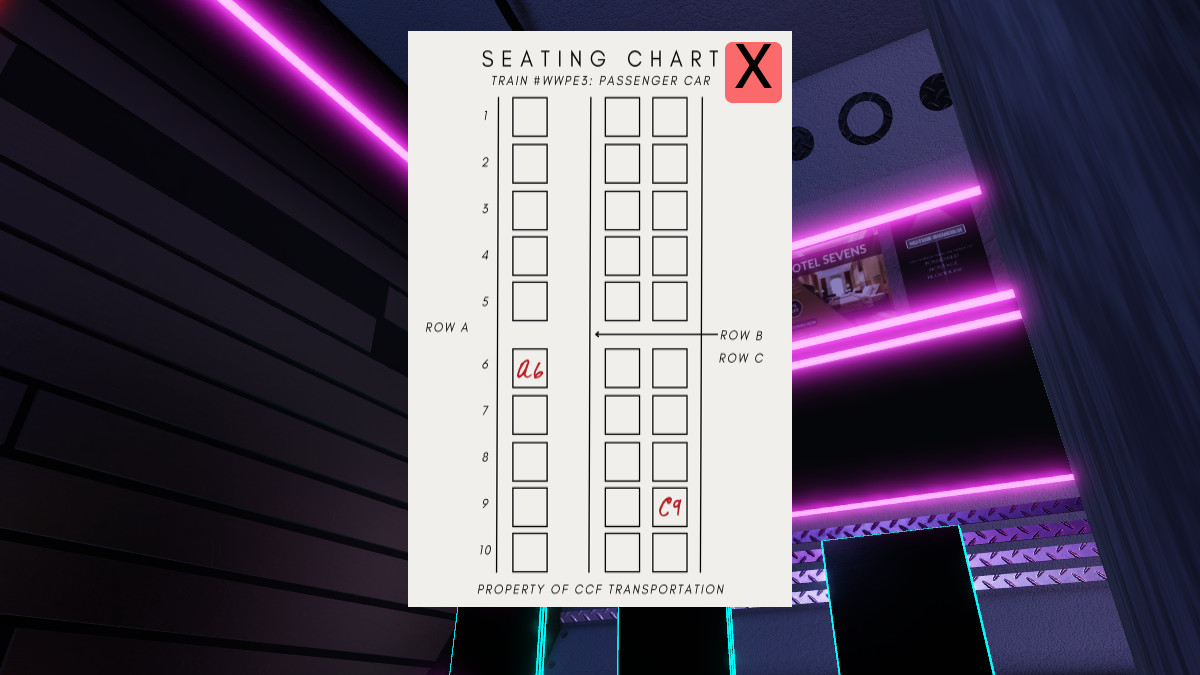
The first clue we’re going to find is going to be the seating chart. Normally, I recommend taking a screenshot so you can remember exactly where every seat is on this fast-moving train, but we’ve already got that covered for you. As you can see, the single row of seats will be Row A, whereas the double rows of seats are listed as Row B and Row C. You’ll need to remember this for the next step of the adventure.
Related: Roblox All IQ Test Answers (Floors 1 – 200)
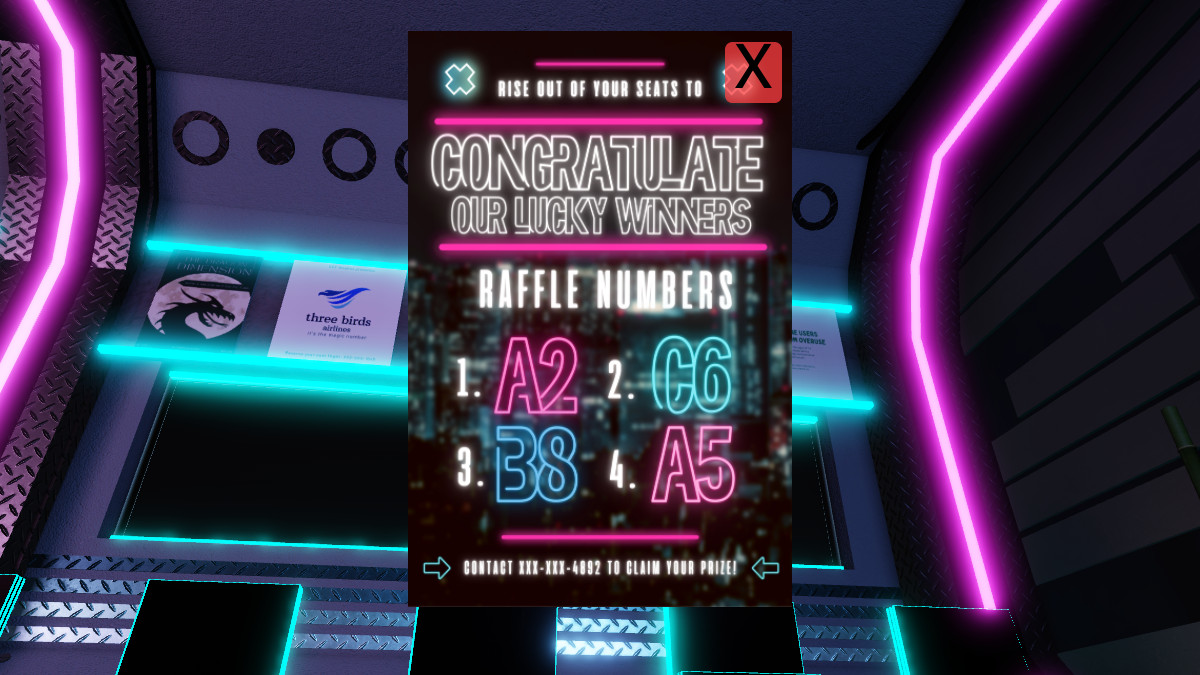
On the opposite side of the cabin, you’ll find a flyer congratulating the winners of a Raffle. You’ll also be able to see the following numbers that have been deemed lucky enough to be crowned the winner of this particular draw:
- A2
- C6
- B8
- A5
Now, where did we recently just see a bunch of numbers and letters? On the Seating Chart shown above, that’s where. Using this to flip up the seats, we can determine the code to open up the door is the following:
- 3479
Interact with the Keypad to enter the next cabin, and start the next part of this chapter.
Terminal Escape Room Chapter 1: Cabin 2

Once we’ve made our way into the second cabin in Terminal Escape Room, we’ll need to find out another code and figure out how we’re going to get the Keycard needed from the vending machine that’s in the room. Thankfully, this is pretty easy, especially when you’ve got our help.
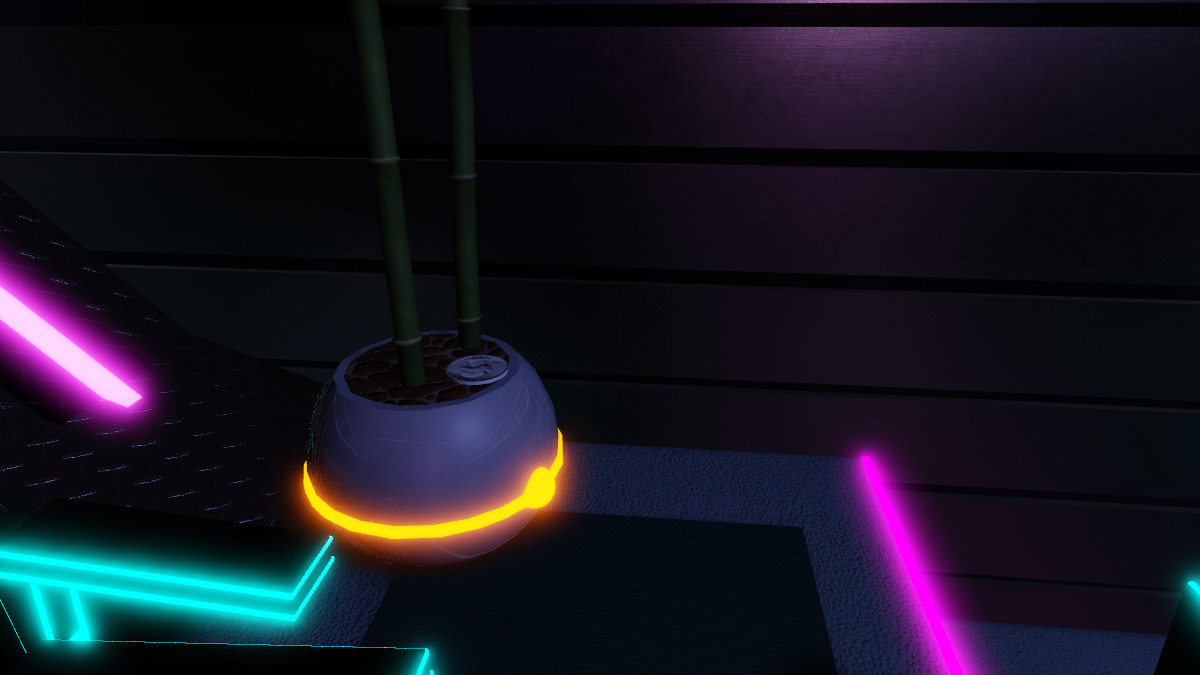
To find the first quarter, we’ll need to backtrack into the first cabin and locate the Bamboo plant. Resting on the edge is a large quarter that we can grab, getting us halfway to our goal of obtaining the keycard. While you’re here, take a look at a few of the posters on the wall, clicking in to zoom in on them to get extra details.
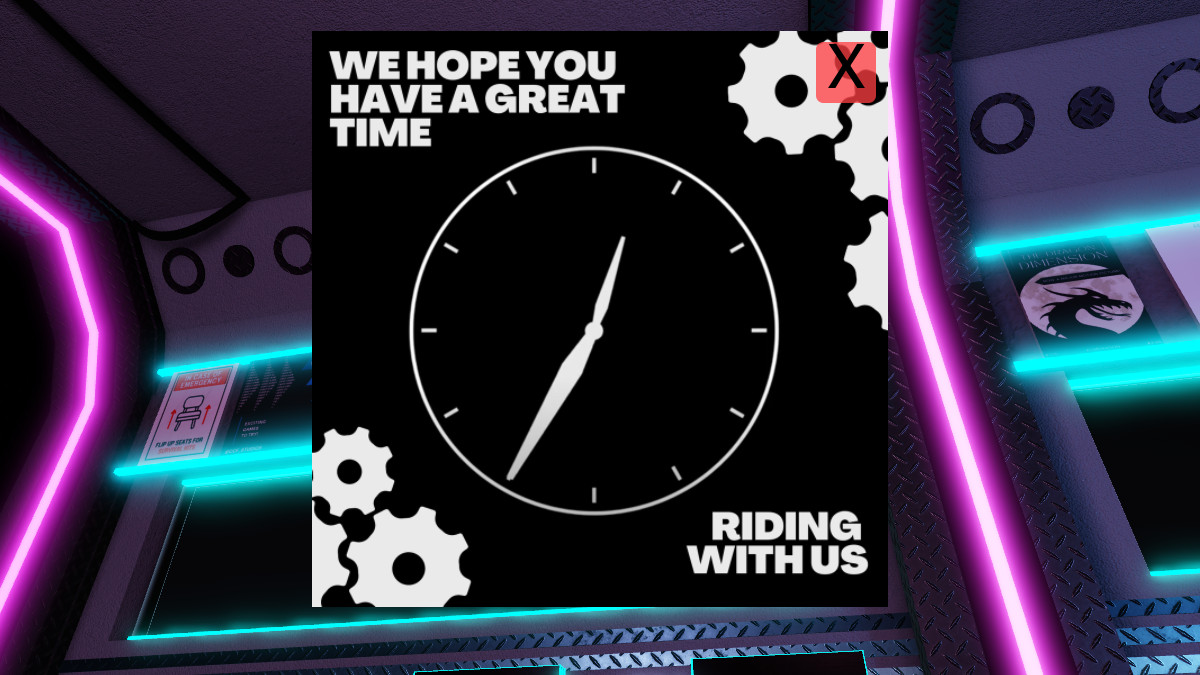
This poster in particular is going to be very valuable to study, as it gives us the code for the ATM in the cabin we’re currently trying to escape from. To get a quarter from the ATM, use the following code:
1235 (It shows 12:35 on the analog clock in the poster)
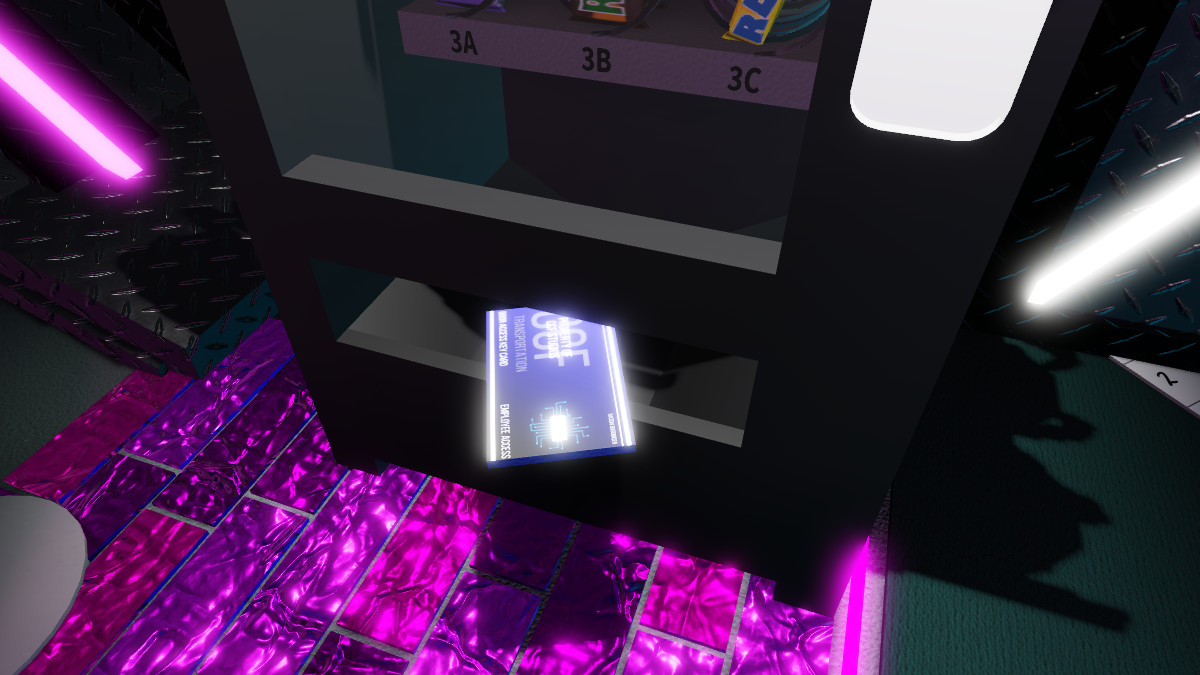
Once you’ve gotten the quarter, head back to the vending machine, insert the money, and select the following item to get the keycard:
- 2C
Grab the Keycard, equip it, and use it on the Slider near the door to open it, granting access to the third cabin.
Terminal Escape Room Chapter 1: Cabin 3
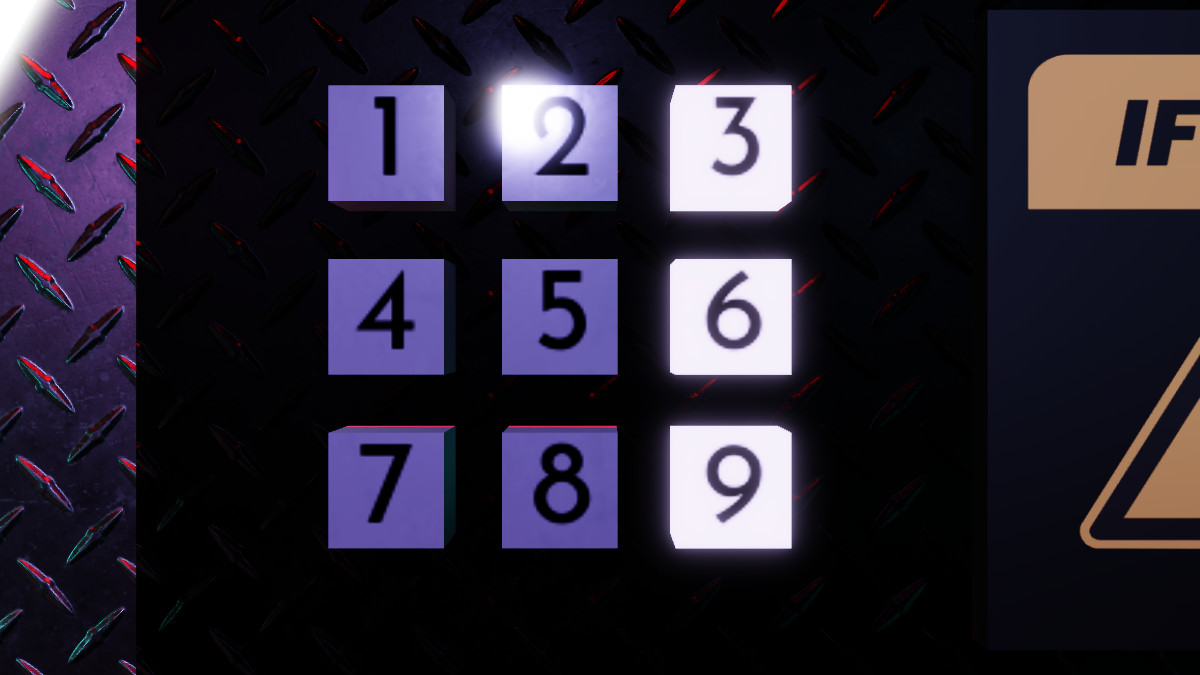
Okay, we’re over halfway through the first chapter at this point now that we’ve made it into the third cabin. This is going to be the most difficult trail so far, so get ready to flex your brain muscles — or just follow our guide to get through it with no issues.
Related: Roblox Bodycam Codes (June 2024)
Interact with the Keypad to blow the fuse — don’t worry, you didn’t do something wrong. It’s part of the process of getting through this room. You’ll now be tasked with finding a replacement fuse that you can use to open the door and get the lights back on. Head into Cabin Two once more.

Look under the glowing blue tables to find the fuse that you need to put back into the fuse box to get things working properly again. It’s easy to miss, due to the bloom of the glowing blue tables, but look for the metallic surface of the fuse and you’ll find it quickly enough. It’s under the table closest to the door.
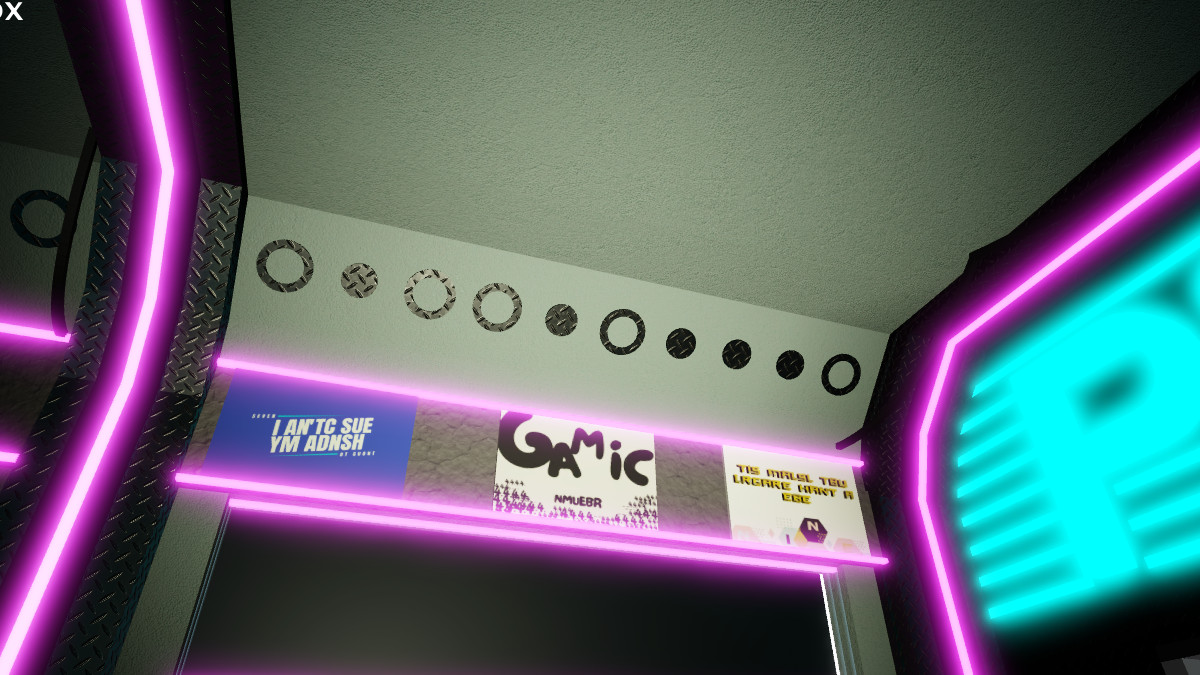
While you’re in this room, power on your flashlight and take a look at the ceiling near the door. You’ll see an interesting pattern up here, and it’s something to take note of. You’ll need it once you put the fuse back into the container to get things back up and working. If you don’t want to memorize it now, you’ll need to flip the switches in the following pattern:
- On
- Off
- On
- On
- Off
- On
- Off
- Off
- Off
- On
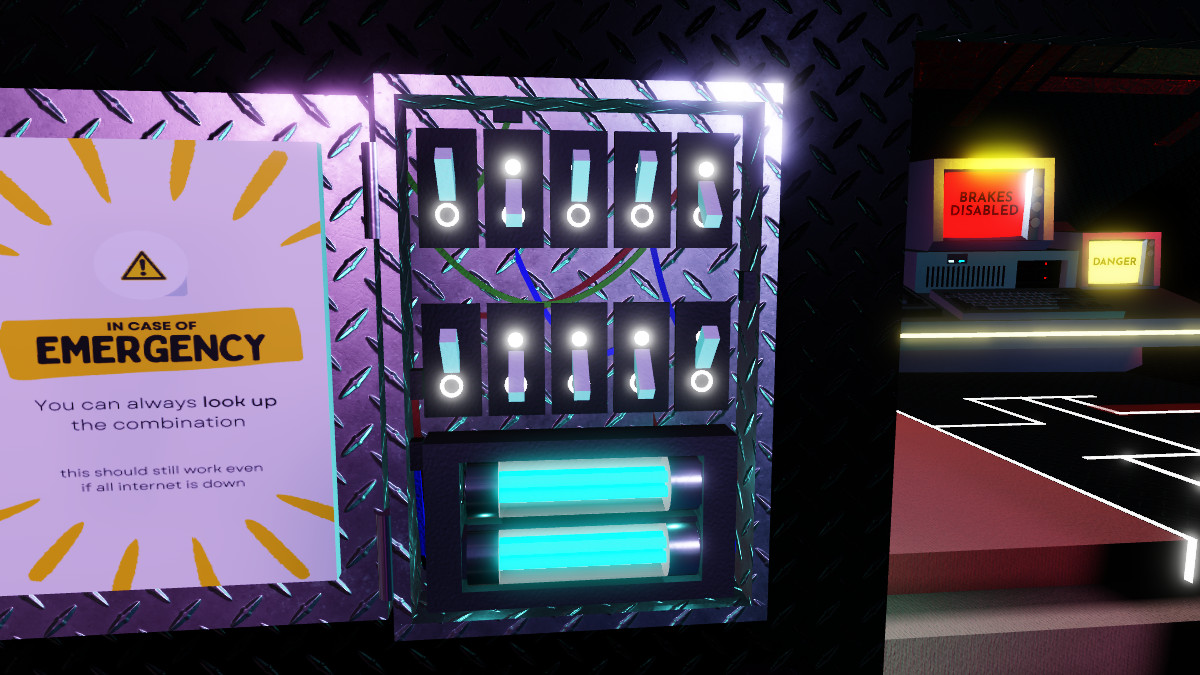
Return to the room, insert the fuse by equipping it and then placing it into the box, and use the pattern listed above or shown in the photo above to get the lights back on. Now, it’s time to figure out how to get the code for the door. Look above the cabin exit, and you’ll see an interesting diagram of Morse Code. Take a picture or write it down and head back into the first cabin.
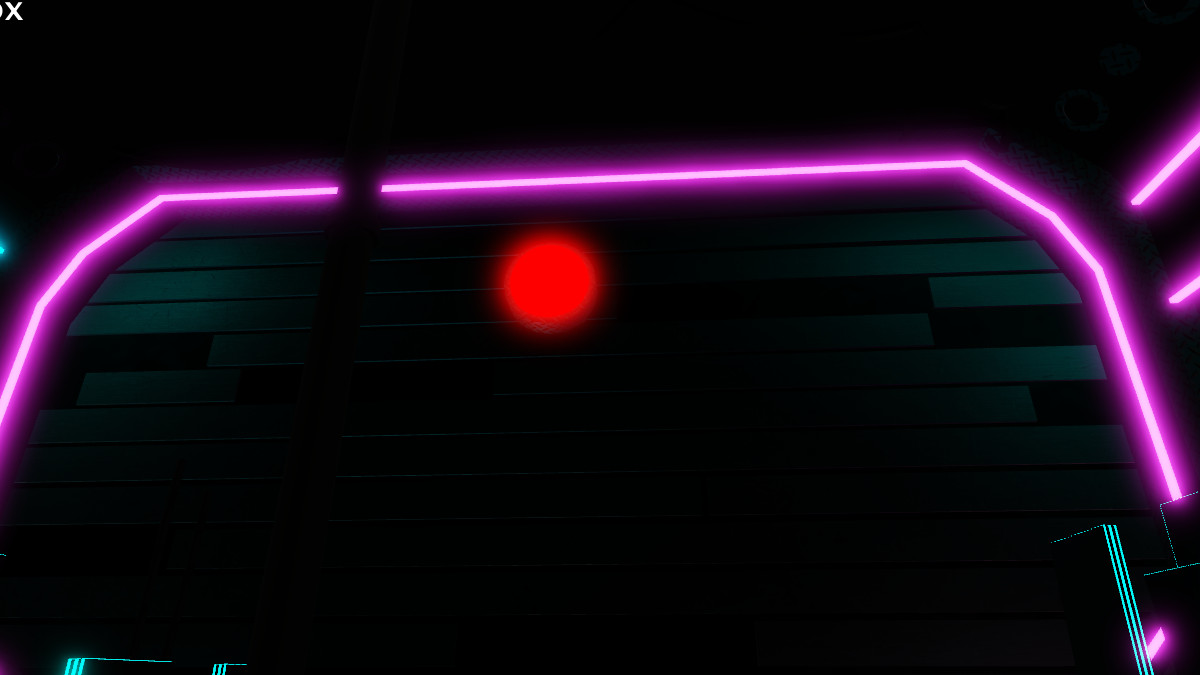
There’s a large, red flashing light in this room that gives us the code. If you don’t want to sit and wait around for it to finish, or you’re struggling to get the timing of things down, the code is listed below:
- 3967
Use this on the keypad to exit the third cabin and enter the final room.
Terminal Escape Room Chapter 1: Cabin 4
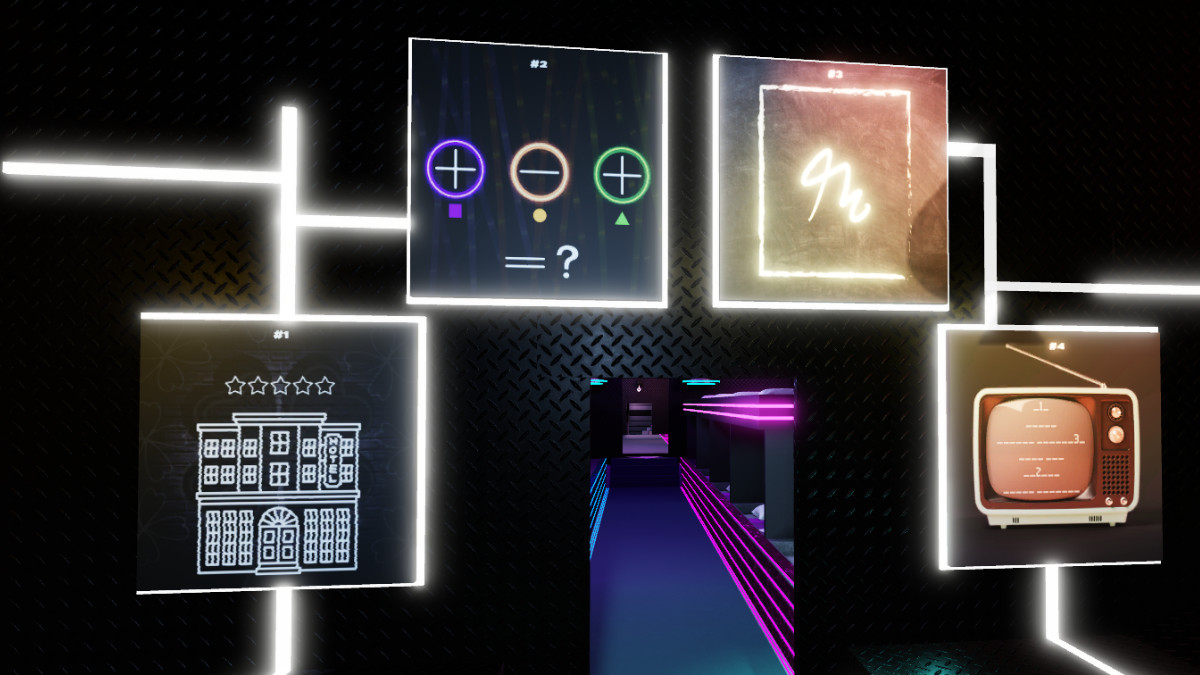
The final room now, and the stakes couldn’t be higher. It’s time to get off of this train, and into the safety of our homes once again — or at least until we start Chapter 2, that is. What you may not realize, however, is the hints for the keypad are all shown to you by the door:
- Hotel
- Math Problem
- Squiggle
- TV
Let’s start with the first digit for this particular pattern, and head back into the first cabin once again.
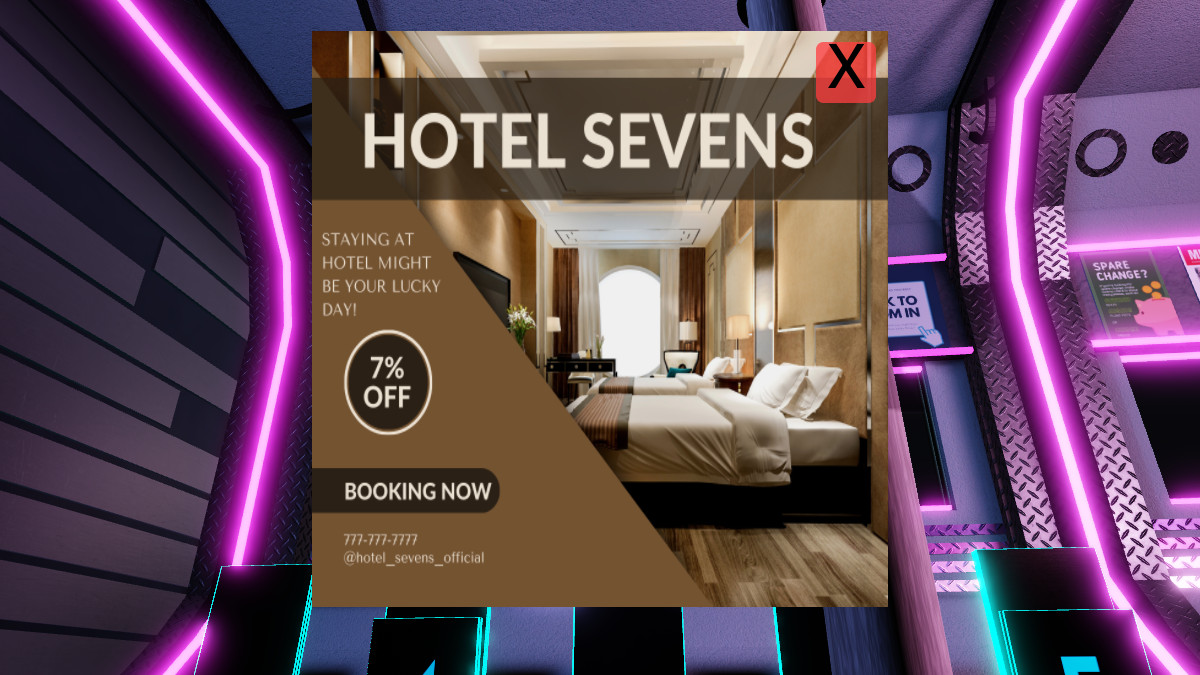
Look across the top of the posters again until you come across a flyer for a promotional flyer for Hotel Sevens — which just so happens to have a percentage off. Note down 7, as it’s the first number to our escape. Now, we’ve got to do some math problems to figure out the next number in our escape guide.
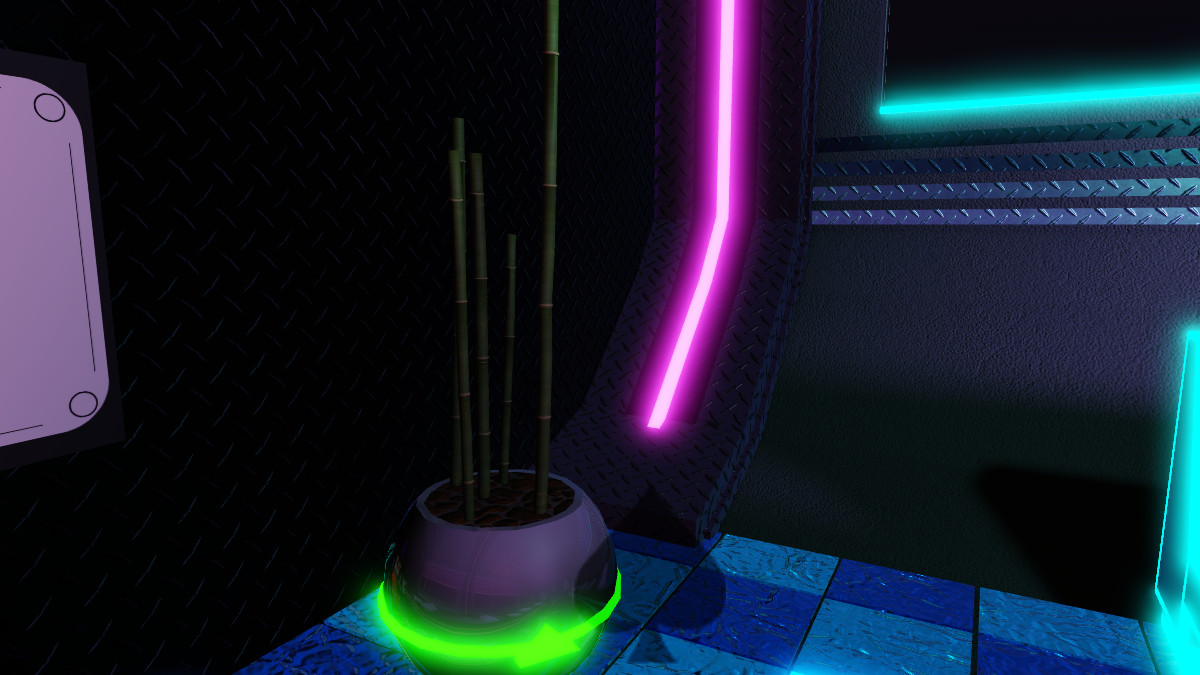
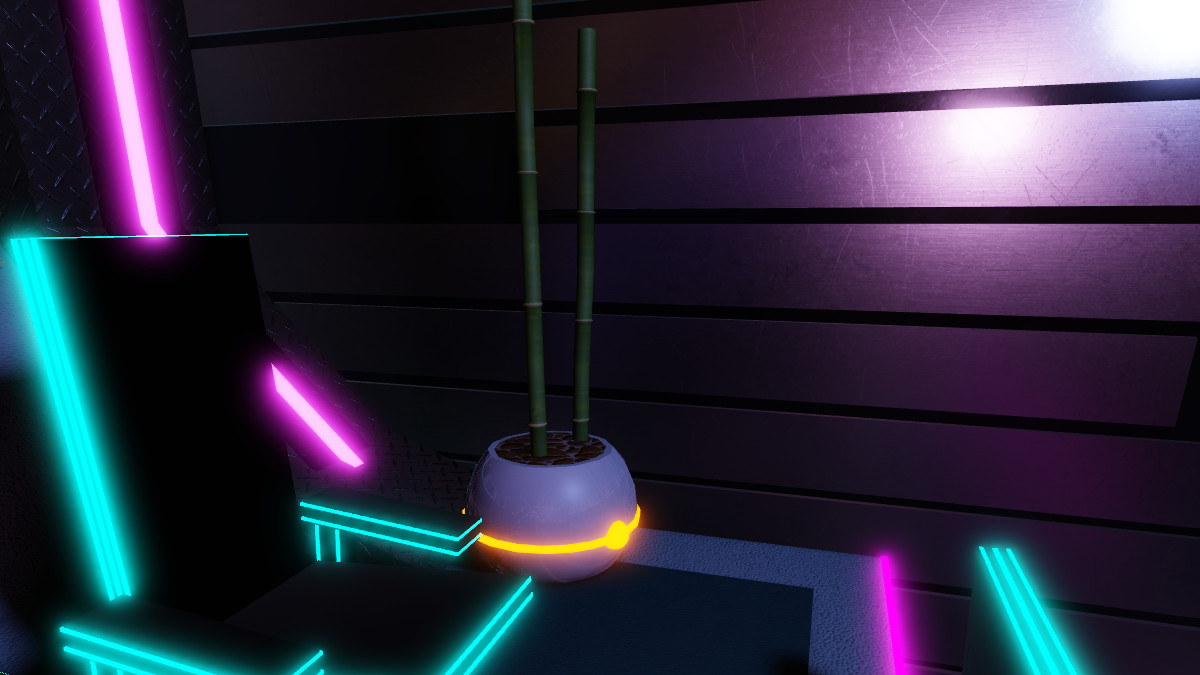
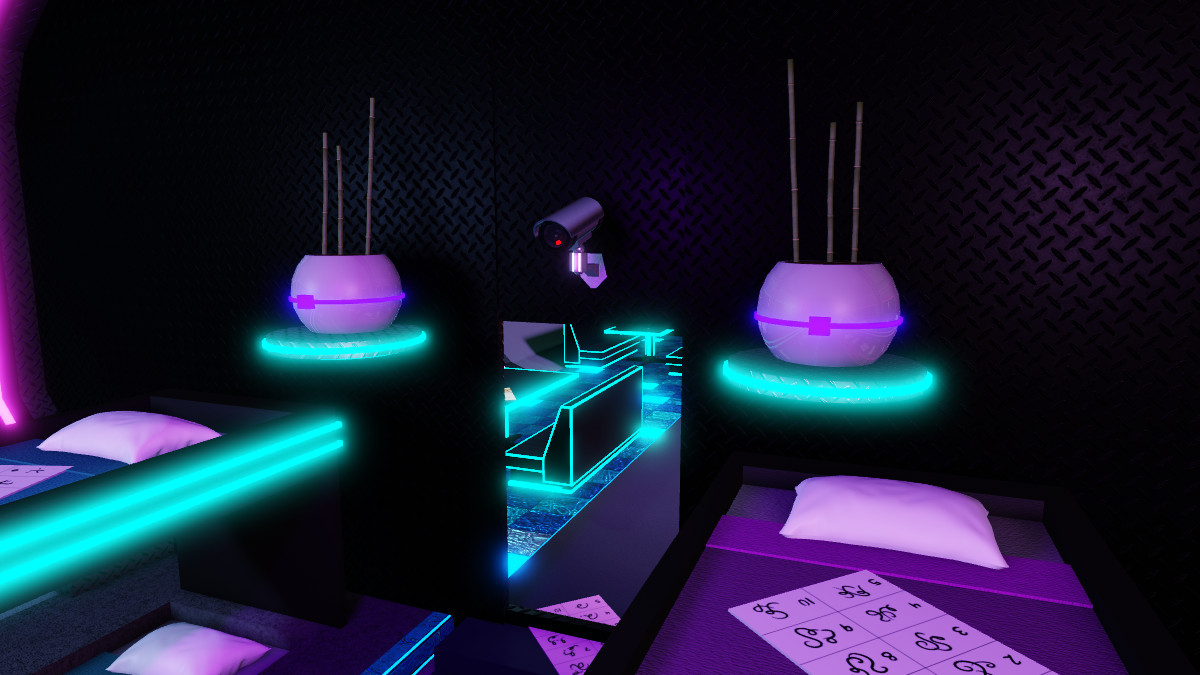
The second hint comes via the Bamboo poles that are in each of the colored pots. Add the total of plants in the Purple and Green pots and subtract the amount in the yellow pots to get the next hint: 9. That’s our second digit.
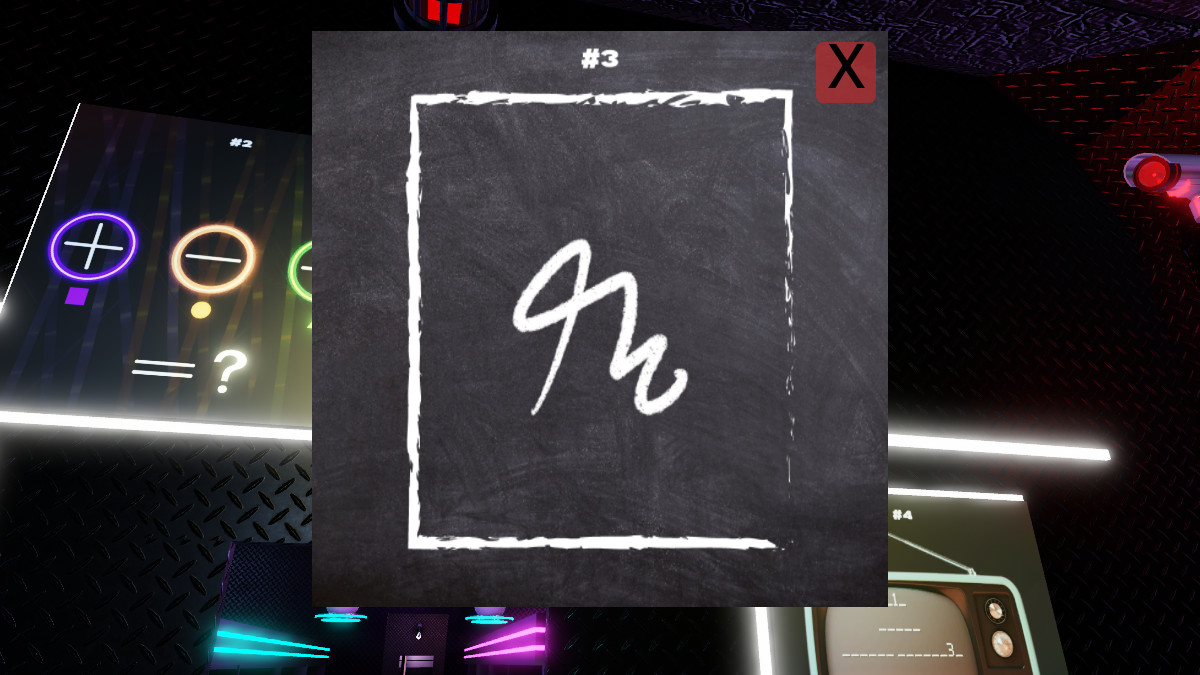
The next hint is going to directly correlate to this particular squiggly pattern. You’ll need to head into cabin three and investigate each of the papers that are strewn about it to get the answer to this one. Or, you can cheat and use our answer: we found it on a sheet of paper listed by the number 4, so we’ve got our third digit.
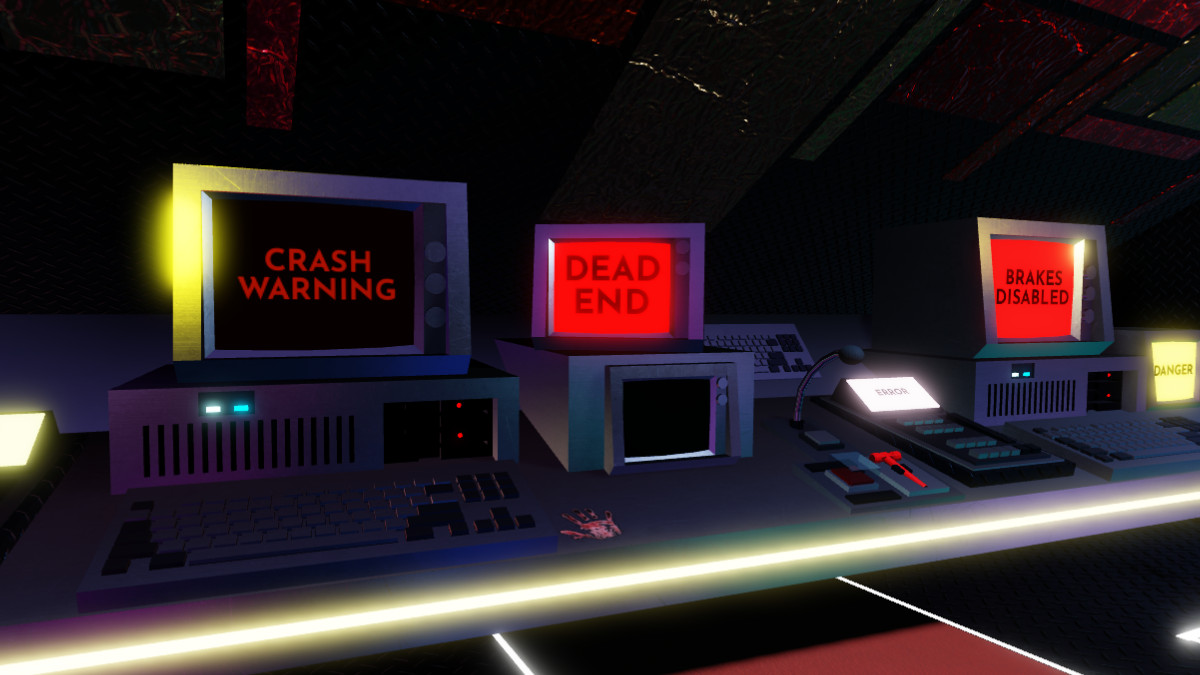
The final hint is going to require us to check through all of the screens in the cockpit to determine what the final number is. You’ll need to examine the poster and use the particular letters from the TV screens to get the final number for this, or once again, use our helpful guide to get it. Without having to scan through them all, the answer is listed below:
- SOS
- DANGER
- BRAKES DISABLED
So, the final digit that we needed is the number 1. Put all of these hints together, and you’ve got a final code of 7941, which you can put into the keypad to complete Chapter One of Terminal Escape Room. One chapter down, two chapters to go.
Terminal Escape Room Chapter 2 Answers & Walkthrough
Alright, we’re refreshed and ready for what Chapter 2 can throw our way. Let’s jump right in and figure out what we’ll need to do to escape yet another room of this terrifying experience.
Terminal Escape Room Chapter 2: The Train Room
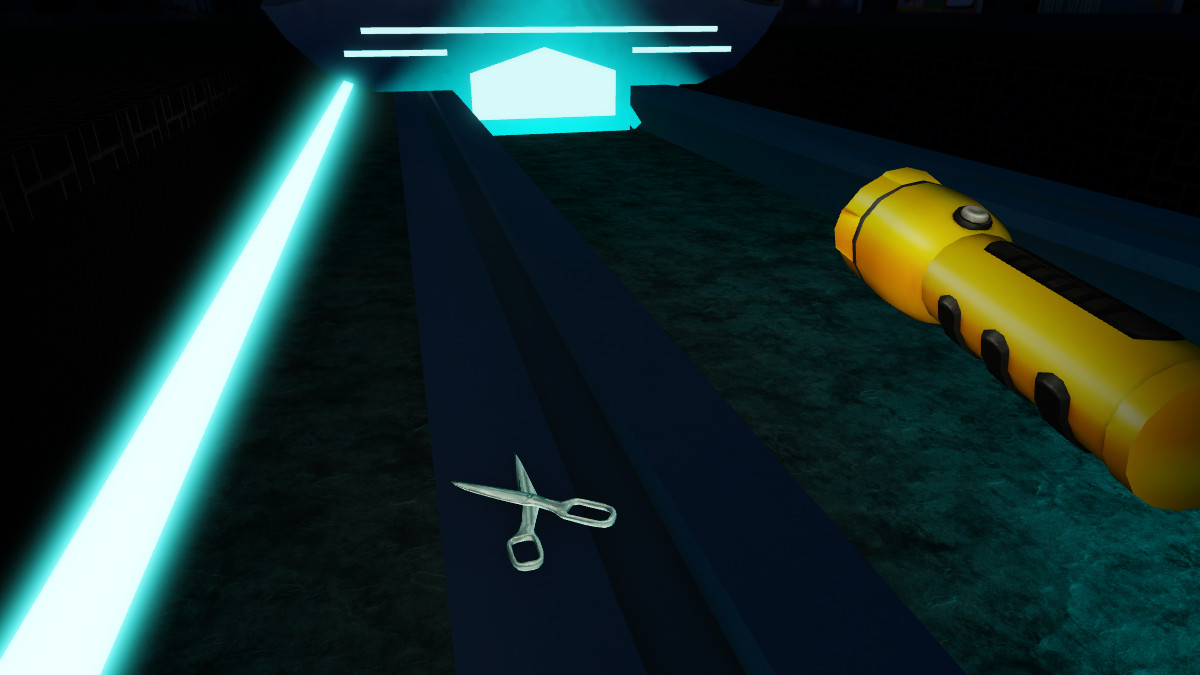
It’s time to get our hands on some necessary items first and foremost. As you enter the area, you may see a box on the side of the train that needs to be opened up. You’ll need to get your hands on a Screwdriver to make that happen, and a pair of Scissors to cut the wires that are inside of it. To find the scissors, head down the train tracks near the front of the train, and you’ll find them laying on the track.
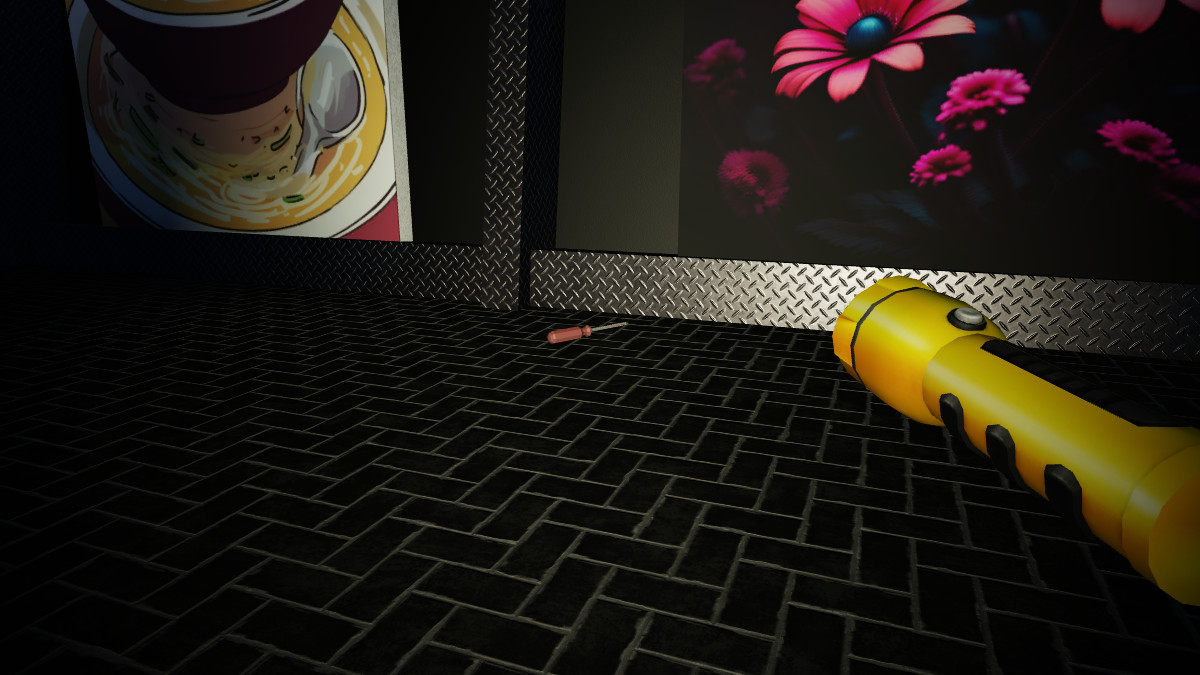
The Screwdriver, on the other hand, is located near the paintings. You’ll find in between the pictures of the Ramen Bowl and the Flowers, lying on the ground. Grab it and head back over to the box to pry it open.
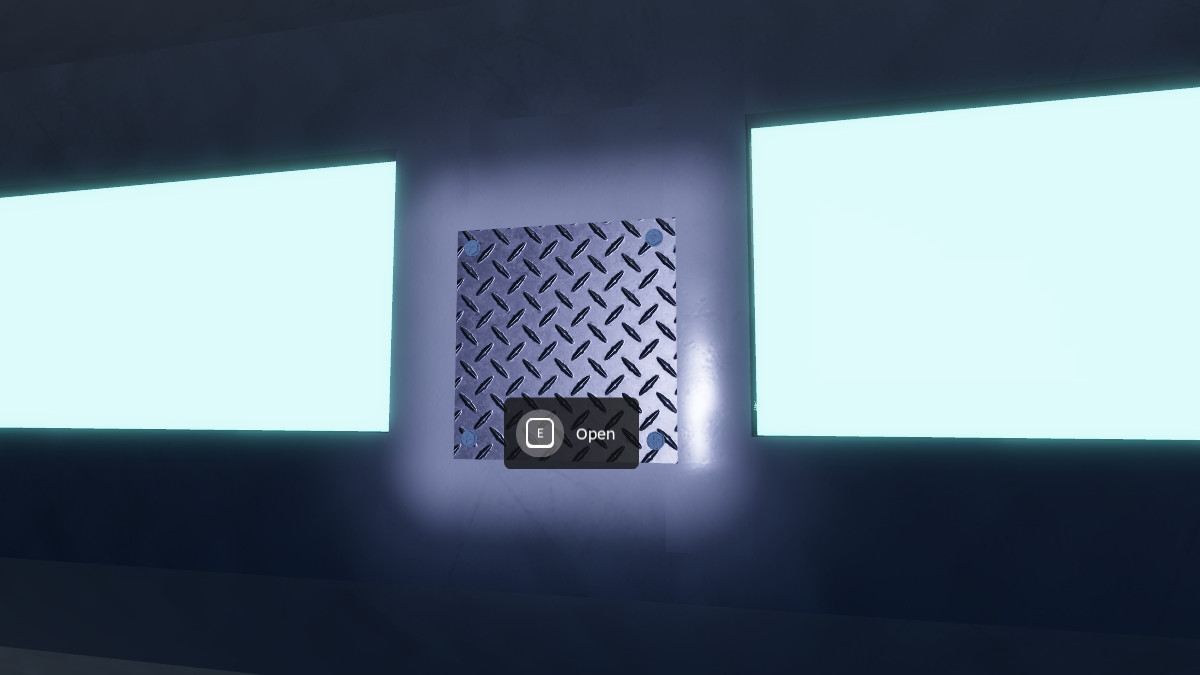

Open the box on the side of the train by interacting with it, and you’ll find a large number of wires beneath the metallic surface. You can go ahead and use the scissors to cut these in any order that you’d like, as we’ll need to properly rewire them in the next step. Once you’ve done this, head over to the other side of the train to get your next set of instructions.
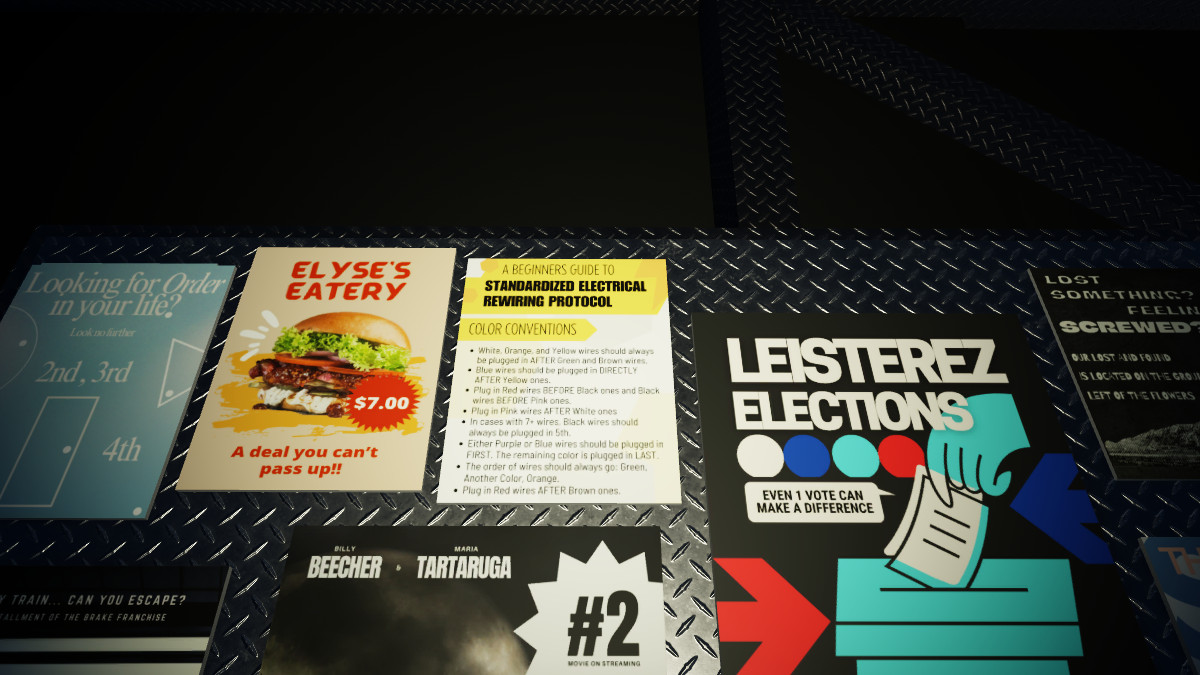
On the large community board, there is a postered titled “Standardized Electrical Rewriting Protocol”, which will detail the steps that you’ll need to take to rewire these back up properly. To save some time and confusion, you’ll want to go ahead and wire them back up as follows:
- Purple
- Brown
- Red
- Green
- Black
- Orange
- White
- Pink
- Yellow
- Blue
If you try to wire these in any other order, you will not be able to proceed. Now that we’ve got proper electrical going once again, it’s time to get through the door with the help of a code. How do we find that out, however? It’s time to investigate once again.
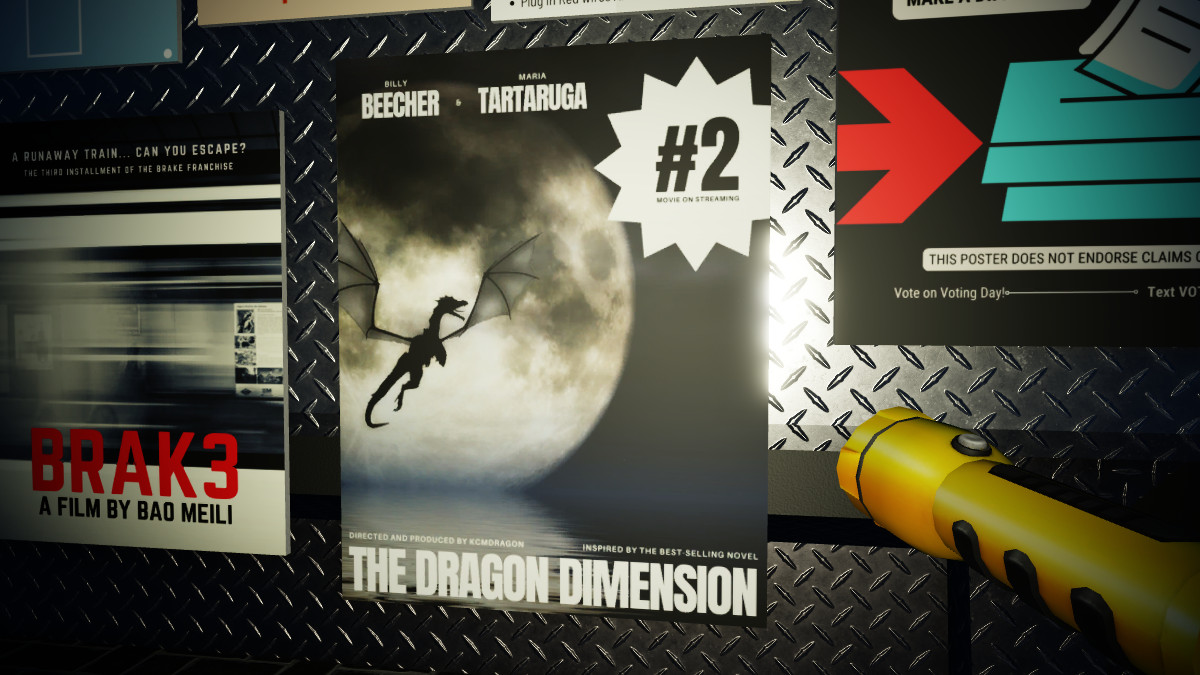
If you take a look at the Community Board once again, you’ll spot that there are a large number of 2 and 3s on here. Be it the Brak3 poster, or the Dragon Dimension Poster, we know that we need to use two and three at some point in our code. Now, what about the next set of numbers?
Related: Is Roblox Crossplay?
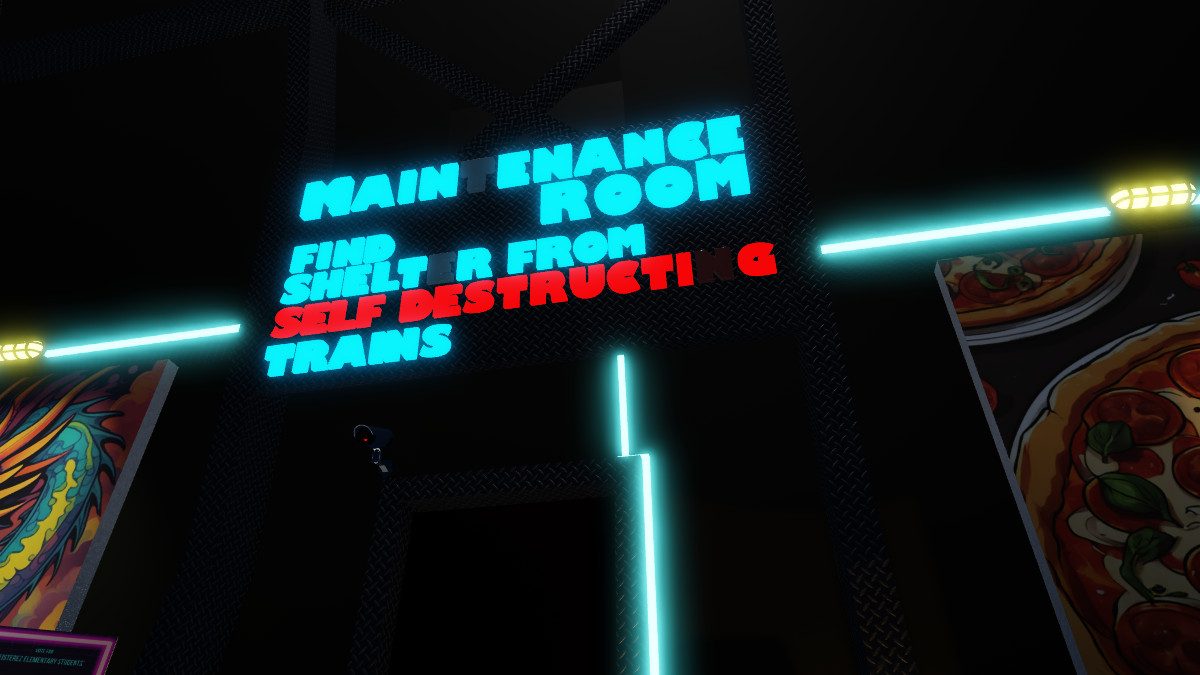
The large sign above the keypad continues to flash, and if you watch it for long enough, you’ll notice that it’s spelling out the hint for the next word. Watch the letters flash and spell out the word NINETEEN. That’s our ticket out of this room, as we can combine them into 2193 and enter the next room.
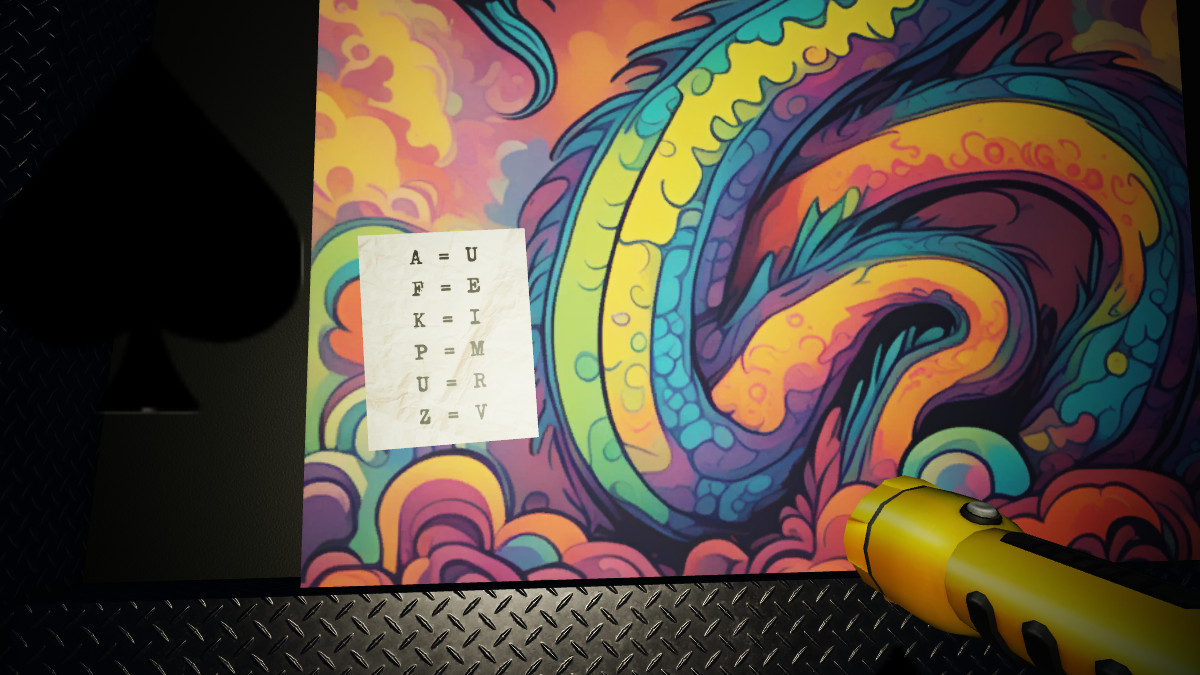
Before we go too far, however, head back into the room and grab this off of the poster with the dragon on it. You’ll need it later — technically, you won’t since we’ll be giving you the answer, but it’s still nice to have.
Terminal Escape Room Chapter 2: Hatch Room
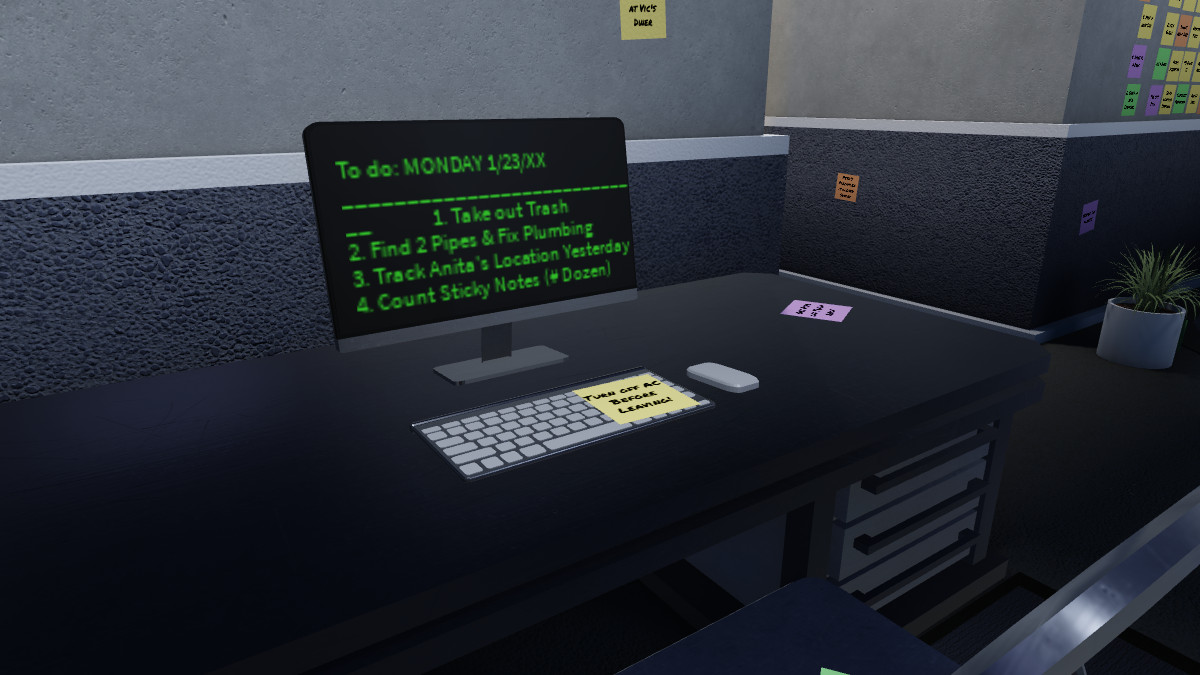
Alright, now it’s time to get into the most ridiculous room of the experience so far. We’ve got a big to-do list of things to get done, with the following tasks needing to be done:
- Take Out Trash
- Find 2 Pipes & Fix Plumbing
- Track Anita’s Location Yesterday
- Count Sticky Notes (Divide By 12)
So, we’ve got to start by taking out the trash. If you head over to the trash bin, you may realize that there is no actual trash to take out there. Instead, you’ll want to head over to the broken glass panels that are on the floor.
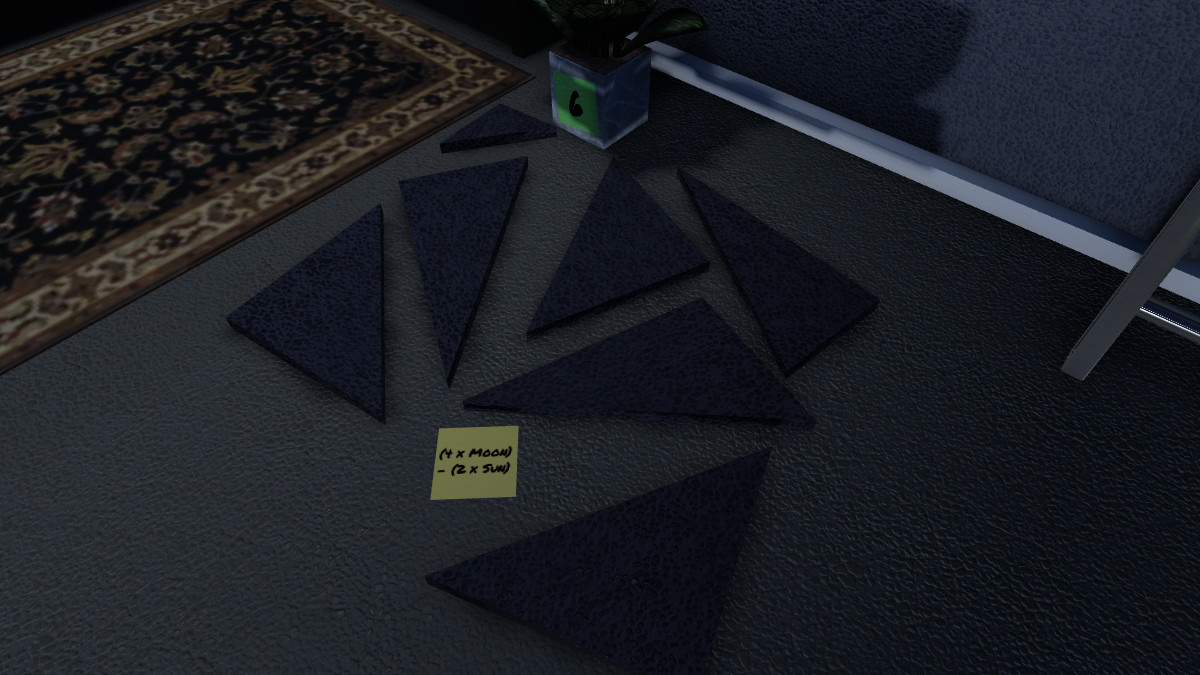
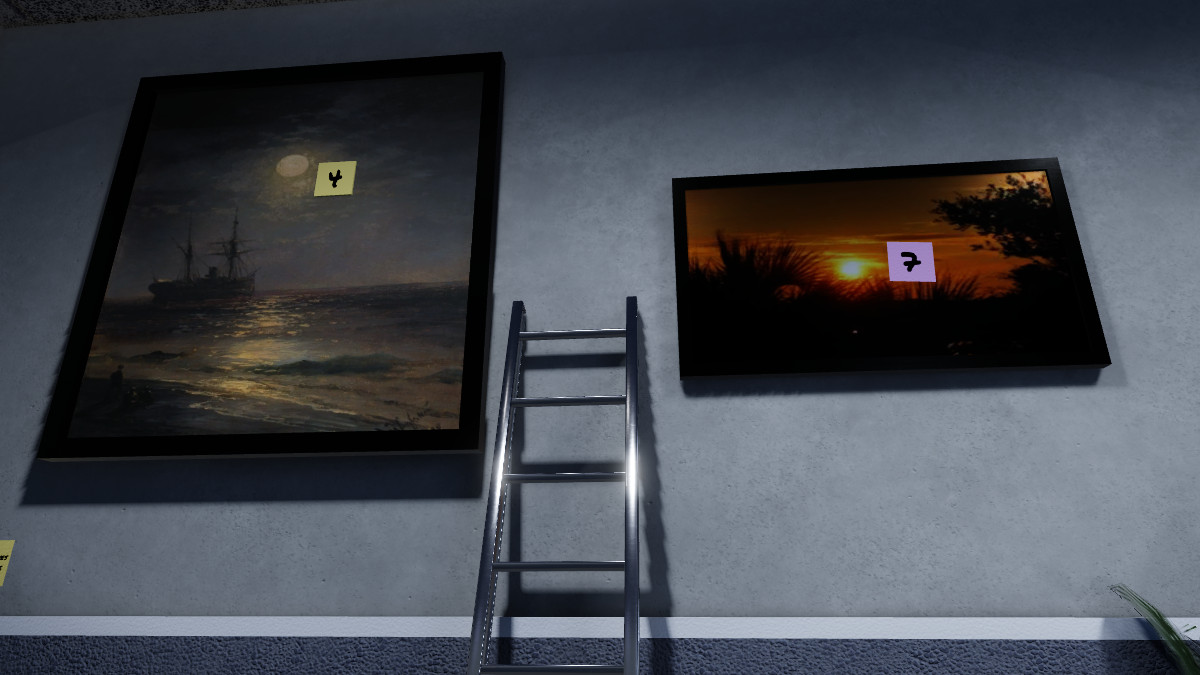
On the floor, you’ll see a particular sticky note that shows a mathematical equation that is required to get the first digit of the code. Looking to the left, you’ll see a photo with the moon and a photo with the sun on it, alongside a sticky note that has a number on it, as well.
To just do this equation easily and quickly, multiply the Moon (4) by 4 and get 16. Then, you’ll have the sun (7) times 2 to get 14. Take 16 and subtract 14, and you’ll get the first digit — 2.
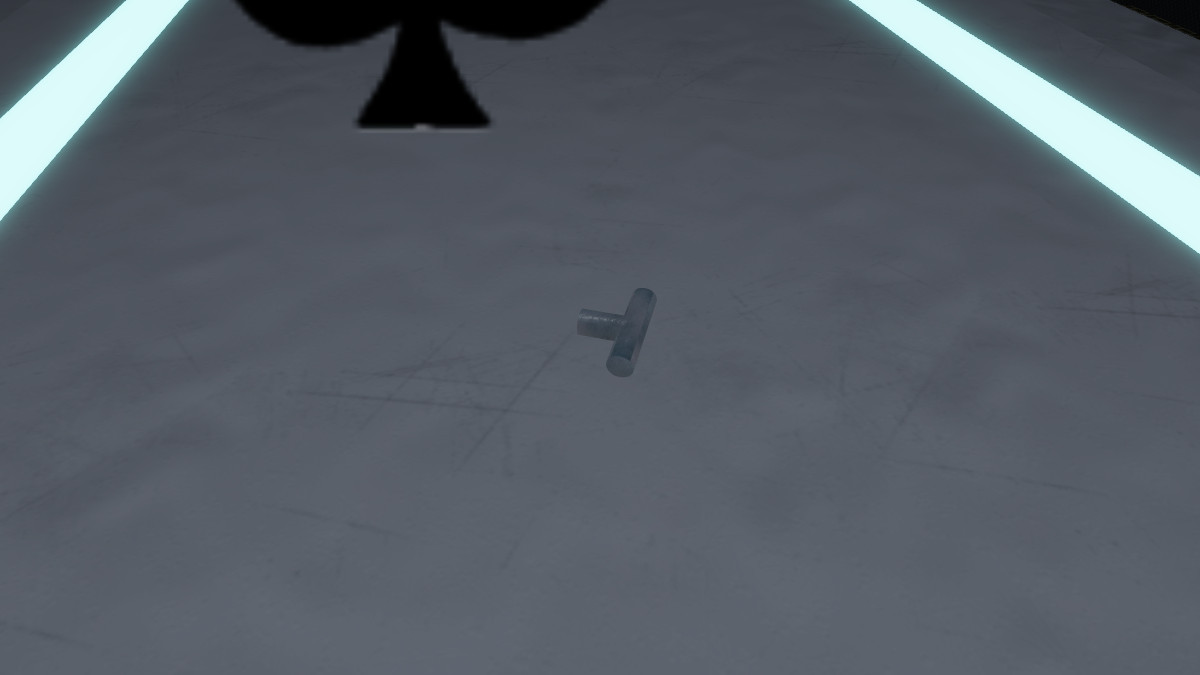

Next, you’ll need to find a few pipes that are laying around. You’ll see two sticky notes in the office to give you a slight idea of where you can find the pipes:
- One pipe is on the Train
- One pipe is in the “Park”
The train one is easy to spot, as it’s directly on the top of the train. Just take a walk along the top of the train and you’ll get your hands on the first pipe. The second pipe is going to be a little bit more difficult to find, as there is no “Park” around here. You’ll want to look at all of the photos along the wall until you come across a photo that looks like a park. You’ll find the Pipe taped in the middle of this photo.
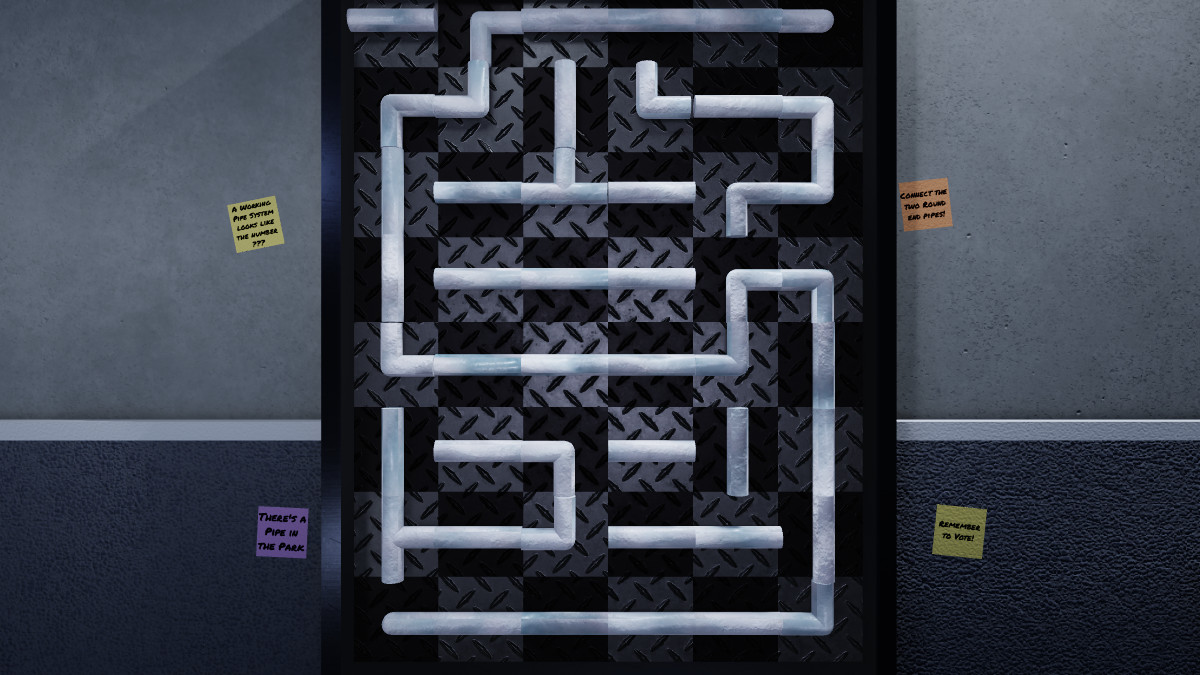
Place the pipes on the piece that is on the wall, and then it’s time to start moving things about. Through trial and error, you’ll hopefully get the second digit out of it — the number 5. Two down, two more to go.
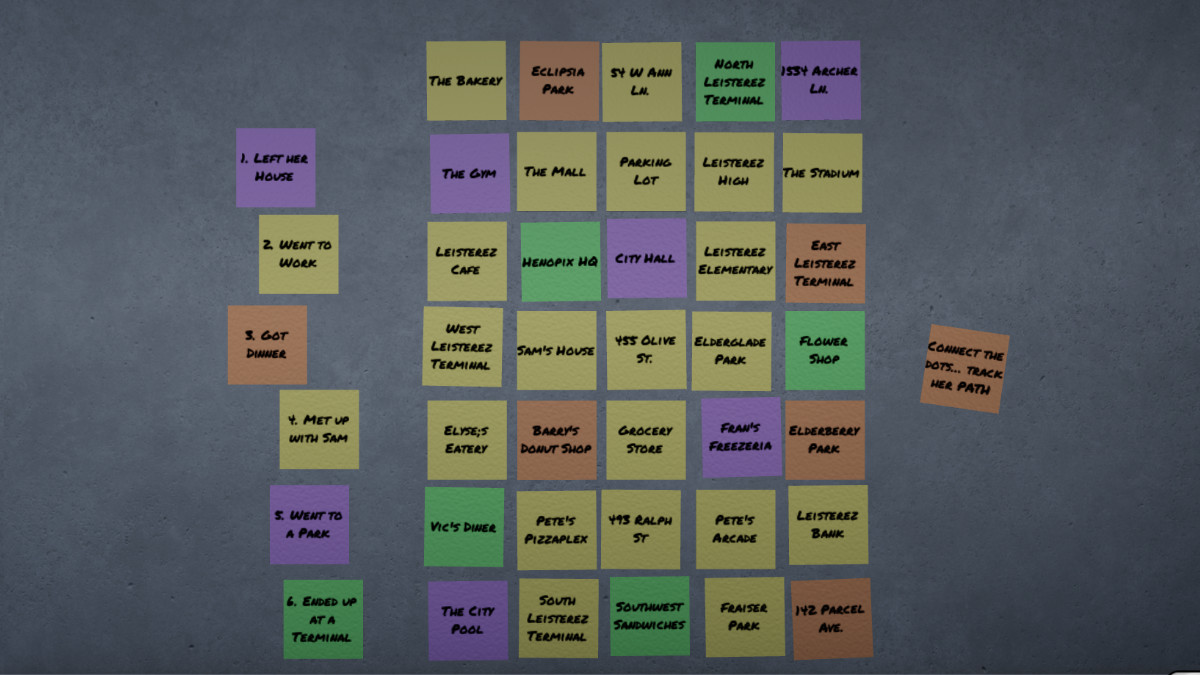
It’s time to play Detective in this particular experience, as we need to track down all of the tasks on the side of the screen. Rather than having to do any of the hard work, we’ll just go ahead and give you the answer: the answer is Six when everything is said and done. So far, we have 2,5 and 6. Now we get to go full-on Pepe Silvia mode, counting every sticky note in the office, and dividing it.
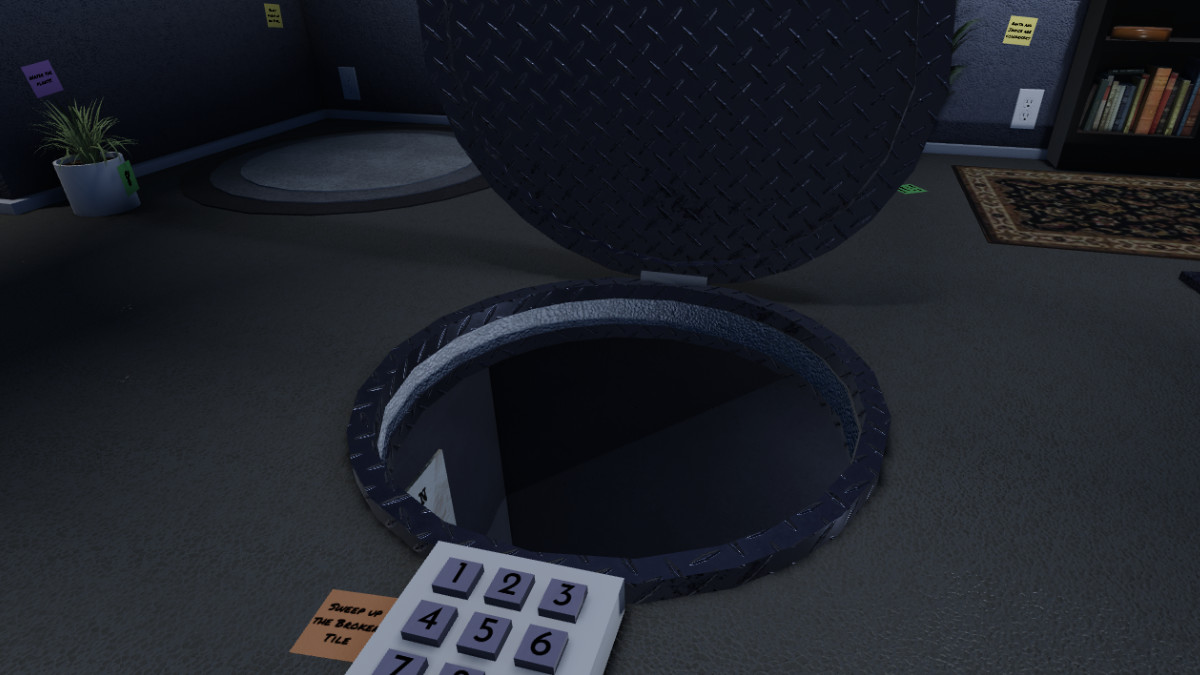
Rather than needing to go through and count all of these yourself, we’ll save you the trouble. There are 7 dozen sticky notes throughout the room, so we’ve got the final digit that we need. Enter 2567 into the keypad and drop down into the room below.
Terminal Escape Room Chapter 2: Maze Runner & TV Room
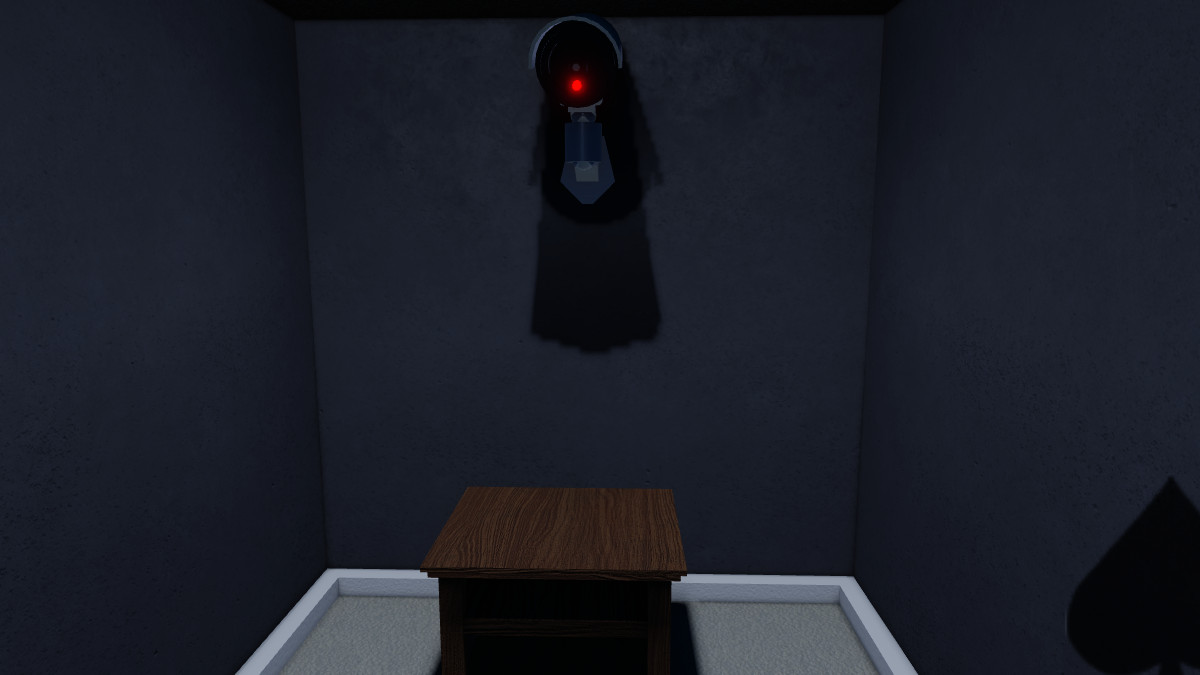
Alright, now it’s time to make our way through this maze. You’ll want to head through the maze until you come across a camera in a random passageway that has a remote. Technically, you won’t need to get your hands on this, since we have the answer here for you, but if you want to grab all of the items, we can’t blame you. Just keep heading through this maze, and then you’ll spot an entrance that leads you into a room with a variety of TVs.
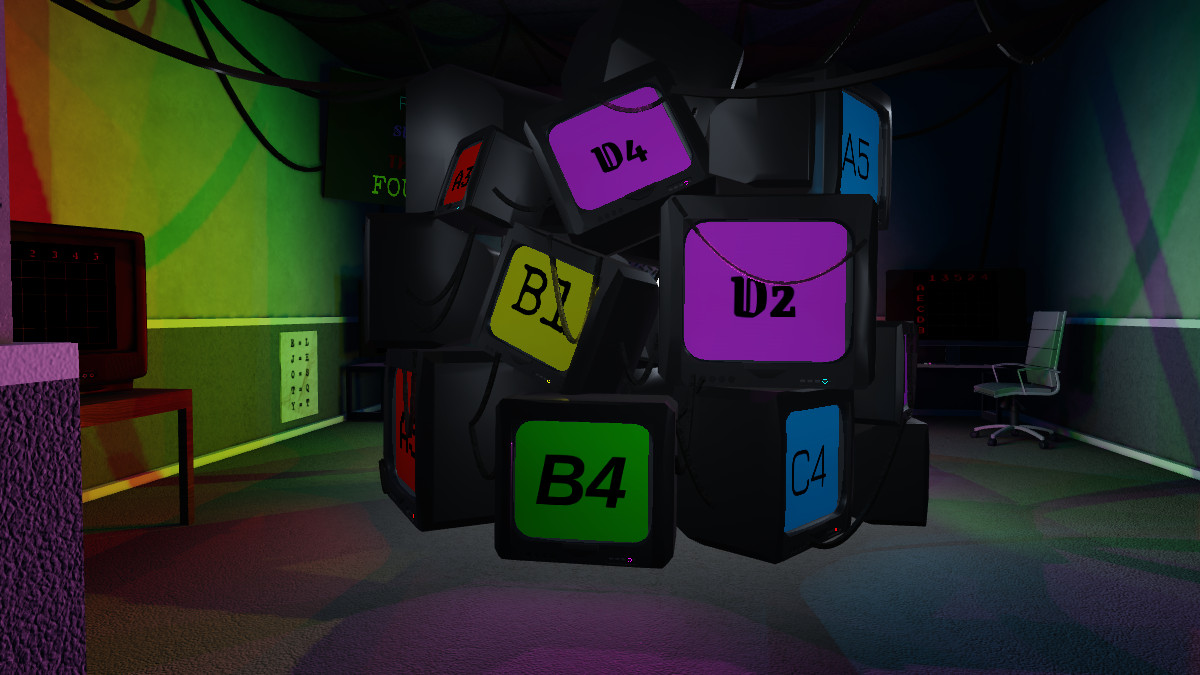
You’ll spot a huge number of TVs spread throughout this room, all with changing numbers and letters. You’ll need to keep a watch over the changing numbers on the TV, paying attention to the changing font and style of the numbers being shown.
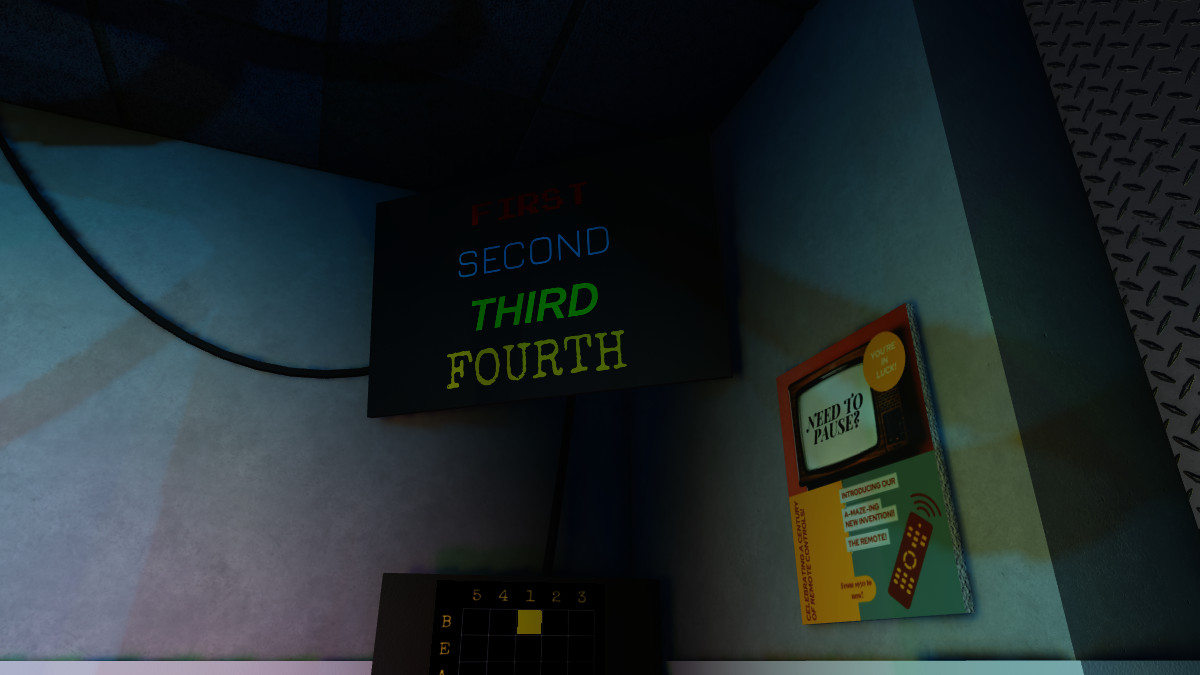
If you have the Remote item, you can pause the TV in the corner so you can get your hands on the code a little faster. You’ll want to keep an eye on everything that you see and start punching them in on the TVs. Or, you can just use our answer and push through — type in 2678 on the Keypad and you’re ready to go to the final room.
Terminal Escape Room Chapter 2: The Cipher Room
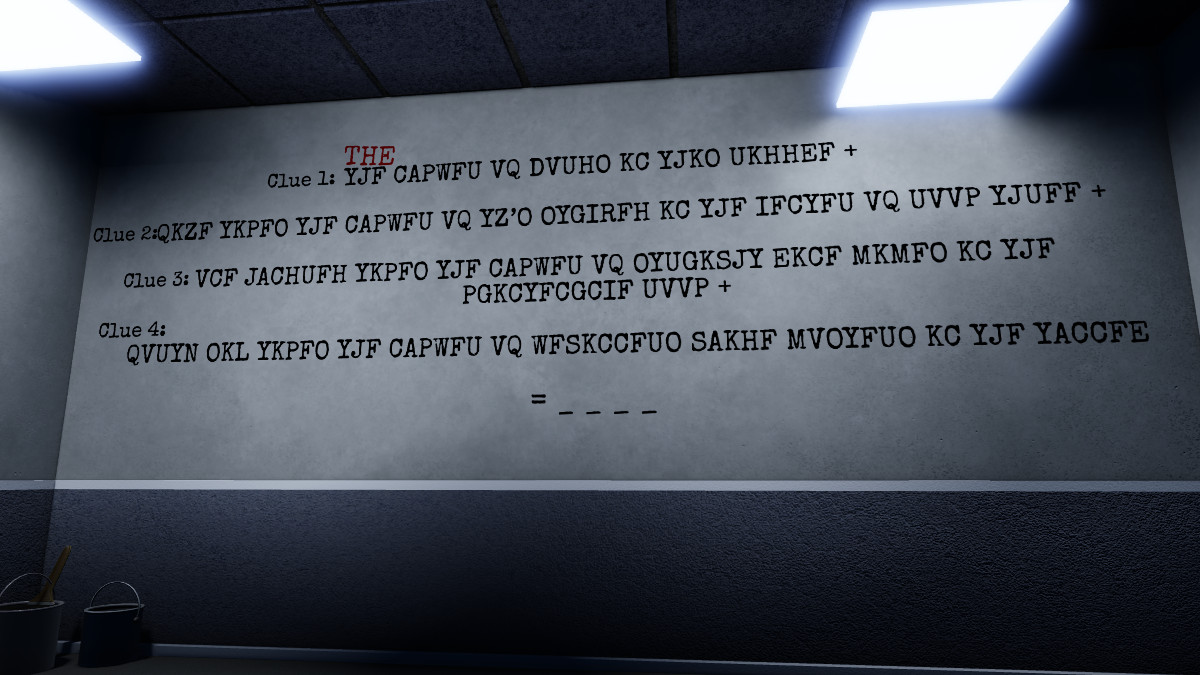
We’re in the final stretch of Chapter 2 of Terminal Escape Room — and now it’s time to decipher the cipher. It’s time to start doing some letter swaps to clean up this last part of the puzzle.
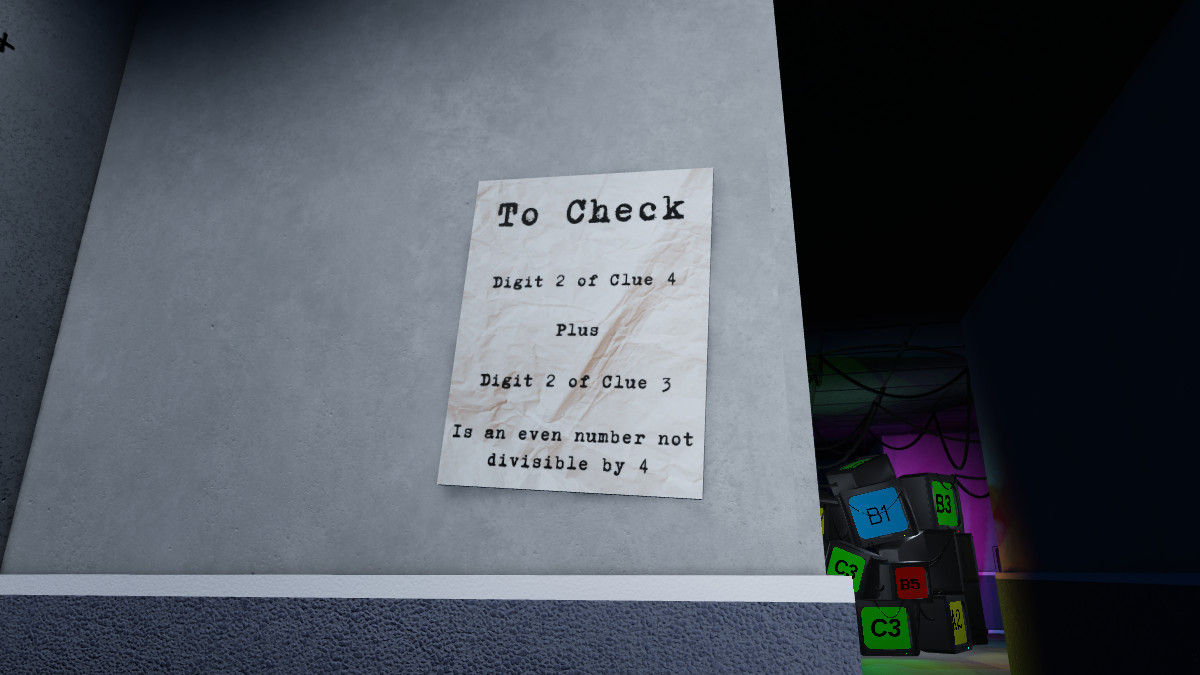
You’ll find that you need to do a little more math to get out of here. On one of the walls, you’ll find this equation:
- Digit 2 of Clue 4 Plus Digit 2 of Clue 3 is an even number not divisible by 4
Bad at math? No need to worry about it – we’ve got your back. By going through and deciphering everything, you’ll see that the note tells you that there are 23 TVs, 7 Beginner Guides, and 30 Pipes. It’s math time, if you want it to be, or you can let us take things from here.
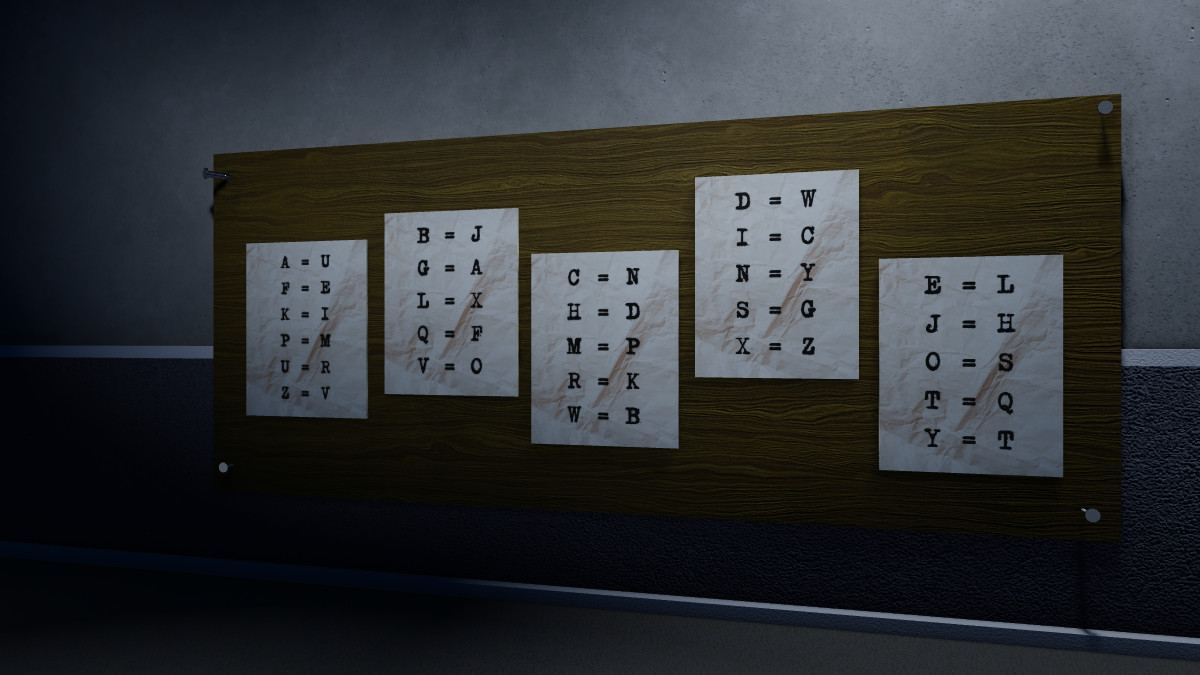
You can place all of the cipher pages that you’ve collected throughout this adventure on the board behind you, and it’s time to start getting things figured out. Or, you can let us just handle everything and get the following answer: 3482. Punch this into the keypad and Chapter 2 is in the books.
Terminal Escape Room Chapter 3: All Answers & Full Walkthrough
Welcome to the most difficult Terminal Escape Room chapter of all: Chapter 3. You’ll find all of the answers you’ll need to escape this particular chapter below, so let’s get right into it.
Terminal Escape Room Chapter 3: Elevator
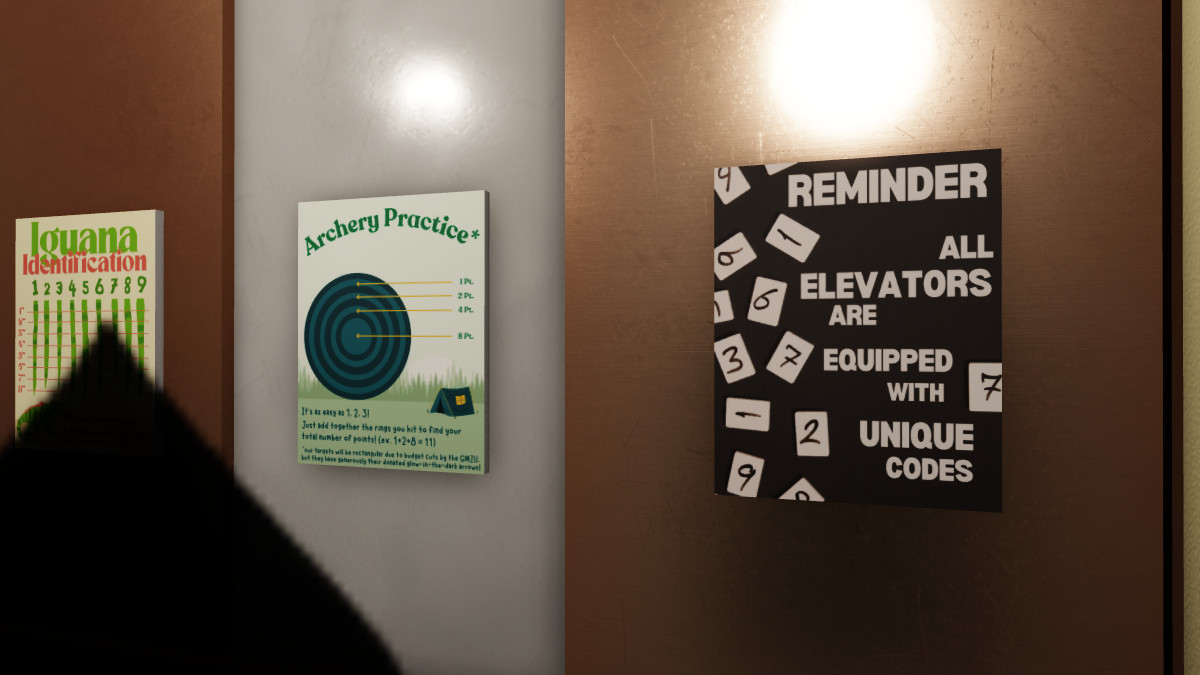
What makes this particular portion of Terminal Escape Room interesting is no two codes are going to be the same. Every elevator code is going to be unique in its own special way, but let’s find out how to get out of here as quickly as possible.
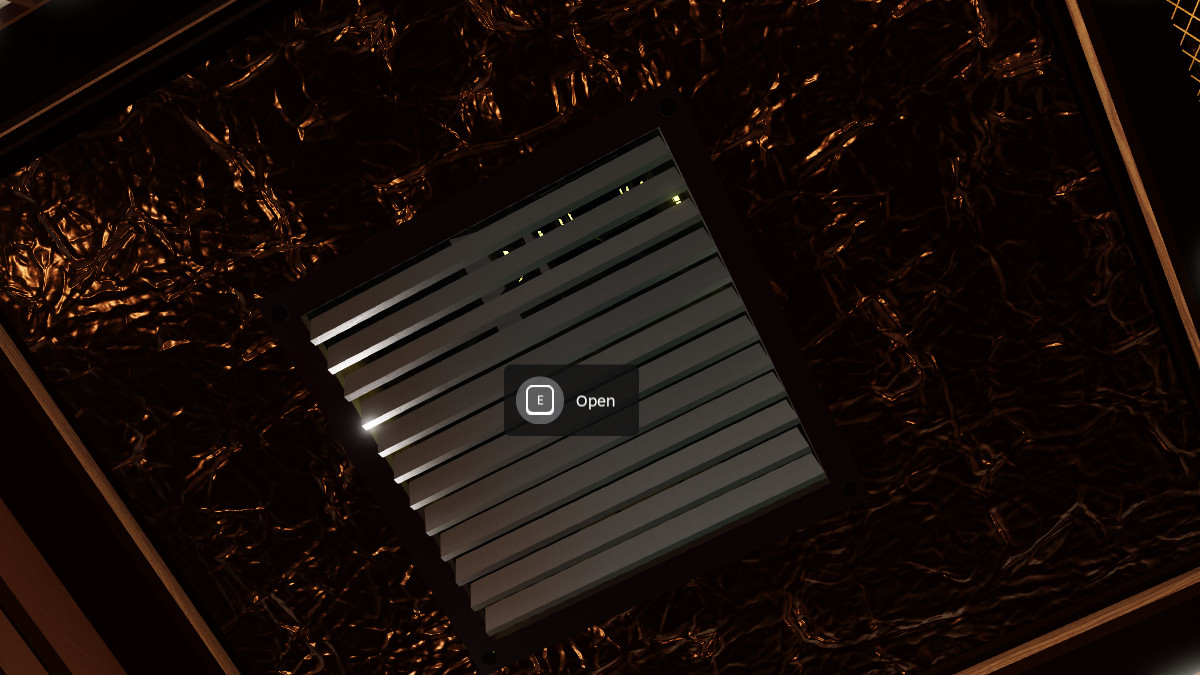
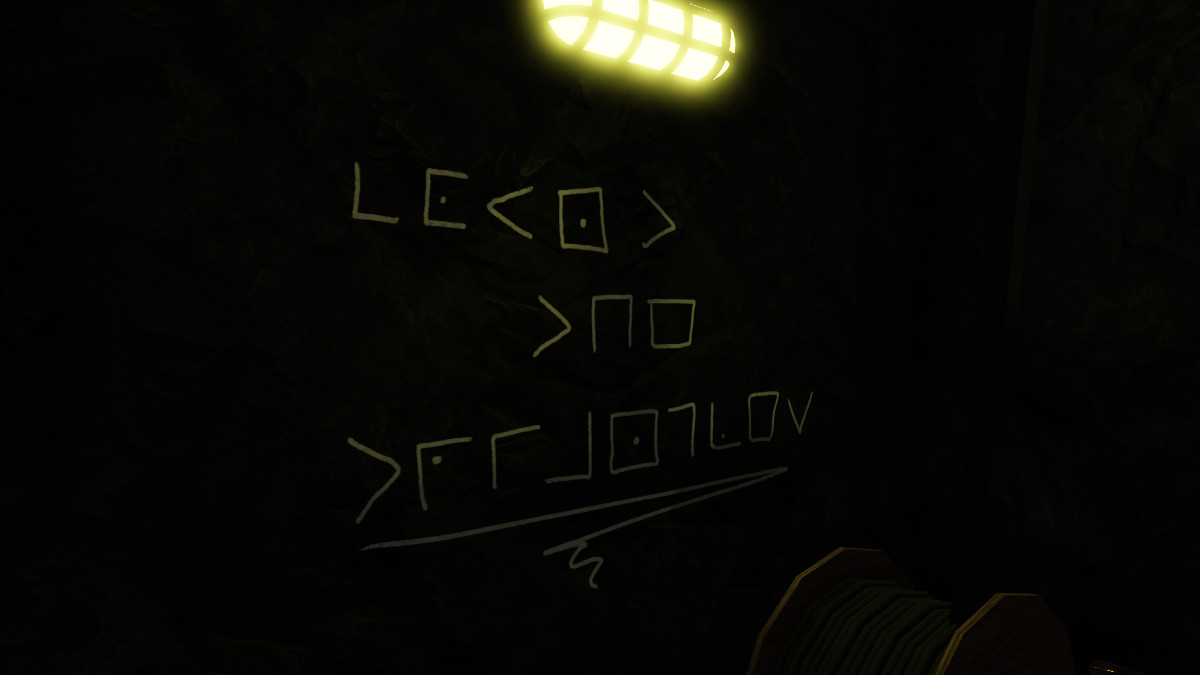
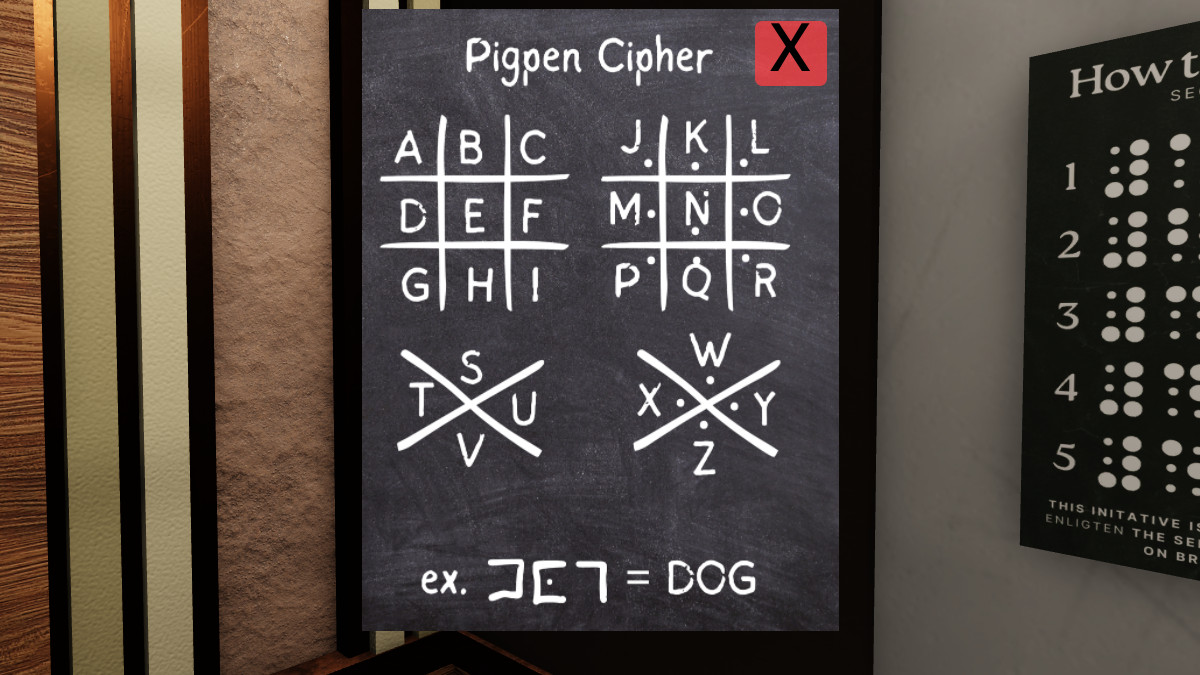
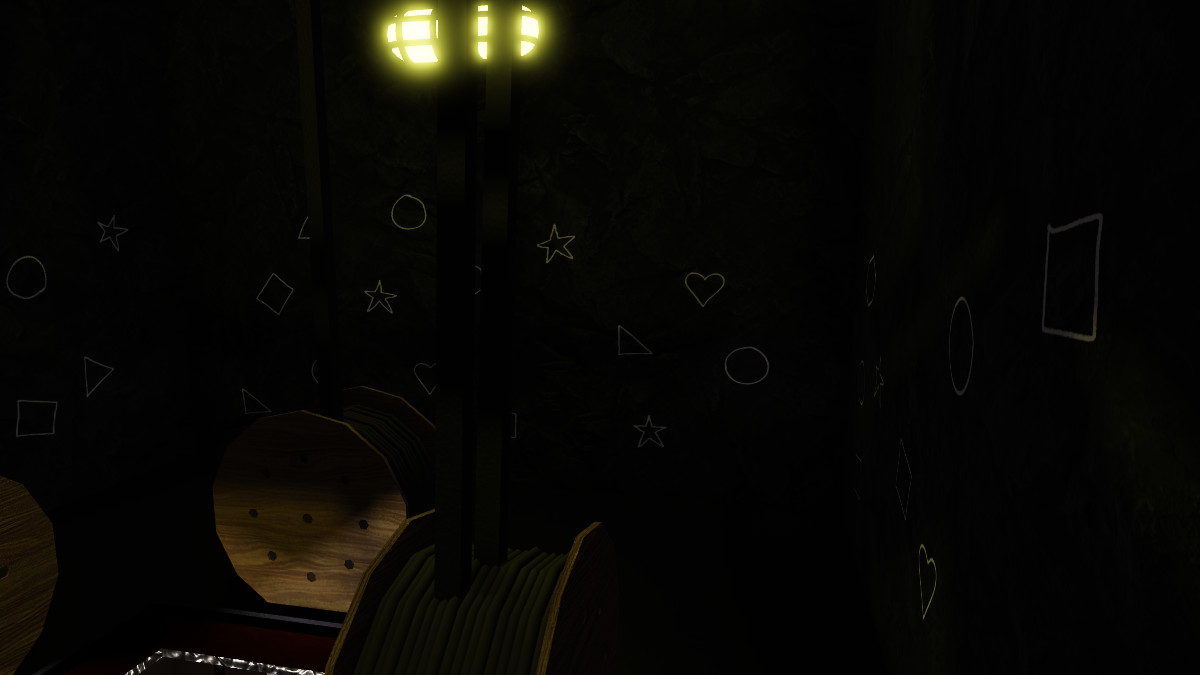
The first thing that you’ll want to do in this situation is look up and access the top of the elevator. Once you open this up, a ladder will drop down and give you access to the top of this area. At the top, you’ll find a Pigpen Cipher that you’ll need to decode, but I’ll just give you the answer: “Count The Triangles.” If you look to the rear of this area, you’ll spot a bunch of shapes and you need count the number of triangles. This is the first digit for this clue.
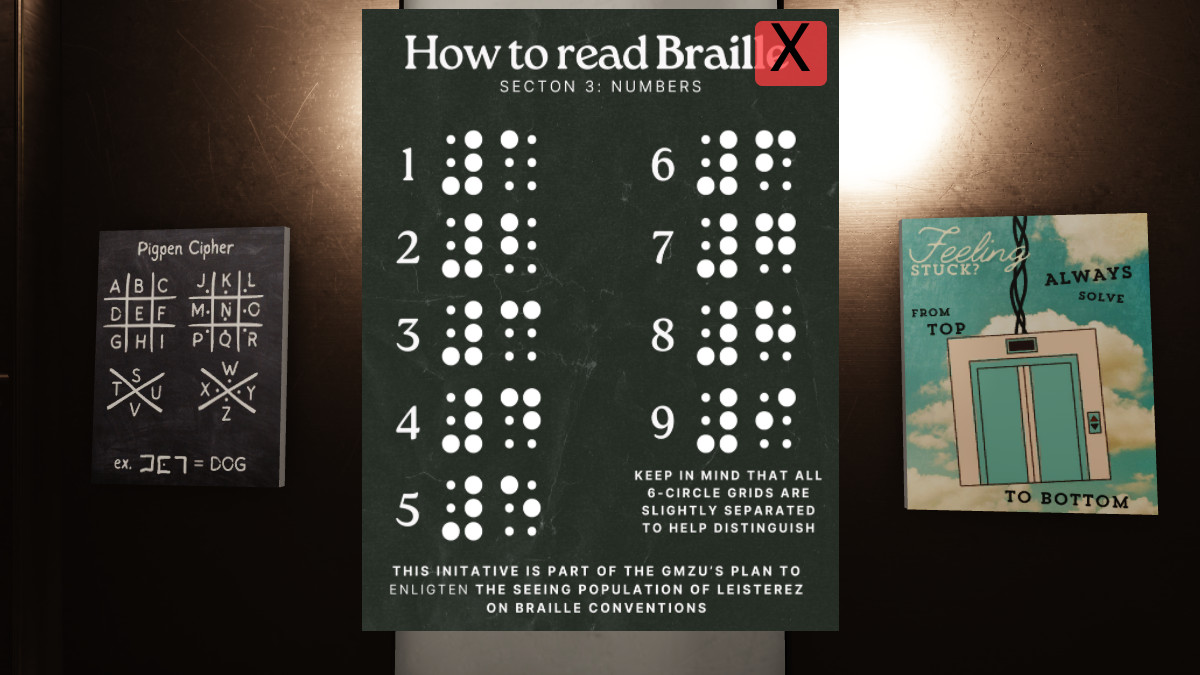
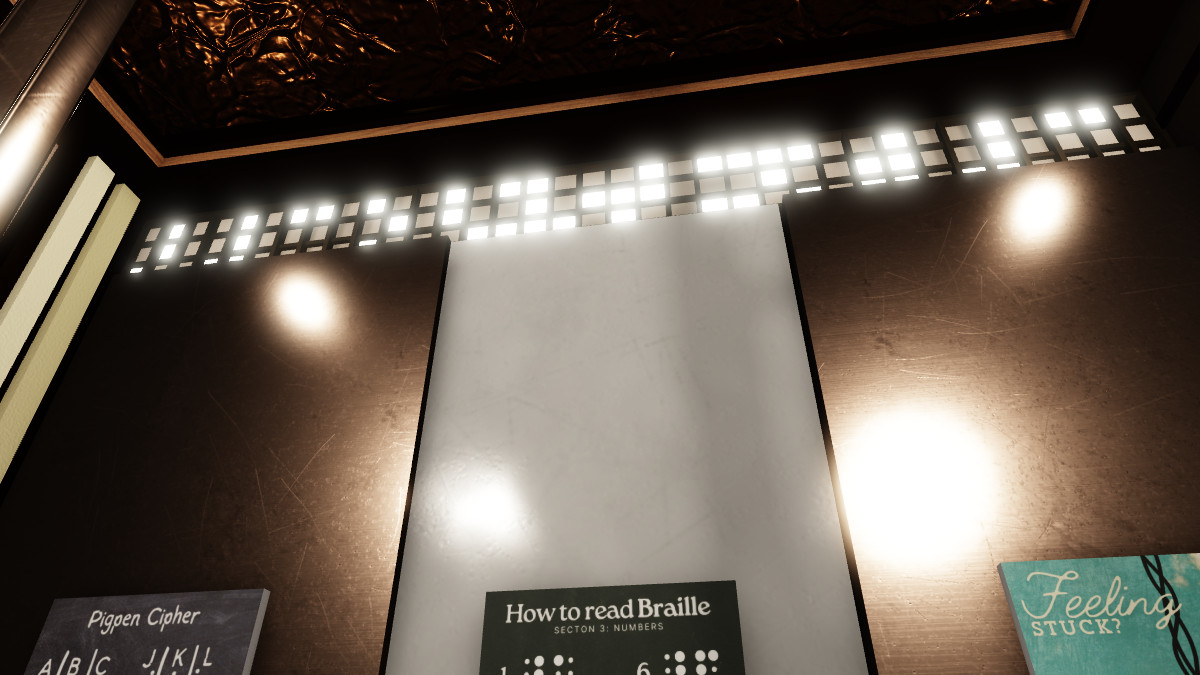
To get digit number two, you’ll need to test out your Braille reading skills. Thankfully, you won’t need to do anything beyond look at the lights at the top of the elevator and examine the patterns. Match one of the lights to the number on the list, and you’ll be ready to clear the second digit.
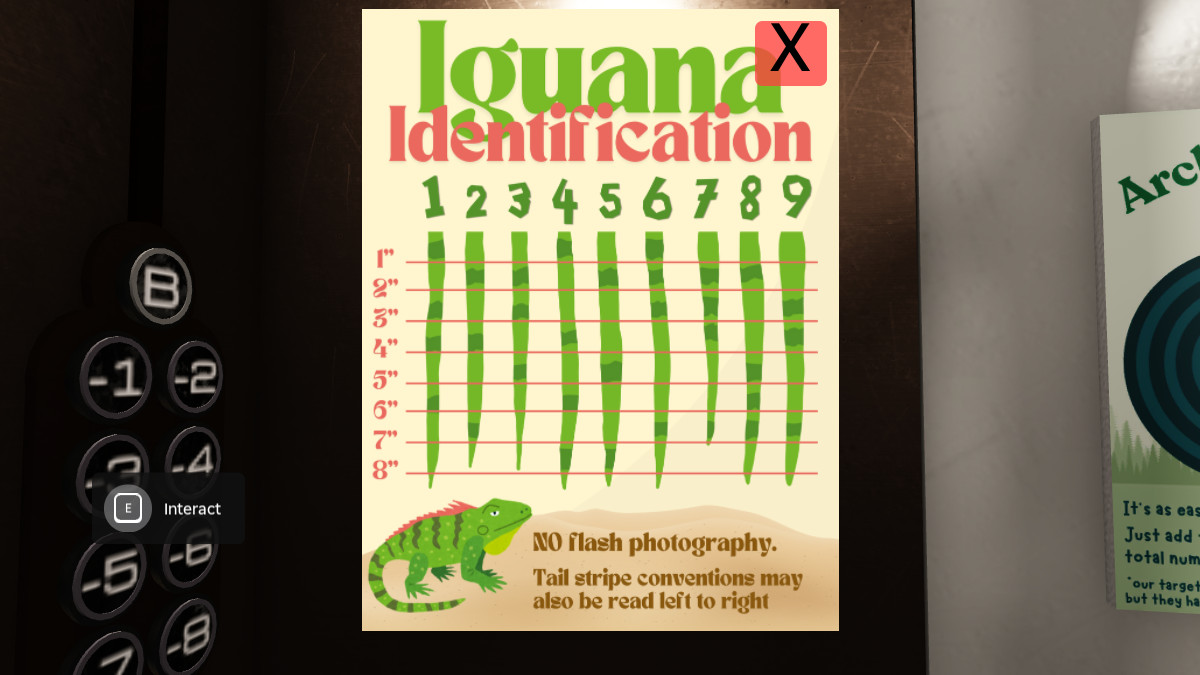
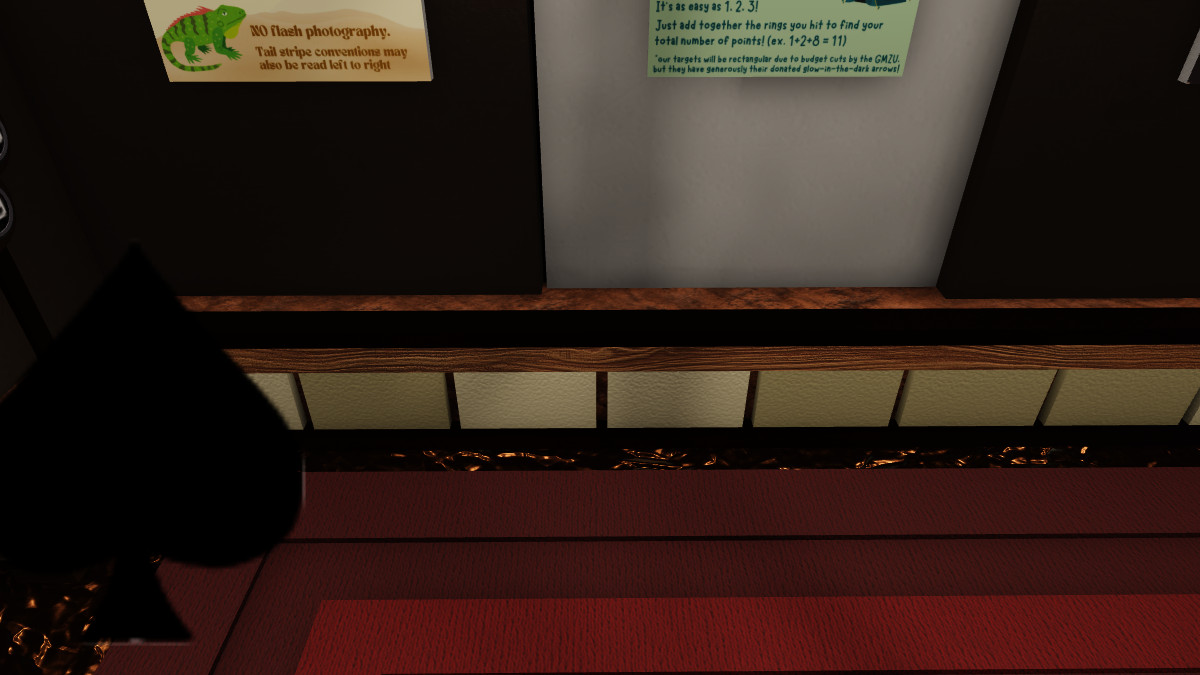
For the third digit, you’ll need to check out the Iguana Identification poster. Why might you need to know how to examine an Iguana, you may be asking? Well, it’s because of the fact that the pattern on the bottom of the elevator cart is in the same pattern as one of the ones shown on the list. Look at the colors, match them up, and you’ve got digit number 3 ready to go.
Related: First 3 Player Tycoon in Roblox Codes
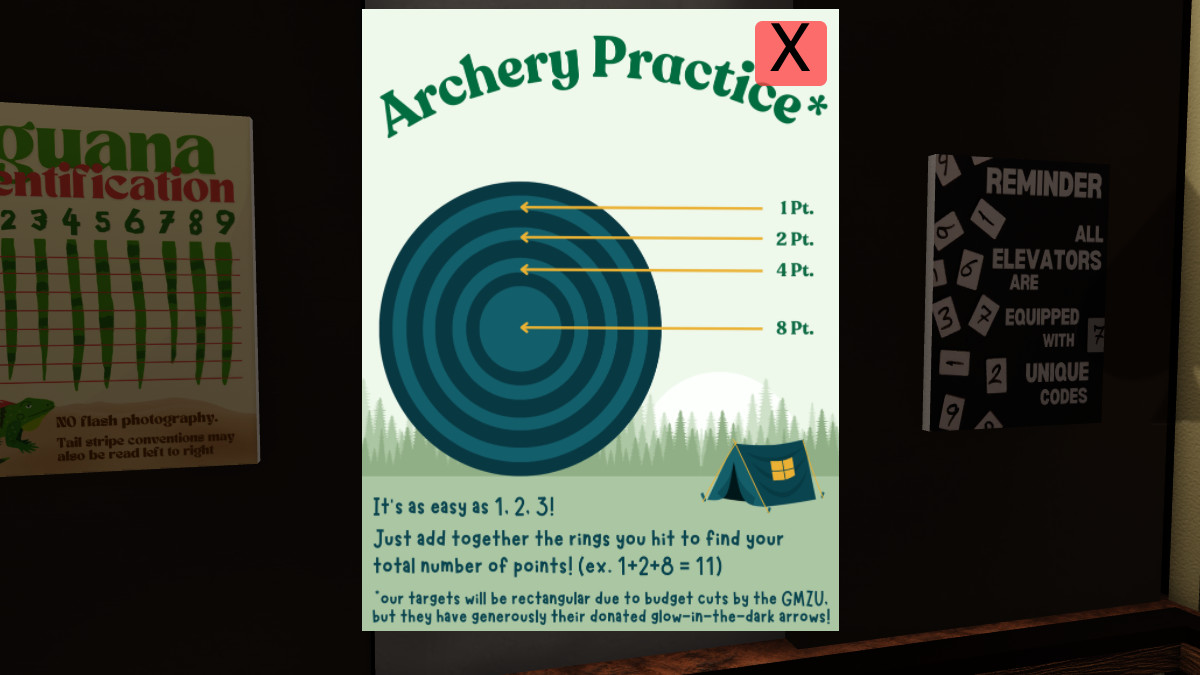
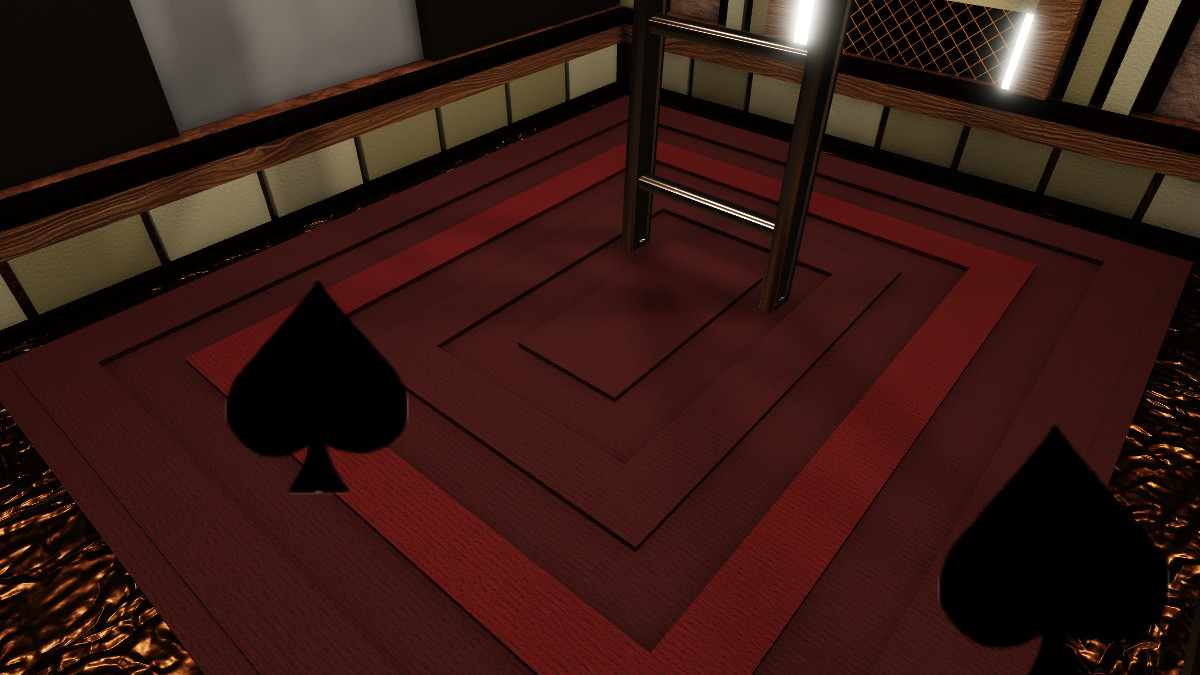
Final number, we’re almost out of this elevator. You’ll want to examine the pattern on the floor that is suspiciously in the same pattern as the archery target. See where the bright red line is, match it with the number on the poster, and you’ve got your final number. Enter them in the order you found them in to escape the elevator.
Terminal Escape Room Chapter 3: Paint & Box Room
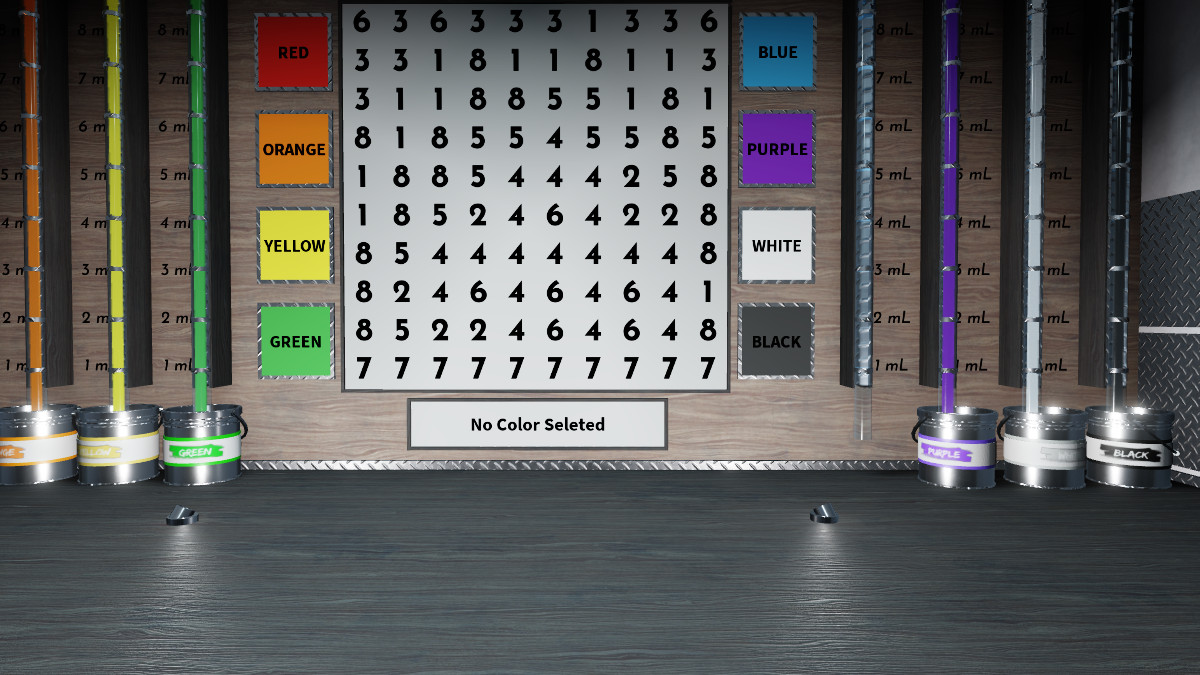
These two steps are going to require you to make a mad dash around the area, collecting as many paint cans and colored boxes as possible. It’s a pain, I know, but you’ll need to get them if you’re hoping to find the codes naturally — or stick around to the end and we’ll just give you the codes you need.
Both of these rooms are going to require you to note the colors that you find for both the paint as well as the boxes. You’ll find specific hints in each of the rooms that will help you track down the numbers, with specific colors correlating to the digits that we need. Thankfully, we’re going to save you some time — just enter these codes to claim your goodies:
- Box Room: 6824 (Blue Paint, Key, Coin, Newspaper)
- Paint Room: 5431 (Key, Coin, Newspaper)
Terminal Escape Room Chapter 3: Newspaper Room
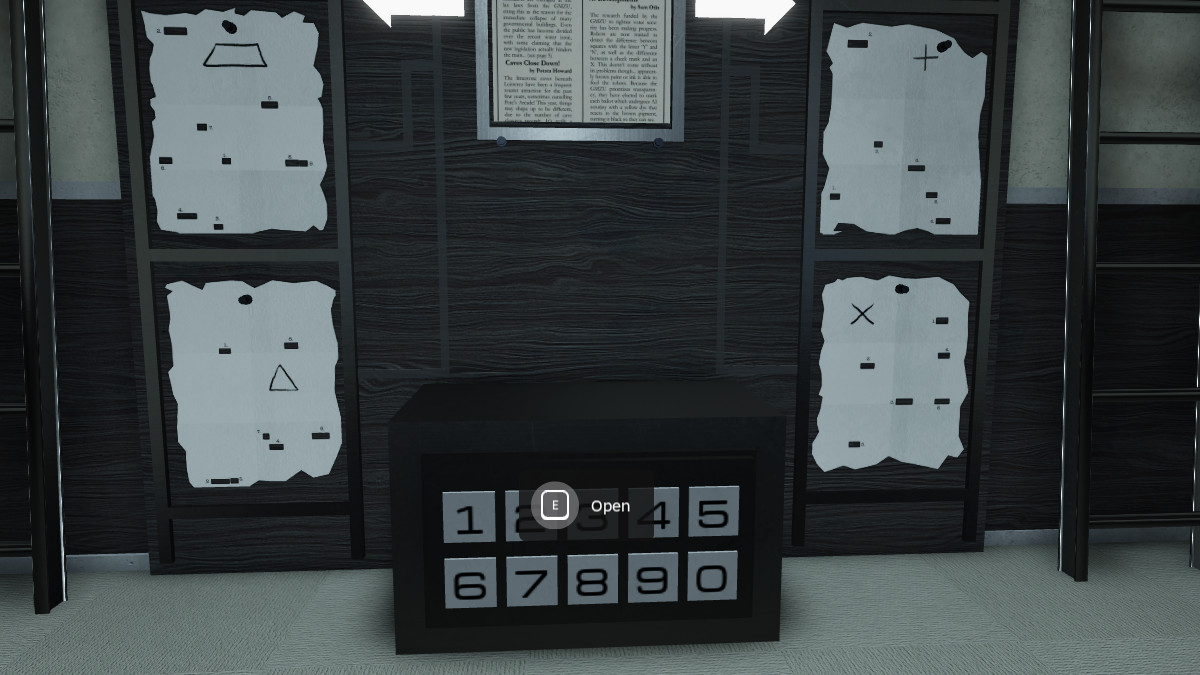
Now that you’ve collected all of the Paint Cans and Blocks, it’s time to find newspapers. You’ll find these scattered around the building, as well as a few extra ones that are hiding inside of the boxes in the Paint and Blocks rooms. You’ll want to unlock those first before coming in here, otherwise you may be missing a few pieces to complete the puzzle.
You’ll want to match up the patterns with the different clues spread around the room if you’re hoping to get through this as quickly as possible — or you can just use the code 7083. This will unlock the safe that is below the newspaper, giving you a Key and a Coin. Now, it’s time to head into the Arcade to finish this off.
Terminal Escape Room Chapter 3: Arcade Room
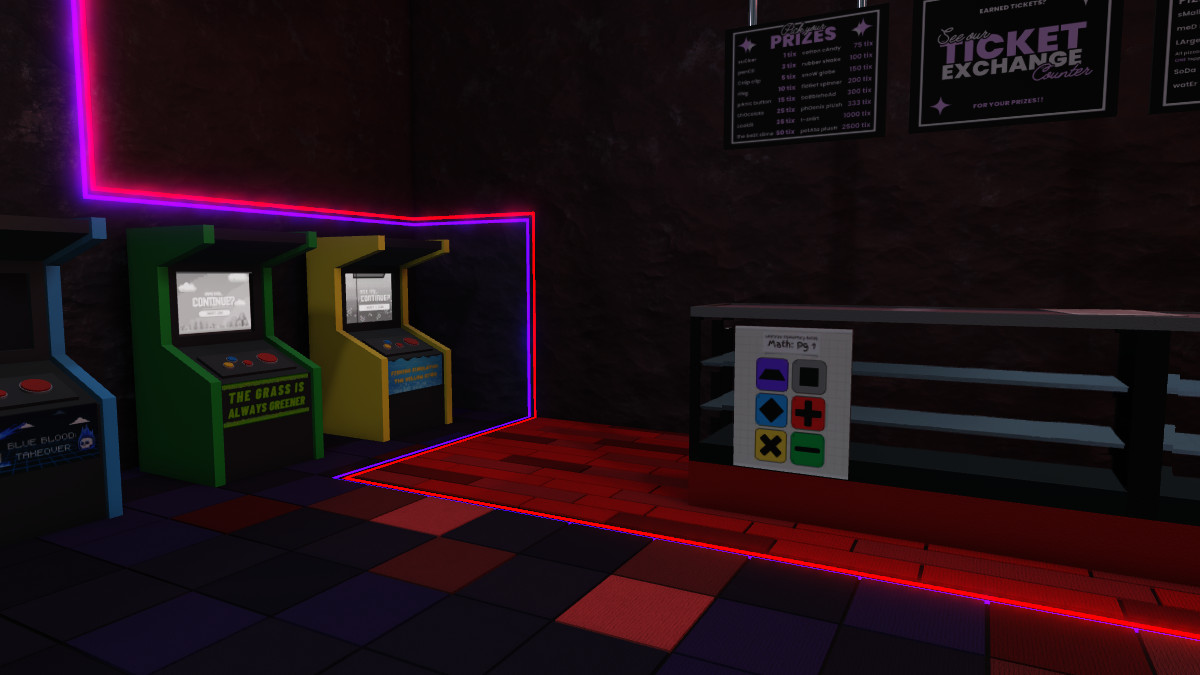
When you enter the Arcade, you’ll need an additional coin if you’re hoping to do this the proper way. You can find the final coin on top of one of the arcade machines, and it’s a great thing that your Robloxian can jump unnaturally high. Grab the coin, put one coin in each of the machines, and get ready to decipher another clue.
You’ll receive a few prizes after receiving your tickets, and there are capital letters in each of the prizes, spelling out the word CHAINS. Enter this on the register at the counter to get the final Key and head toward The Nursery.
Terminal Escape Room Chapter 3: The Nursery
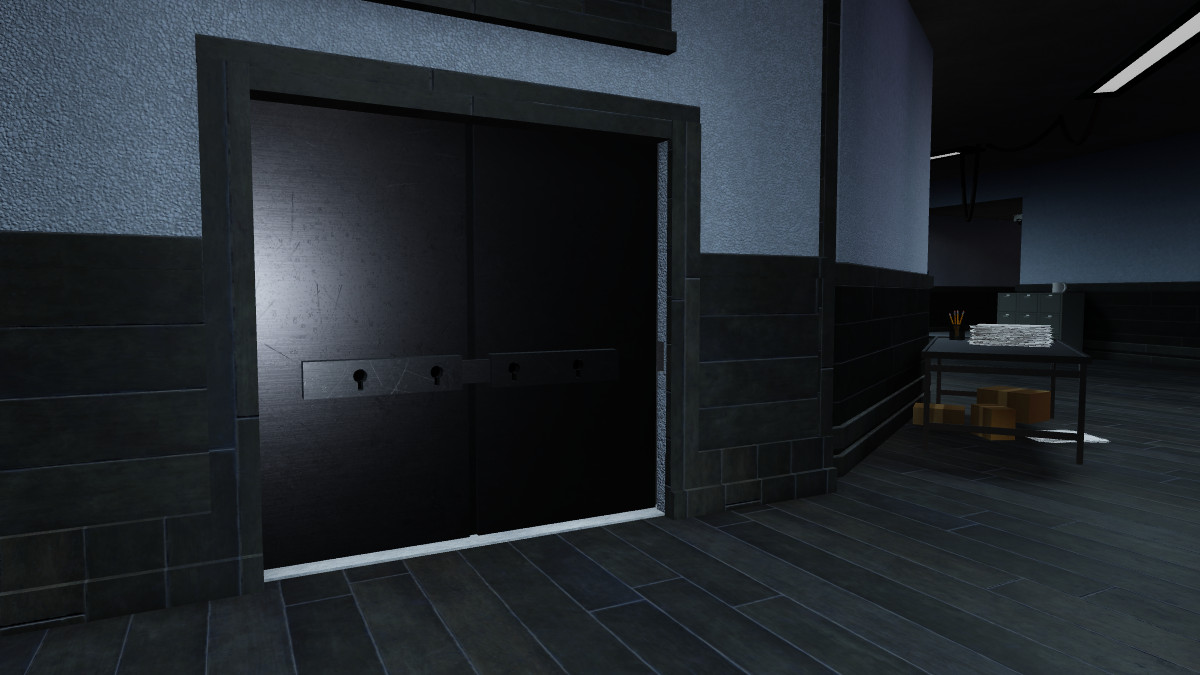
The Nursery is hiding behind a rather uninviting-looking black door, and you’ll need to equip and enter all of the keys that you’ve found from this particular floor. Once you’ve entered and used all of the keys, you’re ready to enter the final room of this challenging chapter.

Not only is this an obstacle course in and upon itself, but you’ll also need to solve a complex set of puzzles if you’re hoping to finally escape these horrors. Now, you can either follow these potentially headache-inducing clues, or you can just skip ahead for all of the answers.
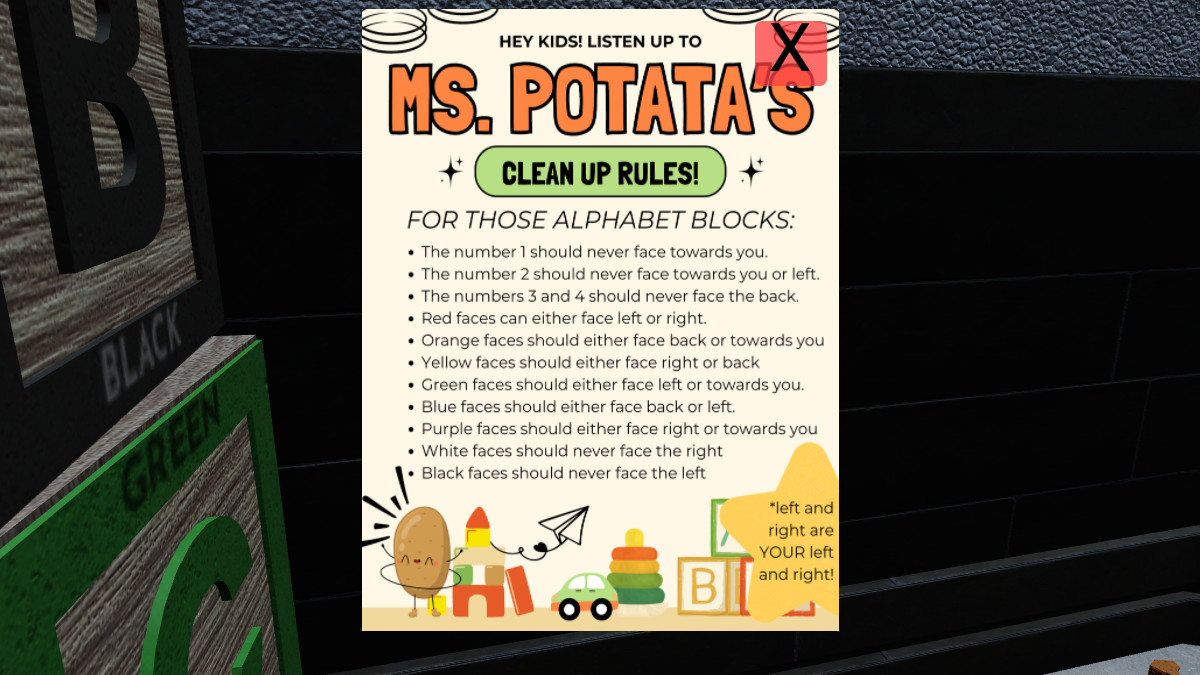

If you’re here, you likely just want the answers for these blocks, and we’ve got that right here for you:
- CLOUD
- OCEAN
- SPAC3
- PL4NT
Related: Roblox Doors Codes
Head around the room, and you’ll spot some posters that have numbers on them, and these numbers will give you the final code that you need to escape — 0743.
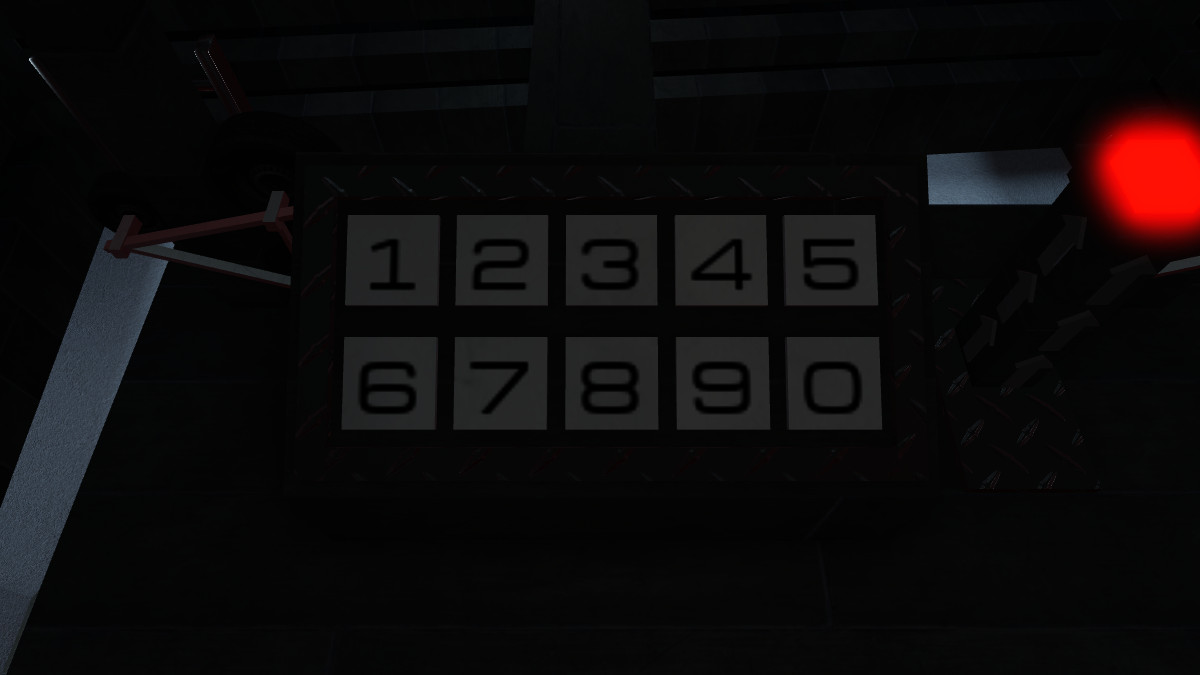
Head up the giant red tower of pillows in the center of the room and input the code that you received. Once the code has been input, you’ll want to hit the green light and you’ll finally be able to escape the final chapter.

And that brings us to the end of Chapter 3 of Terminal Escape Room. With the latest chapter release, we’ve got the full rundown of Chapter 4 below.
Terminal Escape Room Chapter 4 – All Answers Listed
Alright, it’s time to dive right back in for the latest chapter of Terminal Escape Room on Roblox. Once you’ve entered Chapter 4, you’ll find yourself in a lab, filled with a variety of different items. You’ll also notice a large note on the door, stating that the answers in this room are randomized, so you’ll want to follow along with our instructions to figure this one out.
Chapter 4 Part 1 – The Lab
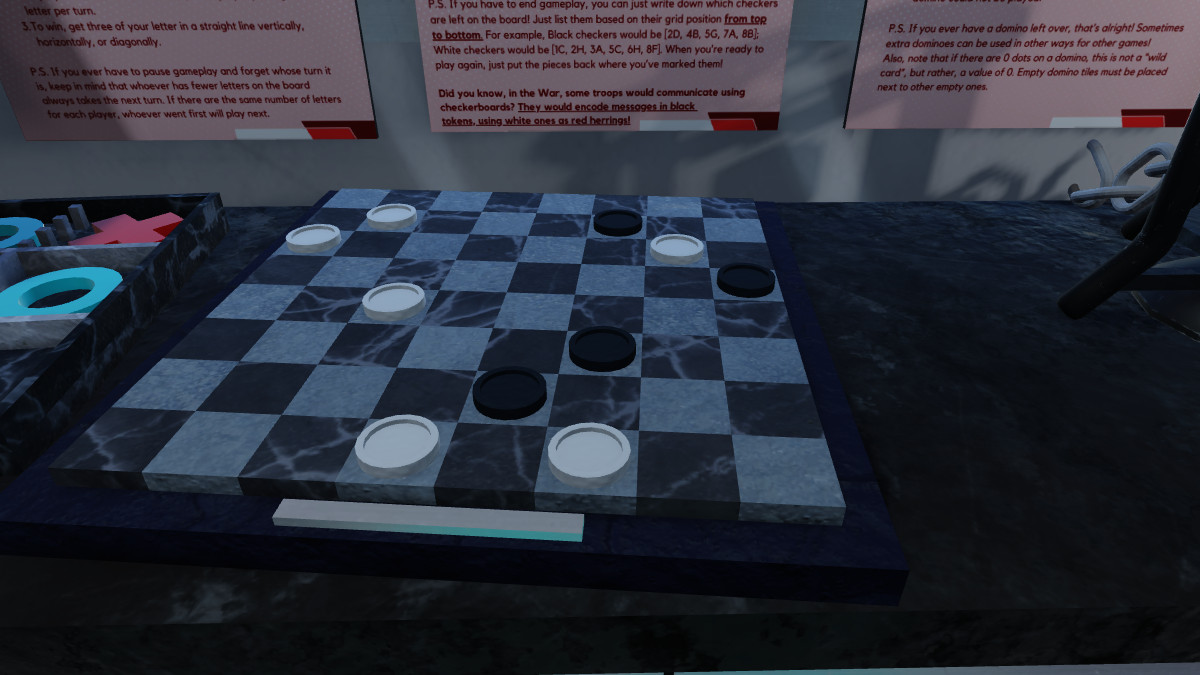
Head over to the Checkers board that is on the table, and take note of where the black Checkers are on the board. Go from the top to the bottom, and note exactly where your pieces are. Across the top, you’ll have letters A through H, and going down will be the numbers. In our example, we had pieces in the following spots:
- F2
- H4
- F6
- E7

From here, head over to the Regeant Shelf and find the special chemicals that match up with the particular spots you had on the checkerboard. On our Reagent Shelf, we had the following Chemicals in the corresponding locations:
- F2: Uranium
- H4: Praseodymium
- F6: Oxygen
- E7: Argon

Head over to the Periodic Table of Elements that is on the wall and start tracking down the specific elements that you had above to find their scientific abbreviation. Or, you can cheat and use Google; I’m not going to judge for that. So, for our example, we had the following abbreviations:
- F2: U
- H4: Pr
- F6: O2
- E7: AR
So, getting rid of the 2 in O2, my clue spells out UPROAR.

Head to the keyboard on the wall and input your password to open a small drawer, which contains a few extra items. It’s time to move on to the next part of this adventure. You should receive 3 random dominos, alongside a cup, which leads us to our next clue – the Tic Tac Toe boards around the room.
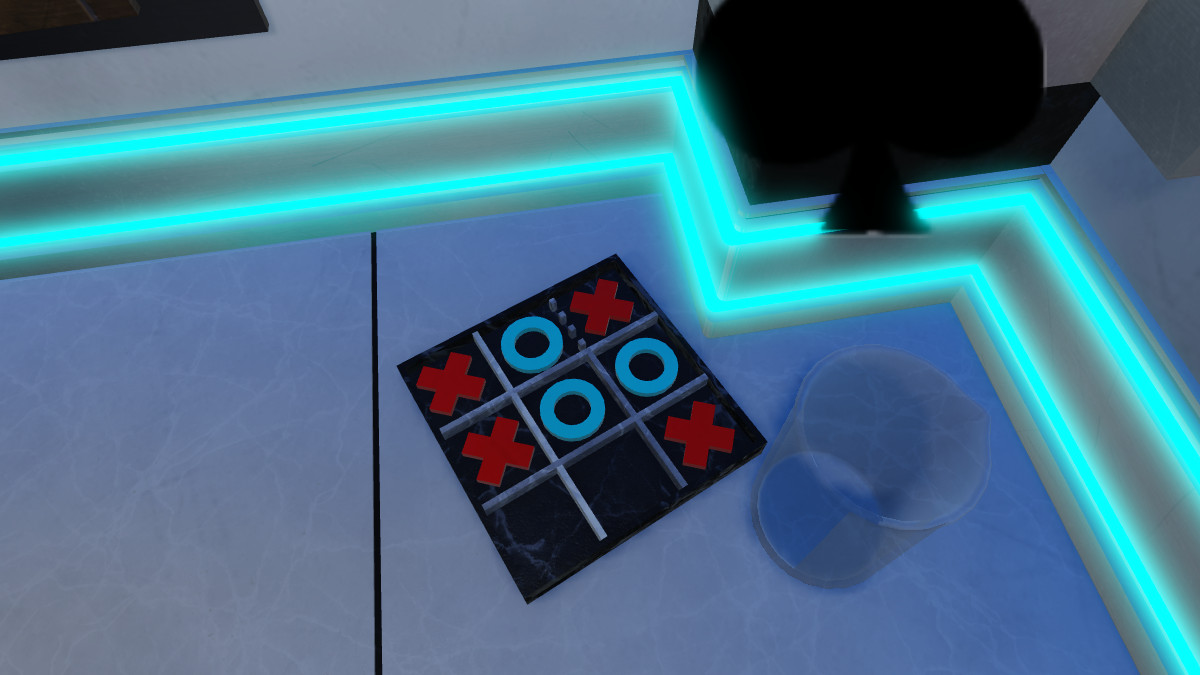
Following the instructions set out by the Beaker Clean Up poster, you’ll want to go around the room and solve the winning Tic Tac Toe spot, remembering where each of them where. You’ll find the boards in the following spots:
- Cylindrical Beakers – Under the Periodic Table of Elements
- Triangular Flasks – By the Doll House on one of the tables
- Circular Round Bottom Flasks – Right below the Beaker Clean Up Poster
- Test Tubes – Table near the Dominos
Keep the winning formula in mind as you go around, and write down the specific location of the winning spot so you can use it on the pin pad. Pay attention to where the slotted lines are on the pin pad, and find the winning spot from that location. In our example, it was the following:
- Bottom Middle
- Top Middle
- Middle Left
- Top Left

Inputting this code will give you 4 more dominos, and another cup/bottle. It’s time to go to the next part of the puzzle, which revolves around the amount of Total Mass. This one is a doozy, so let’s prepare together, shall we?

You’ll need to head over to the scale and start measuring the weight of all of the minerals and materials on the shelf above the scale. You’ll need to make a concoction of sorts to get past this next part, so pay attention here. In our example, our code is going to consist of the following:
- 1 Scoop Water
- 1 Scoop Gasoline
- 1 Scoop Acid
- 1 Dash Salt
- 1 Dash Limestone
- 1 Dash Sulfur
- 1 Nail
- 1 Glass Shard
This will make the “Combustible Corrosive Cocktail”, which also just so happens to be the combination to the next area. The Total Mass calculated is going to be our next step here, so it’s time to head back to the table. As we can see, 1 Scoop is equal to 4 Dashes, and in our example, a Scoop of Limestone is 92g. If we divide that by 4, we’ll get 23g for the weight of a Dash.
Continue doing this math until you have a grand total, which can be input on the keypad to get to the next part of the Escape Room. In our example, we had the following answers:
- 1 Scoop Water – 40g
- 1 Scoop Gasoline – 28.4g
- 1 Scoop Acid – 48g
- 1 Dash Salt – 21.6g
- 1 Dash Limestone -23g
- 1 Dash Sulfur – 19g
- 1 Nail – 7.5
- 1 Glass Shard – 8.5
For us, our Total Mass was 196, which we entered on the keypad to get the final items and move on.

You’ll receive more items after completing this portion of the Escape room, including a few more Dominos, but you may notice that you’re still missing some. Grab the fourth bottle of water near the Posters on the wall, and get ready to go fishing for some dominos.

Thankfully, this part is easy – head around the room find the bottle with dominos on the bottom, and pour the bottles of water that you received into them to get the dominos out of there. Now, it’s time to play this particular game.

Here, you’ll just need to match all of the Dominos that you have with one end matching with another one on the board. It sounds more complicated than it is, but for example, match a purple five with another purple five and fill up the train. You’re almost out of the room, finally.
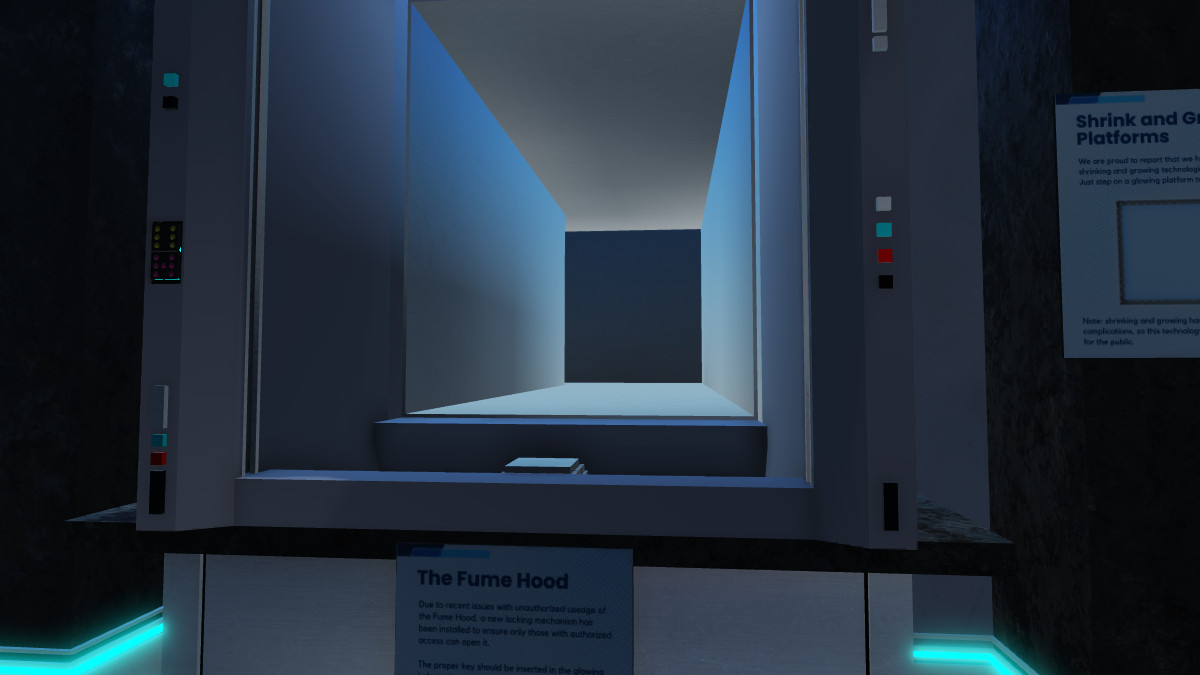
Once you’ve gone ahead and matched up all of the Dominos, you’ll have one left over. Stick it inside the Fume Hood and press the glowing white button inside to access the first of the additional rooms that you’ll need to navigate through by stepping onto the glowing platforms on the floor.
Chapter 4: Part 2 – Shrink Room/Dollhouse
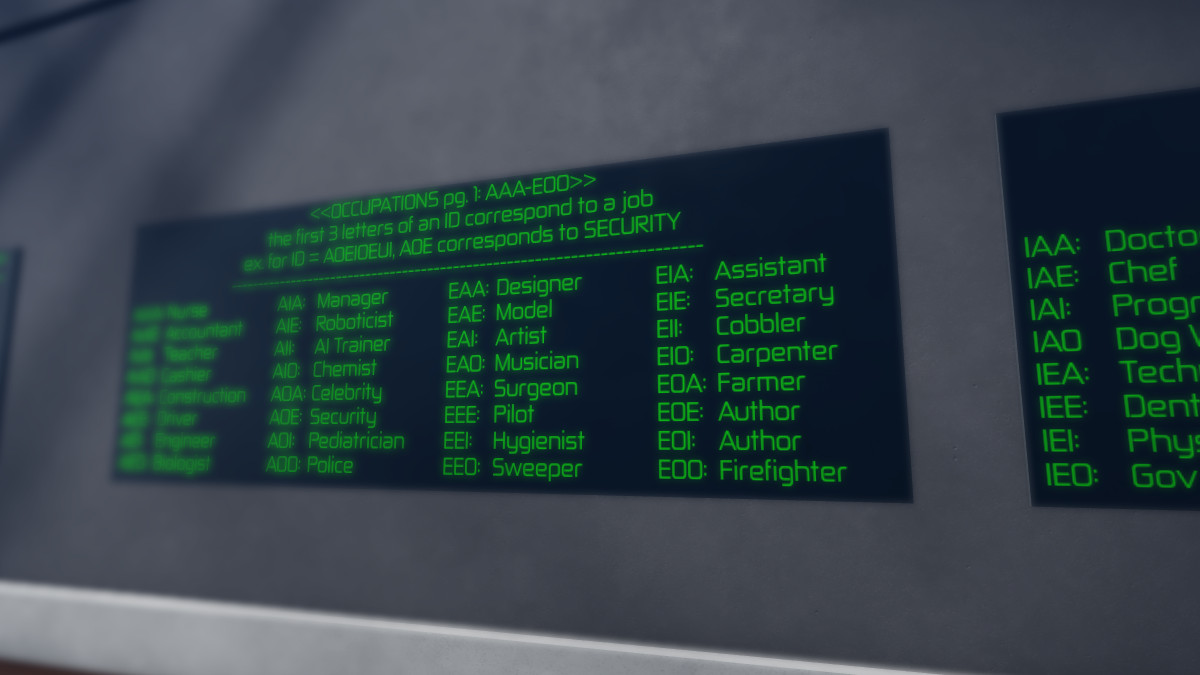
The first portal will cause us to shrink down to a tiny size; perfectly small enough to fit inside of the Dollhouse that was on top of the table next to the portal. Head inside and head up the stairs, where you’ll be greeted by a wall of screens filled with green text.
There are a variety of questions that you’ll need to explore the house to answer, and in our example, we had the following questions:
- What’s the license # of the citizen who shares the Engineer’s birthday?
- What’s the ID of the Citizen living in the same city as the Carpenter?
- What’s the hometown of the citizen whose license has 4 unique pairs of repeating letters?
- What’s the last name of the citizen whose ID is not on the approved list?
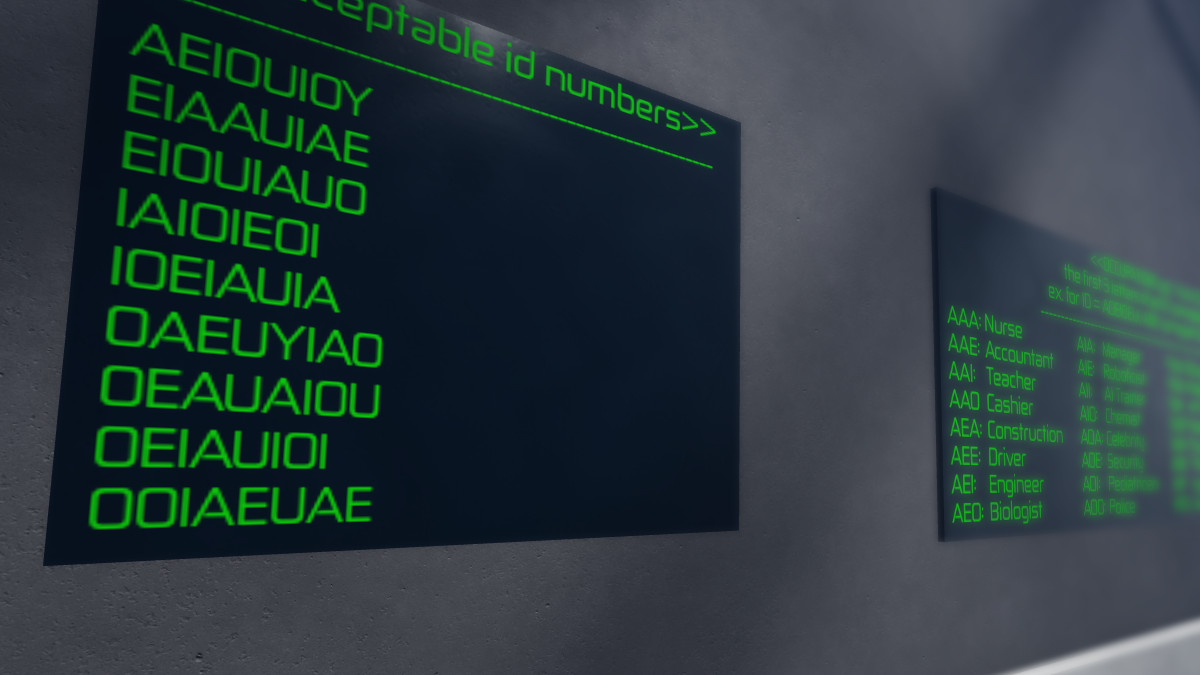
You’ll need to use all of the information on the screens before you to try and answer these questions. Since you’re on a time limit, I would strongly suggest writing down all of the critical information, such as the Acceptable ID numbers, and start putting your best foot forward trying to solve this puzzle. In our example, the answer was 5409.
Related: Dress To Impress (DTI) Codes (July 2024)
With this first puzzle complete, you’ll want to head back to the pad that you started on an interact with it to grow back to normal size. Head to the next glowing portal to start the next part of this chapter.
Chapter 4 Part 3 – Simon Says
Once you return to the room, head to the next portal and head inside the Domino building to find a Simon Says machine waiting for you. This one is going to be the easiest part of the journey so far – just match what it shows, and you should be more than good to advance to the next part of the Escape Room.
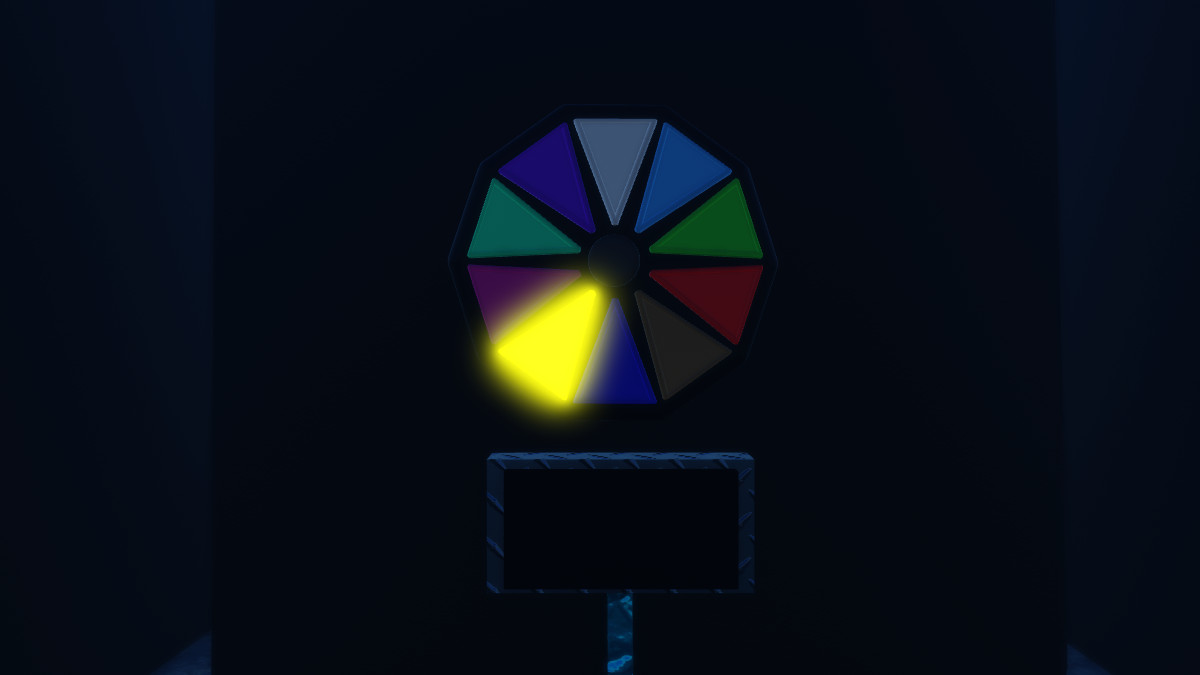
All in all, there were a total of 8 rounds, and our example had the following:
- Green
- Yellow
- Yellow
- Teal
- Green
- Brown
- Purple
- Red
Once you have completed this, head back to the portal that you came in on and prepare for the third section of the level.
Chapter 4 Part 4 – Card Puzzle

Step onto the third portal to shrink down in size once again, and get ready to either take plenty of screenshots, or write down exactly what you need. You’ll need to score each player’s hand, and there are a few sets of instructions scattered around the area to show you how to properly score each hand.
There are three players around the table, and our example had the following hands:
- Player 1
- 9 of Puzzles
- President of Circuits
- 8 of Puzzles
- Player 2
- Child of Flames
- 3 of Flames
- 6 of Circuits
- Player 3
- 2 of Puzzles
- 2 of Circuits
- 9 of Flames
- Center Cards
- President of Circuits
- 2 of Flames
- 6 of Circuits
- 7 of Puzzles
- 1 of Flames
- 9 of Flames
I strongly recommend ignoring the rest of the instructions and only viewing Pages 6 and 7 of the scoring booklet that you can find, as it’s going to have the most valuable information for this challenge. Just be ready to add everything together and get a final score.
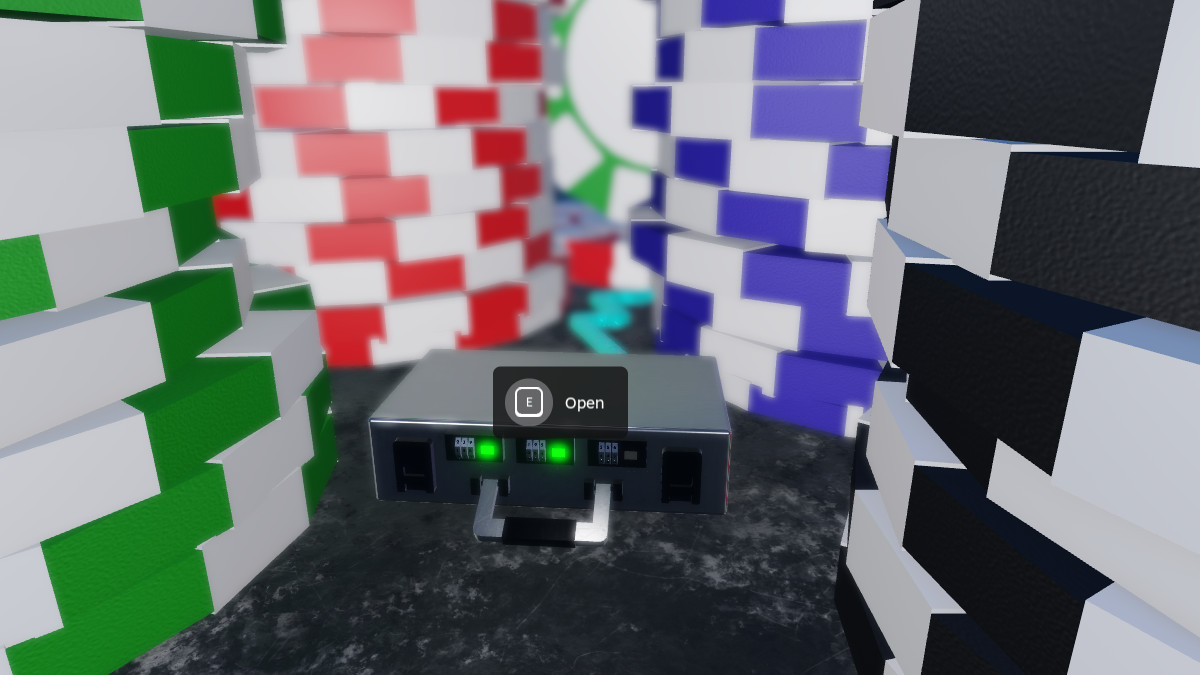
Now, you’ll need to put this all together and input the final scores into the safe in the middle of the pile of chips. So, scoring all of this together for our example, Player 1 would have a total of 128 points, Player 2 would have 088 Points, and Player 3 would have 086 Points.
Input your specific answer and open the chest, making sure that you push the button inside. Head back to the portal that you came in on, and get ready for the final room of this challenging chapter of Terminal Escape Room.
Chapter 4 Part 5 – Time To Be A Contractor

We are in the home stretch, finally. Head down the road until you come across a set of blueprints for buildings, and get prepared to study them to find which options are the cheapest available. In total, we’ll need 9 letters to get past this final section, so grab a pencil and paper, or open up the notes app on your phone.
You’ll be instructed to buy the three cheapest houses, in order of their price. Examine all of the Blueprints and get ready for another tedious puzzle. There are plenty of Blueprints, so you’ll need to write down the following information:
- Building Number Name
- Est Cost
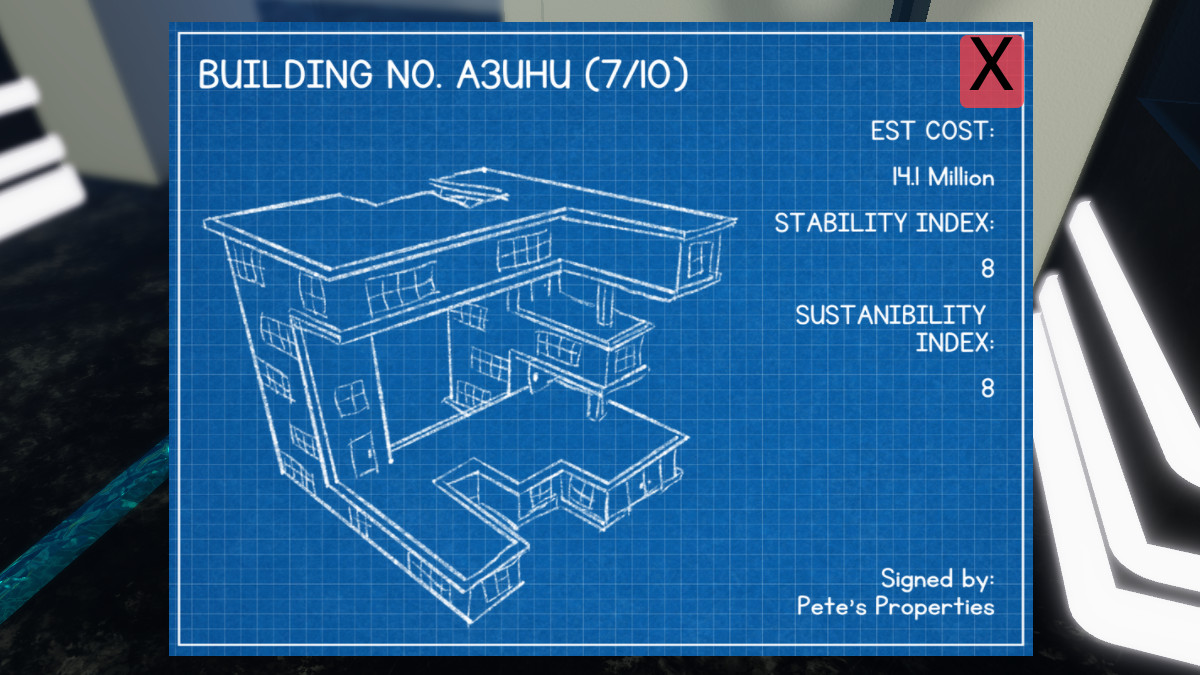
There should be three that almost immediately stand out, and in our example they were the following:
- Building No. OHY5Y – Est Cost: 1.5 Million
- Building No. YTFTY3 – Est Cost: 2.3 Million
- Building No. WRRIA – Est Cost: 3.1 Million
Remember where you encountered these particular buildings, because then it will be time to try and find some letters by using the Red, Green, and Blue buttons in the middle of the room. Sounds confusing, doesn’t it? When you press the button, you’ll find a letter displayed near them, and you’ll want to capture the letters in the following order:
- Red Letter
- Green Letter
- Blue Letter
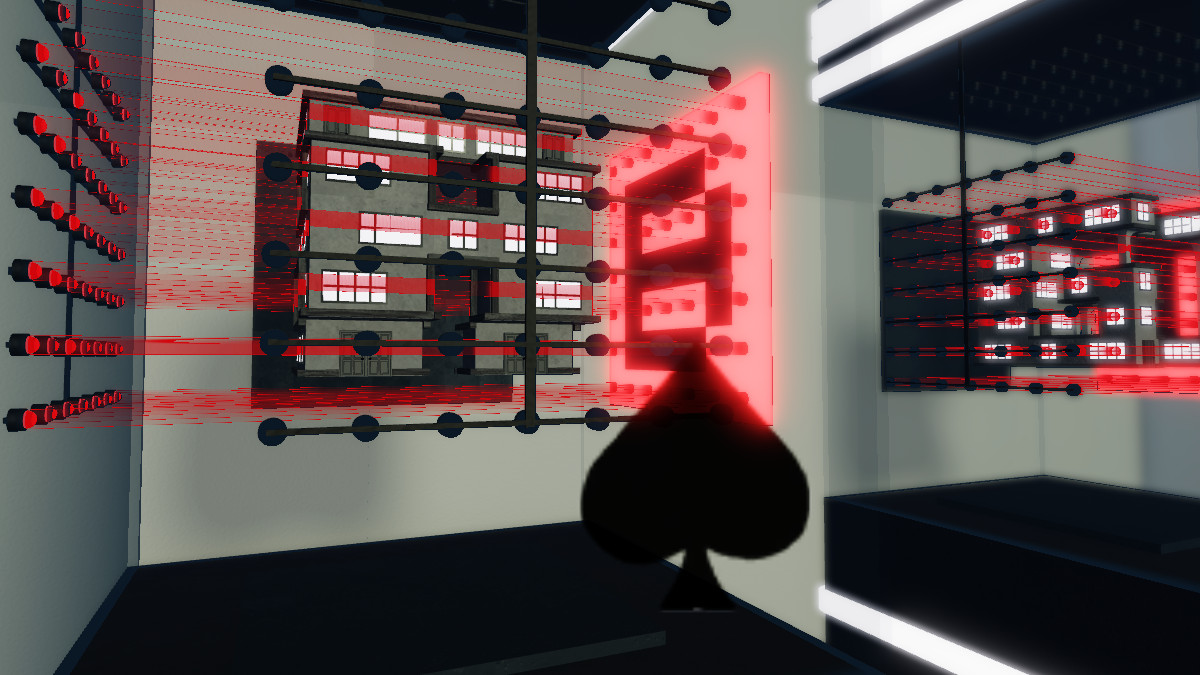
So, for our example, I got the following letters for those particular houses:
- Building OHY5Y
- BLA
- Building YTFTY3
- OUR
- Building WRRIA:
- GIN
Now, we have to use something like a word finder to make words with the letters we’ve received. I would recommend using Jumble Solver for this particular part of the mission. In this instance, the word it came up with was LABOURING, so input that in the terminal in the back of the room to continue to the final portion of Chapter 4. A cutscene will show the Chemical Closet opening up, and this is our final destination.
Chapter 4 Part 6 – Chemical Closet
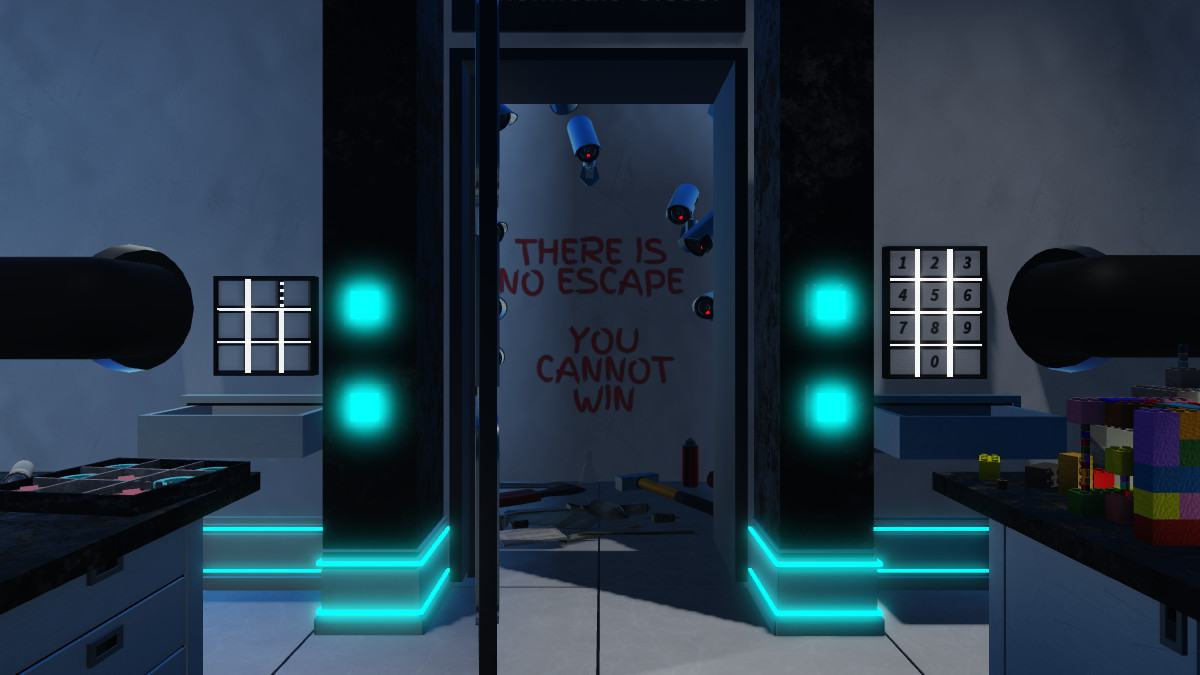
Security cameras are everywhere in this particular room, so we need to get busy and fast. We need to enter the Chemical Closet and grab the following items:
- Chain cutters
- Sledgehammer
- Wrench
We’ll need these in just a little bit, as we need to find a way to deactivate the sprinklers that are in the room. But first, we get to be a little destructive, so bring out the Sledgehammer and head over to the wall.
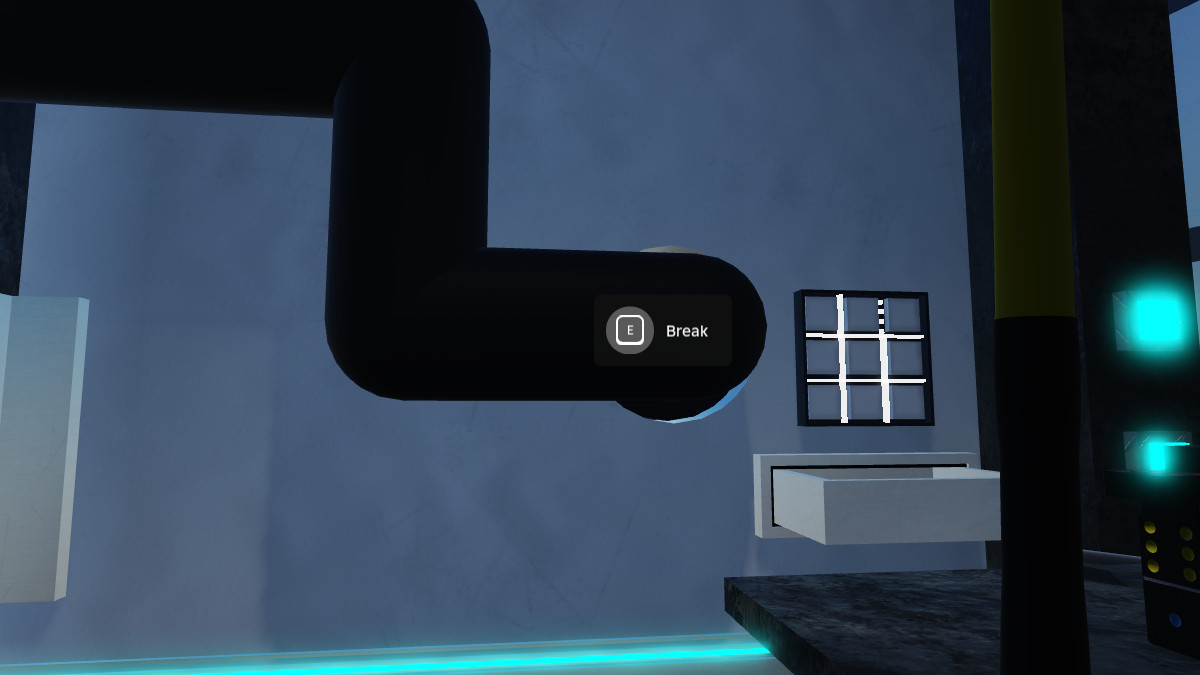
Use the Sledgehammer on every single pipe in the room to remove them all, and put way the hammer. It’s a shame that there is no destruction physics or animation, just kind of a boring pull away from the wall, but we can’t complain too much. We’re almost out of here, so take them down in any order that you’d like. There are 12 pieces of pipe in total.
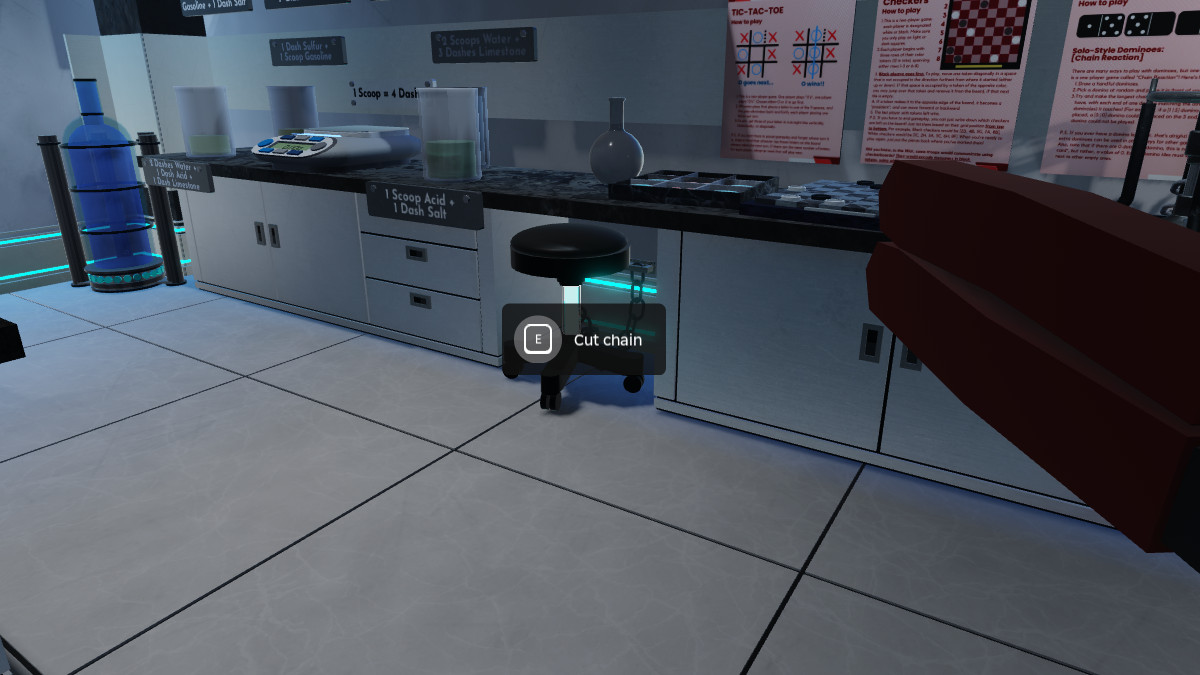
Once you’ve removed all of the pipes from the wall, grab the Chaincutters and head back toward the wall with all of the posters on it. You’ll see a small, rolling chair that happens to have a chain on it. Cut this off, and obtain the Stool as an item in your inventory.
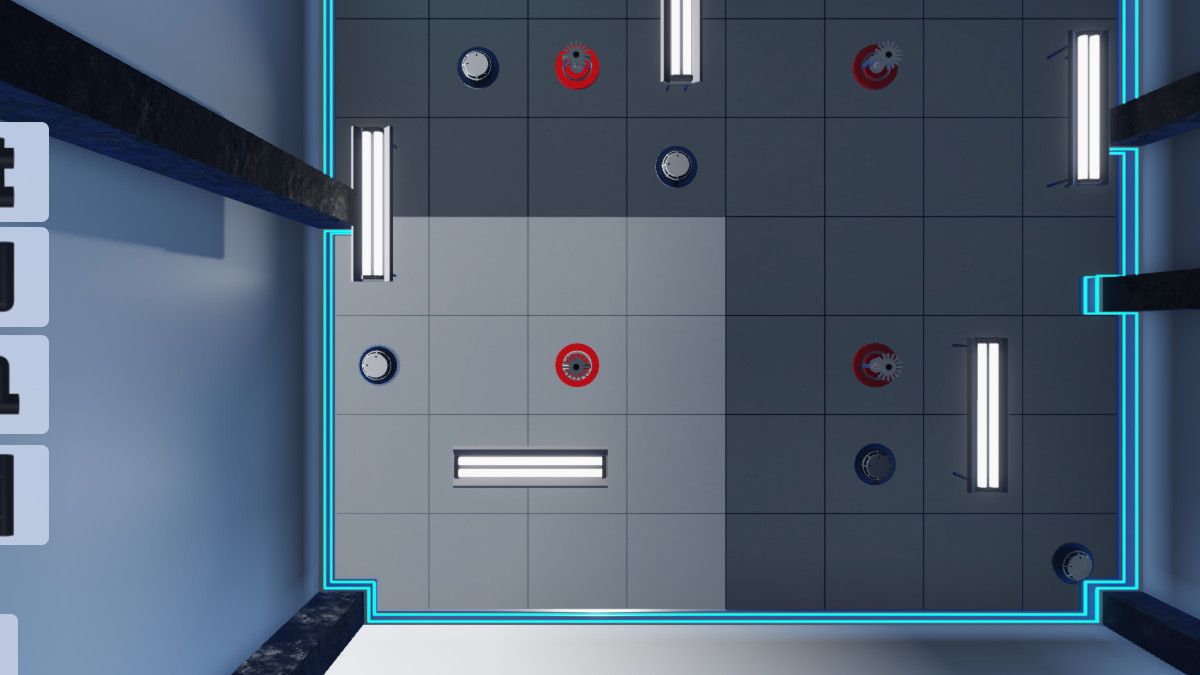
Take out the stool and place it on top of one of the tables to get access to the ceiling, where you’ll have another puzzle waiting for you. You need to connect all of the pipes together to create a single flowing area, so hop between the tables and start putting everything together to make one interconnected pipe.
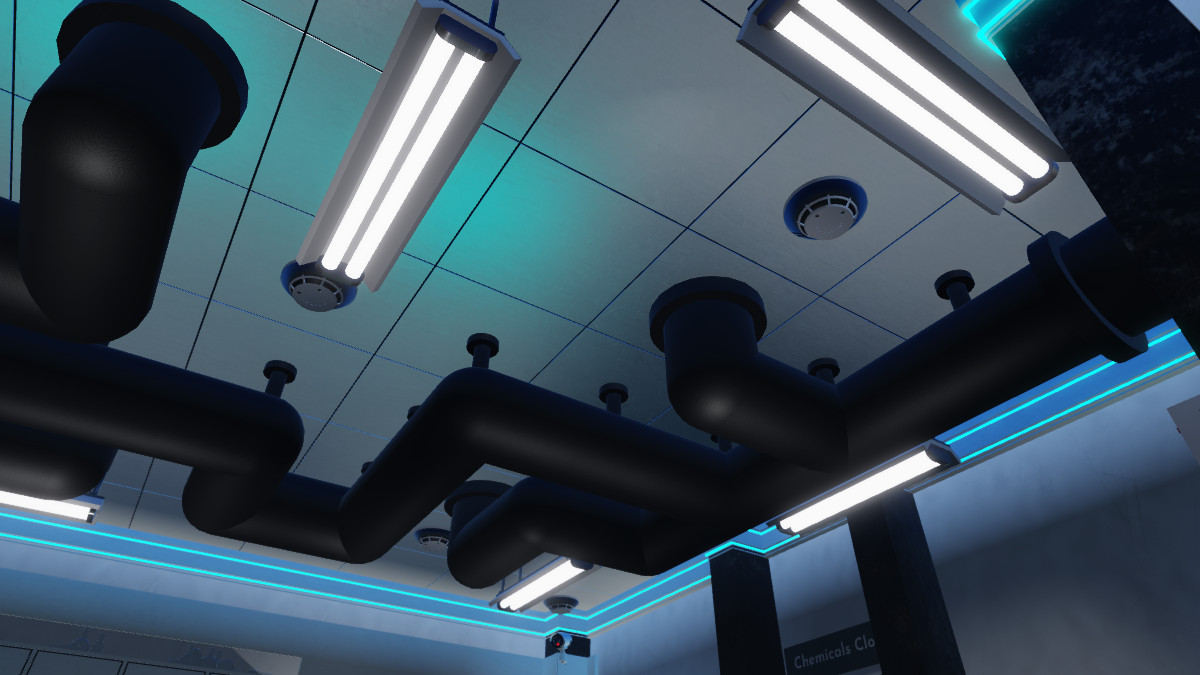
What makes this part frustrating is your progress isn’t shown as you lay down pipes; it only shows when it’s completed. But, as long as you’ve got some time left on the timer, you should be able to make it out of here quickly. I am unsure if this part of the puzzle is randomized like the rest of the stage is, but it took about 5 minutes of swapping between tables to figure this one out.
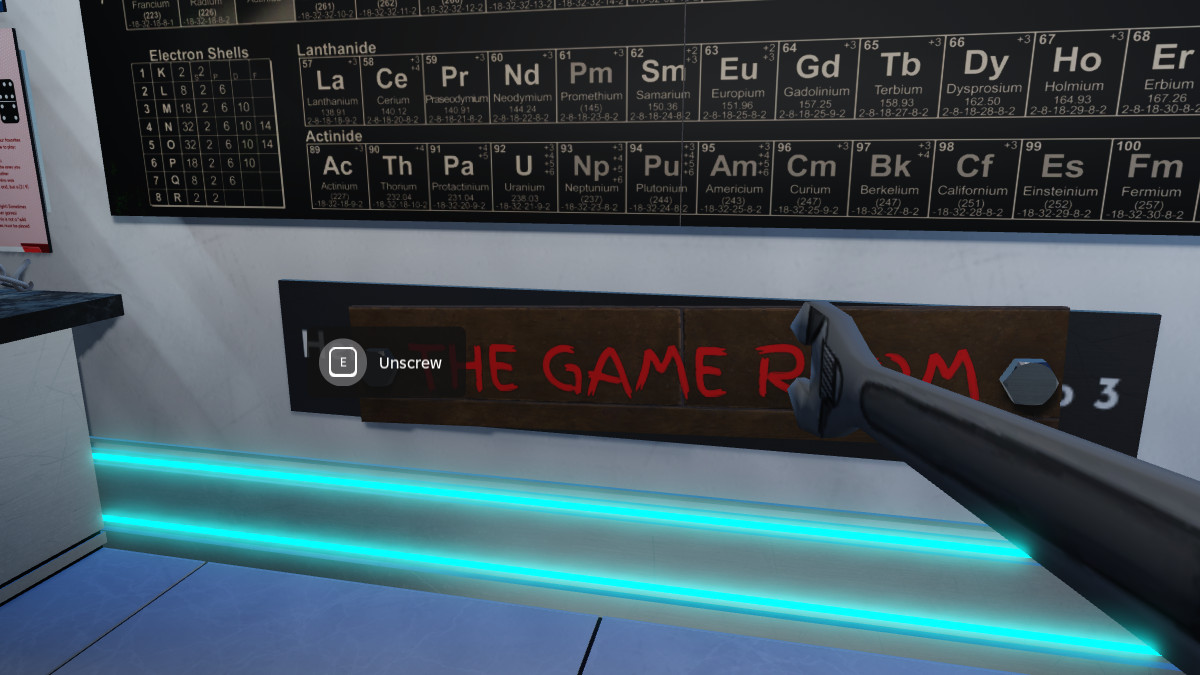
After that is completed, head toward the “The Game Room” sign on the wall, and use your wrench to remove it from the aforementioned wall. Click on it to add it to your inventory, as it’s a surprisingly useful tool to escape with. If you look slightly to your left, there will be a burner chained to the wall, and it would be a mighty awful shame if someone put something on it.
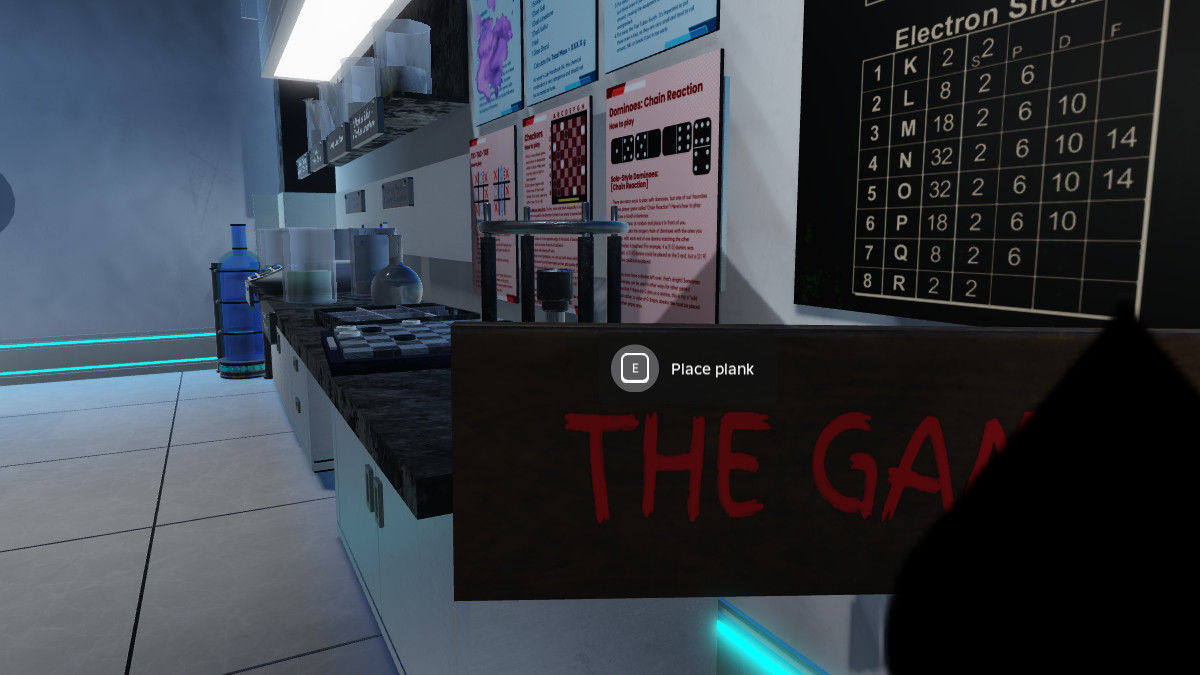
Take the sign out of your inventory, and place it on the burner. This will trigger a cutscene showing the fume hood breaking, and that’s our escape out of here.
Head inside and interact with the Escape option to finish off Chapter 4 in style.
Chapter 5 – Searching for Keycard 2

We find ourselves in the vent that we used to escape in Chapter 4, with a note and a keycard at the end near the grate. You’ll receive a Level 1 Keycard, and now we need to find a Level 2 Keycard. This is going to be interesting. Be sure to jot down the user ID and Password found at the bottom of your note.
Walk through the grate, and you’ll find yourself in a room full of computers. You can access any of the PCs that you find in the office, but you’ll need to enter the user ID and Password found on the note. In our example, it was the following:
- User ID: jstewart
- Password: TXcpi480
Do note that the user ID and Password are going to be case-sensitive, so you’ll need to enter them exactly as you see them on the note at the start of the game.

After you have done this, you’ll find that the PC will open up and show you an email client. You’ll need to search through these emails until you find a list of Locker Assignments. You’ll see a variety of different names, but there are only a few that we’ll need to pay close attention to.
You’ll need to read through the other emails until you find out whose locker we need to get into, and in our example, it was #27: Neha Dickinson. She wanted to switch with Janice, due to the height of the locker and not being able to reach the DNA scanner. You’ll also find another email with Neha Dickinson’s user ID and Password, which are as follows:
- User ID: nehadksn
- Password: KRAsnw22
Click Log Out in the top right of the computer screen and log in with Neha’s information. Just as before, the user ID and Password are case-sensitive. In Neha’s email, you’ll find another Locker Swap request, this time with Thomas Slade. He’ll also give you his user ID and Password, which are as follows:
- User ID: tslade
- Password: 3bw1rwxx
Log out and sign into this account. This is the final email that we’ll need to log into, and we’ll find an Onboarding Puzzle email hidden away inside of his messages.

You’ll need to follow this puzzle when you arrive at Thomas Slade’s locker, which is Locker 27. Take a screenshot of the Onboarding Puzzle, or use the one that we have supplied above to get into his locker when the time is right.

We’ll need to collect a DNA sample if we’re hoping to get into the locker, so you’ll need to head into the kitchen to get a towel to collect it. You’ll find the Kitchen in the same room that you’re in, open the door, and grab the towel off the front of the stove to continue moving forward. Equip the Cloth by pressing the 2 key on your keyboard, or tapping the Cloth button on your screen.

By deducing the puzzle, you’ll find that Thomas Slade’s cup is located next to The Locker Room on a table, also known as example number 9 of the onboarding puzzle.. Use the cloth to collect a DNA sample and head inside the Locker Room. Use this cloth on Locker #27 to open it. This will reveal Keycard Number 2, so click on it to pick it up and add it to your collection.
Chapter 5 – The Testing Room/Keycard 3

Now that we’ve gotten the next keycard, we can head into the next location; The Testing Room. This section is going to change with each playthrough, so you’ll need to track down and locate who the initial infected patient is, and mark who they were, alongside every person who was infected with them. You’ll find your Patient Zero by checking the board to the left of the door.
By reading the lore pages around the office, you’ll discover the following information:
- Stage 1: Incubation
- During stage one, those who are not infected will only be non-contagious for 2 hours. After this stage, they become contagious.
- Stage 2: Contagious
- Infected individuals can now spread Z-PX to other people. Read Section B to see how it is spread. This lasts around 1-2 days.
- Section B: Z-PX is spread via Salvia to open wounds of uninfected individuals. It can be spread via respiratory droplets, and the transfer takes an hour to complete. if a person stays an hour or longer in the same place as someone with a Stage II infection, they will contract Z-PX.

Use this information to determine who has the infection, and click their names off of the board. Once you have done this, the box at the end will open up containing balls in a tube, and it will be time for a new puzzle.
Chapter 5 – Terminal Transmissions

Now that we’ve figured out the infection patter, we need to decipher all of the different terminal messages spread throughout the room. Interacting with the monitor near the entrance of the room will show that transmissions are encoded based on the letters that start each sentence, and they will spell out a message when everything is done. For example:
- Try not to panic. Regulate your breathing. All will be okay. Panicking will not help you, try and stay calm. CODE: TRAP
Head throughout the room and read the message on the “Tune Your Radio” monitor until you have a clue spelled out. Also keep note of the shapes that the message relays to you. After this, head around the room and search for a PC monitor that has the same letters that you found in your clue, and jot down the numbers.
For example, I had the following letters and numbers.:
- U, R, N, V, I, L, L, E, square, triangle, dash, dot, circle 267.3

Enter the numerical answer to open the box and get more balls for the final puzzle. It’s time to move onto the next part.
Chapter 5 – Location Puzzle


Now, we’ll need to use a map on the wall to plot a path through infected houses and avoid getting sick in the process. We’ll also need to find the fastest way to get there as possible. This is going to be tricky, but just follow the same type of direction we do below:
- WNENENW

Once you’ve figured out the best possible path, you’ll want to head over to this keypad and punch in the answer that you’ve discovered. Press the Enter key at the bottom to input your answer and grab the balls that come out of the box when completed.
Chapter 5 – Ball Puzzle/Antidote

Now, we’ll need to mix the different balls on the table around until each of the tubes only has the same colors inside of it. This can be time consuming, so make sure that you have enough time to get everything swapped around.
Note that in this section, you can only put balls of the same color in the same tube, or put them into tubes that have no other balls in them. You’ll need to combine four balls in the same tube to clear that spot and get rid of the color.

Once you have successfully made the antidote, you’ll receive Keycard Level 3. It’s also time to go back into the main area and clear through the final door and get out of this terrifying location once and for all.
Chapter 5 – Looking for Keycard 4

Once you have received Keycard 3, head into The Electrical Room in the next hallway. You’ll have another puzzle you’ll need to complete here, and you’ll need to deduce a solution. In our example, it went as the following:
- Red 4
- Orange 2
- Yellow 7
- Green 1
- Blue 5
- Purple 8
- Pink 6
- Black 9
- White 3
Once you have turned off the electric, you can go through the vent on the floor. Inside of the new room, you’ll find a backpack full of broken ladder parts. Take this bag and go back through the vent. Switch the Heating Area to the Surveillance Room and go back into the vent.

You’ll now find yourself in the Surveillance Room, and it’s up to you to determine the order of the cameras to turn everything back on. You’ll learn more information by checking the blue terminal near the door. In our example, it was the following:
- 6, 11, 5, 7, 9, 10, 8, 12, 2, 3, 1, 4
This rebooted all of the cameras, and let us see a code for a vault on the screen closest to the door. The code in our example was as follows:
- 40481
Head back through the vent, select The Vault on the screen, and enter the vent again to show up in the vault room.

Use the code that we received from the vault, and you’ll find a blank keycard inside. Head back through the vent and head into The Archives. We’ve got one more puzzle to solve before we can print the keycard that we need. We need to rebuild the ladder.

After rebuilding the ladder at the bottom of the loft, you can climb up and obtain some information about the user ID and passcode that we’ll need to access the PC in the Printing Room. Once you’ve gotten all of the information that you need, head down and head into The Printing Room.
Chapter 5 – The Printing Room

You’ll find yourself back at a computer, and you’ll need to enter the username of the person at the top of the stairs, alongside the security information that you found to reset their password. In our example, it was the following:
- User ID: aotlo
- Childhood Teachers Last Name
- Ms Potata
- What was the name of your imaginary friend?
- Dorothy
- What is your favorite food?
- Honey
After doing this, you’ll need to choose a password that you’ll remember. Log off of the computer and load the blank keycard into the large printer in the back of the room.

Once you’ve done this, enter the user ID and the password that you created, and select the option to print a Level 4 Keycard. Grab it from the same printer that you loaded it into, and prepare for the end of Chapter 5 of Terminal Escape Room.

You’ll find a room called The Stairwell, which only requires a Level 1 keycard to access. Inside of this room, however, you’ll find a second door that requires Level 4 access. Head into this room, approach the vent, and select the Escape option to bring Chapter 5 to a close.
Roblox is available on PlayStation 4, PlayStation 5, Xbox One, Xbox Series X|S, Meta Quest, PC & Mobile. You can play Terminal Escape Room on any platform.










Published: Sep 3, 2024 9:13 PM UTC